
Azure DevOps Work Items
Azure DevOps Work Items is the work-management integration between Azure DevOps and Allure TestOps. It covers:
- browsing and linking Azure DevOps work items from TestOps;
- configuring issue mapping so test metadata becomes work-item links in TestOps automatically;
- linking work items to test cases, launches, and defects;
- synchronizing the defect life cycle in Allure TestOps with the status of the linked work item in Azure DevOps.
If you need CI pipeline execution rather than work-item linking, see Azure DevOps CI.
Before you begin
- The Azure DevOps organization URL, for example
https://dev.azure.com/your-organization. - Access to create a personal access token in Azure DevOps.
- The Azure DevOps project whose work items TestOps should see.
- Permission to add global integrations in TestOps and to enable them in the target project.
- Project administrator access in Azure DevOps if you want to synchronize the defect life cycle (required to create service hooks).
1. Add the global Azure DevOps integration
An instance administrator should:
- Open Administration → Integrations in TestOps.
- Click + Add integration.
- Select Azure DevOps Server.
- Enter a stable name for the integration and the Azure DevOps organization URL,
for example
https://dev.azure.com/your-organization. - Click Add integration.
2. Create the Azure DevOps personal access token
In Azure DevOps, click the User settings icon and select Personal access tokens.
Click New Token.
Fill in the fields:
- Name — a recognizable name, for example
Token for Allure TestOps. - Organization — the Azure DevOps organization that contains the project.
- Expiration — how long the token should stay valid.
- Scopes — select Custom defined, then click Show all scopes at the bottom.
- Name — a recognizable name, for example
Under the scopes list, enable:
- Work Items → Read, write, & manage
Click Create and copy the generated token. Save it in a secure location.
3. Enable the integration in the project
- In TestOps, open the target project and go to Settings → Integrations.
- Find the Azure DevOps integration and click Add integration.
- Enter the Azure DevOps sign-in email and the token from step 2.
- Click Test connection. If the credentials are correct, a "Connection established" message appears.
- Click Add integration.
4. Configure issue mapping for automatic links
If your tests already emit issue labels through an Allure adapter, configure an issue mapping so TestOps can turn those labels into real work-item links automatically.
Open the TestOps project.
Go to Settings → Issues.
Click + Create.
Fill in the fields:
- Key — the short identifier your tests use in metadata.
- Issue tracker — the Azure DevOps integration you enabled for the project.
Save the issue mapping.
5. Add issue links
Once the integration is set up, you can link test cases and launches to Azure DevOps work items manually.
To link a test case:
- Go to Test cases and open the test case.
- Click the pencil icon next to Issue links.
- Click + Add.
- Under Issue tracker, select your Azure DevOps integration.
- Under Key, enter part of the work item title and select it from the list.
- Click Submit.
To link a launch:
- Go to Launches.
- Click
⋯next to the launch and select Edit. - In the Issues section, click + Add.
- Under Issue tracker, select your Azure DevOps integration.
- Under Key, enter part of the work item title and select it from the list.
- Click Submit.
6. Synchronize the defect life cycle
When this path is enabled, Azure DevOps sends work item updates to Allure TestOps, and the status of a linked work item controls the state of the defect. For example, when the linked work item moves to Done, Allure TestOps closes the defect.
Once a defect is closed, its automation rules stop working, and new failing tests are no longer linked to it.
Create the webhook in Allure TestOps
Open Administration → Integrations in Allure TestOps.
Open the Azure DevOps integration.
Go to the Webhooks tab.
Click + Create webhook and confirm the creation.
Copy the generated webhook URL. It has the following format:
https://<your Allure TestOps URL>/api/webhook?type=azure&token=<token>
The token is shown only once and cannot be retrieved from the Allure TestOps UI later. If you lose it, delete the webhook and create a new one.
Add the service hook in Azure DevOps
Service hooks are configured per Azure DevOps project. Repeat these steps for every project whose work items are linked to defects.
In Azure DevOps, open the project and go to Project settings → Service hooks.
Click + (Create a new subscription).
Select Web Hooks and click Next.
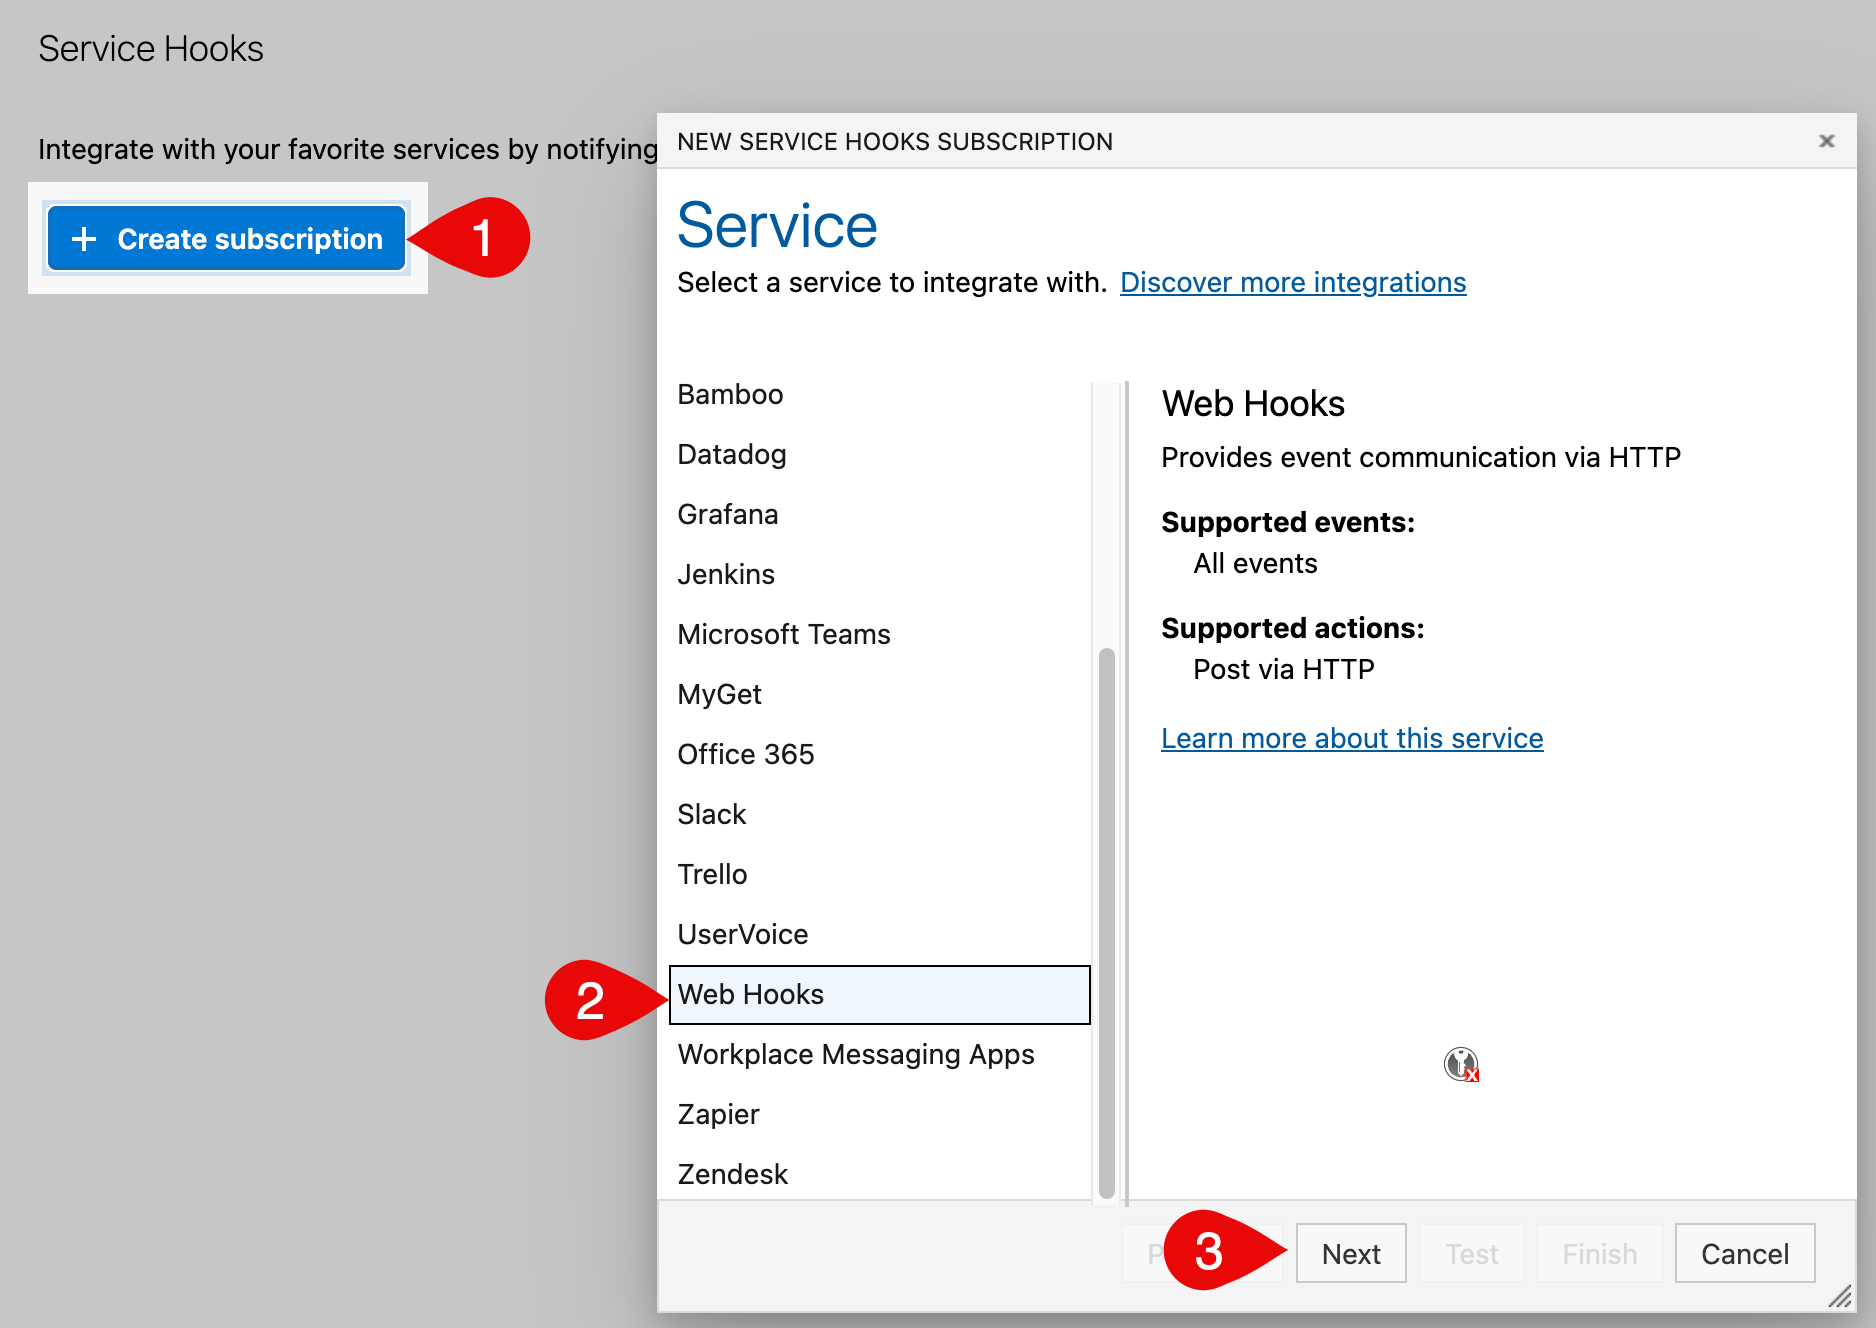
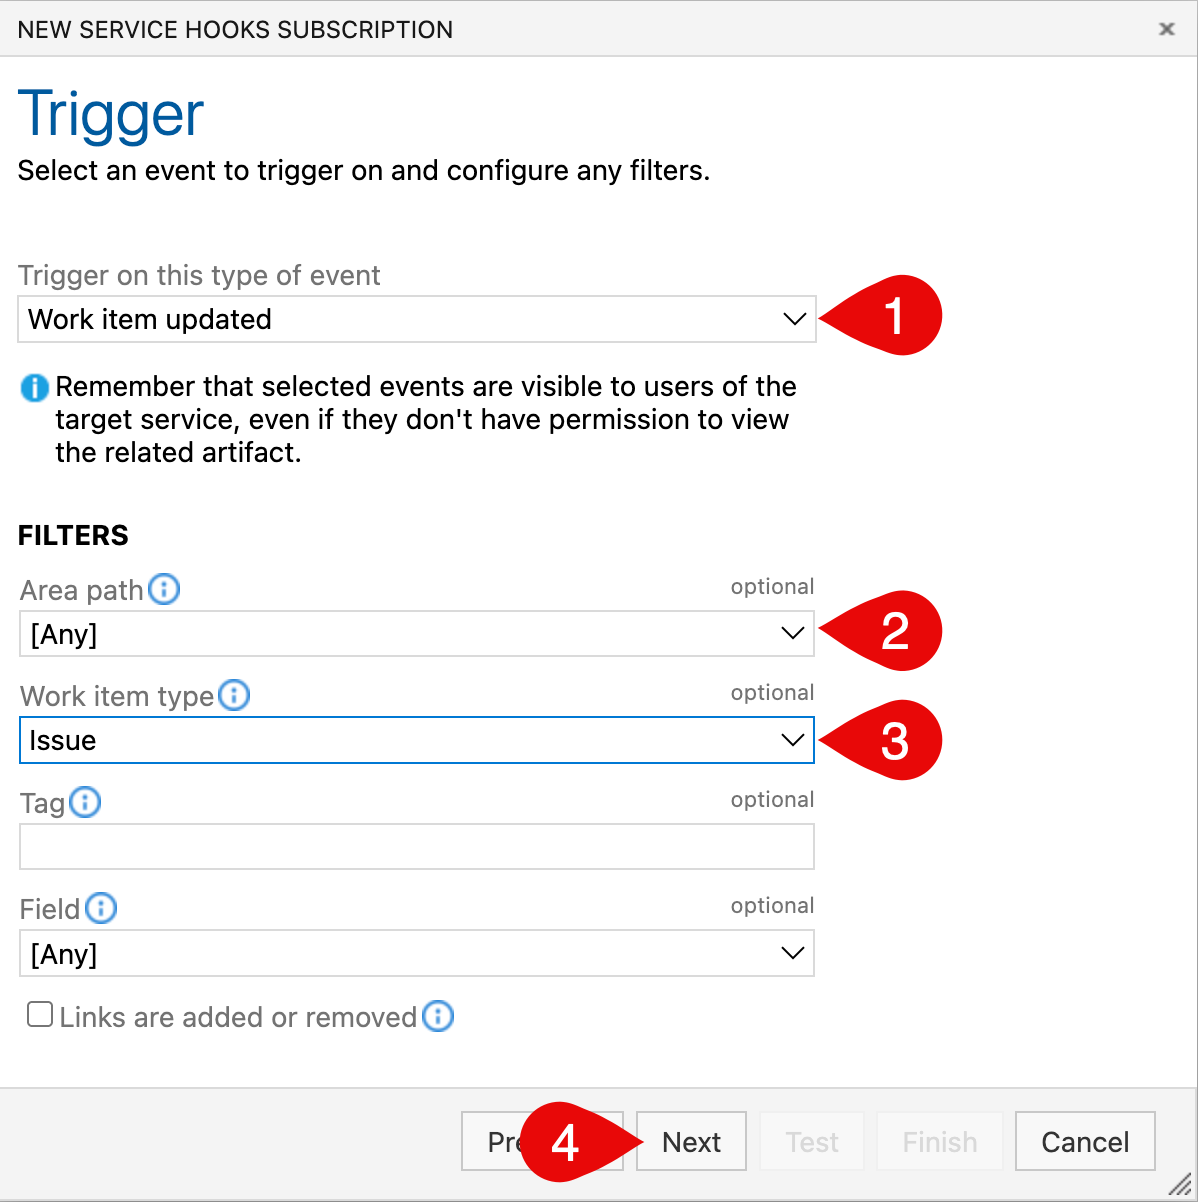
Configure the trigger:
- Trigger on this type of event — Work item updated.
- Area path — the project or area that contains the linked work items.
- Work item type — the type your team links to defects, for example Issue or Bug. Leave [Any] to send updates for all types.
- Tag and Field — leave empty and [Any] unless you need to narrow the events further.
Click Next.
In the Action step, keep Post via HTTP and paste the webhook URL copied from Allure TestOps into URL. Leave the authentication and HTTP headers fields empty — the token in the URL authenticates the request.
Click Test. A successful test shows Succeeded on the Summary tab and
Status Code: 202(Accepted) on the Response tab. Click Close.Click Finish.
The new subscription appears in the Service Hooks list with Web Hooks as the consumer and Work item updated as the event.
On Allure TestOps side you will see whether the test of the configured webhook successfully completed in the webhook settings of the integration.

Verify the integration
- Open a test case in TestOps and add a work item link.
- Confirm that the issue picker can search the expected Azure DevOps project.
- Open a launch and add or edit a work item link there as well.
- If your team uses defect export, create or link a defect to confirm that the Azure DevOps work item workflow is available in that view too.
Troubleshooting
The issue picker does not show the work items you need
Check these points:
- The project integration uses valid credentials (email and token).
- The token includes the Work Items → Read, write, & manage scope.
- The Azure DevOps account behind the token can access the target project.
The integration works for CI but not for work items
The CI token was created without the Work Items scope. Add that scope to the existing token or create a separate token with Work Items → Read, write, & manage and update the project integration.
Related pages
- Azure DevOps CI for pipeline upload and triggered runs.
- Links, issues, and relations for how issue links appear in TestOps.
- Defects for defect-to-issue workflows.
