API of Allure TestOps
The API is for teams that need programmatic access to TestOps data and
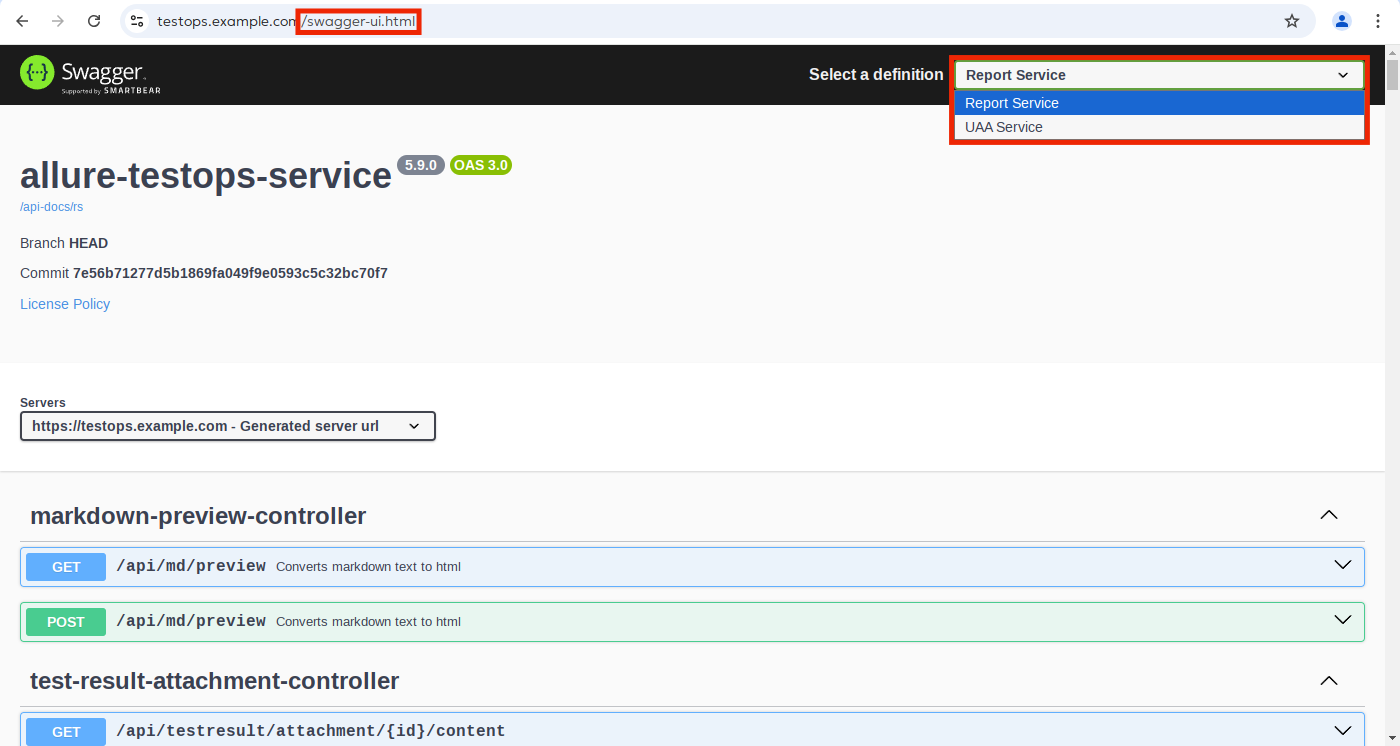
administration rather than only UI workflows. The entry point is the Swagger
UI served by your own TestOps instance at
<your Allure TestOps domain>/swagger-ui.html.
Test result upload
Use the public API for reading and managing TestOps entities.
Do not build your own direct test-results upload client against internal upload endpoints. Upload workflows are supported only through Qameta-maintained tools such as CI plugins and
allurectl.
Use one of these supported upload paths instead:
- Integrations for CI plugins and connected build systems;
- allurectl for CLI-driven upload and selective execution.
Find operations in Swagger UI
In the upper-right corner, click the Select a definition drop-down list.
Choose the appropriate section:
- Report Service — API methods for creating, updating, and retrieving information about test cases, test results, launches, etc.
- UAA Service — API methods for managing user access permissions in Allure TestOps, adding new users, and working with Allure TestOps licenses.
- All Services — all available Allure TestOps API methods (a combination of the Report Service and UAA Service sections).
Discover API calls from the UI
Not every internal workflow has a dedicated documentation page. When that happens, start from the UI action and confirm the endpoints in Swagger:
- Open browser DevTools on a page where you can perform the action manually.
- Perform the action once in the UI and inspect the network request.
- Note the request path, HTTP method, payload shape, and response structure.
- Find the corresponding controller in Swagger UI.
- Reproduce the same call with your Bearer token outside the browser.
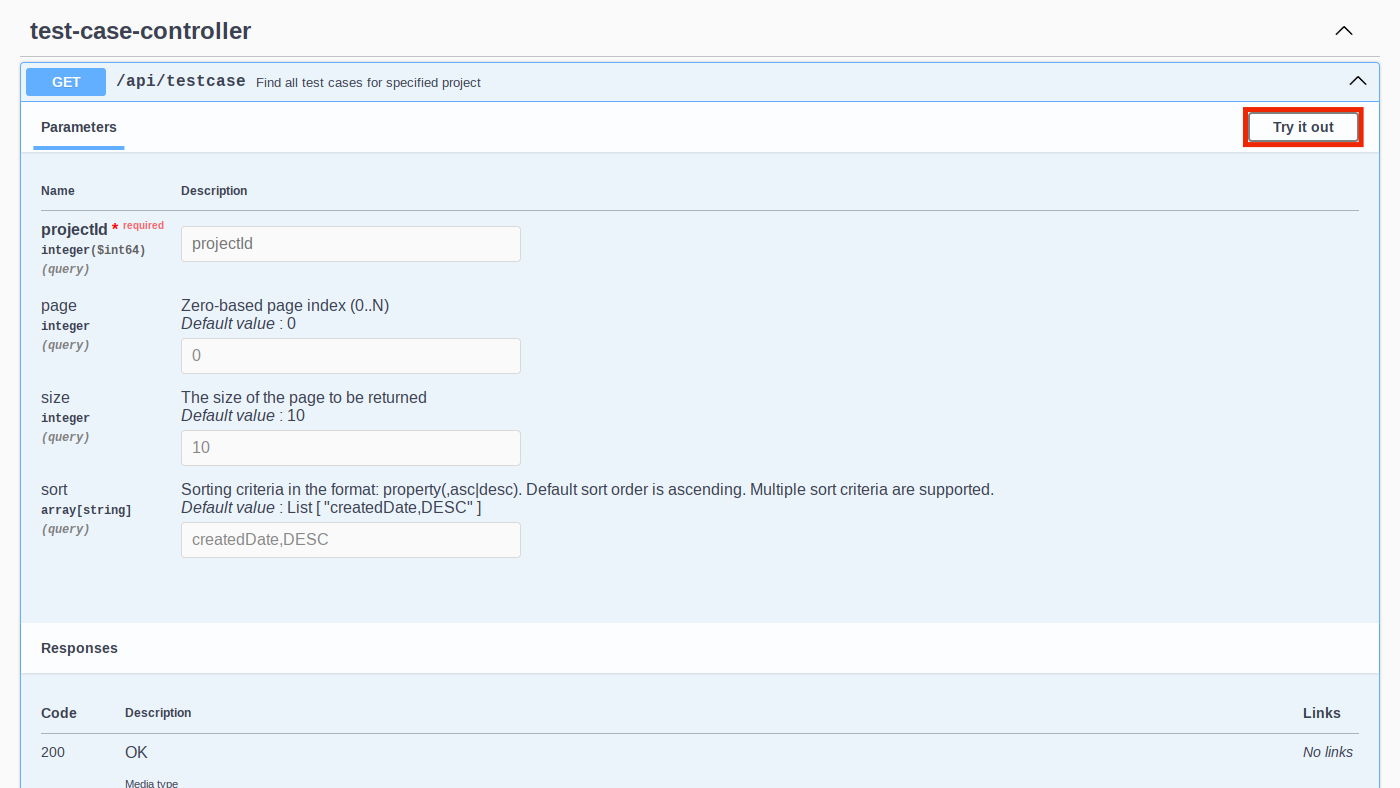
Try operations directly in Swagger UI
Swagger UI lets you execute the request against your own instance and inspect
the resulting curl example, parameters, and response payload.
Authentication
Swagger UI uses your current browser session automatically. External scripts and integrations should use a Bearer token derived from your personal API token.
Create the personal API token in User menu and API tokens before you automate API calls.
Generate a Bearer token
The example below exchanges a personal API token for a short-lived Bearer token:
export ENDPOINT="https://testops.example.com"
export USER_TOKEN="ef06773a-544b-4f0b-ad53-5a11972c8b74"

echo "Obtaining jwt token"
JWT_TOKEN=$(curl -s -X POST "${ENDPOINT}/api/uaa/oauth/token" \
     --header "Expect:" \
     --header "Accept: application/json" \
     --form "grant_type=apitoken" \
     --form "scope=openid" \
     --form "token=${USER_TOKEN}" \
     | jq -r .access_token)
Use the Bearer token in requests
echo "Getting user information"

curl -s -G "${ENDPOINT}/api/uaa/me" \
     --header "Accept: application/json" \
     --header "Authorization: Bearer ${JWT_TOKEN}"
Bearer token validity
The Bearer token is short-lived. The default validity is controlled by
the ALLURE_JWT_ACCESS_TOKEN_VALIDITY_SECONDS parameter in your instance
configuration. Re-generate the token when it expires.
Related pages
- User menu and API tokens for creating or revoking the personal token.
- AQL if your API work depends on reusable query expressions.
- Integrations if the real goal is supported CI or issue-tracker connectivity rather than direct API scripting.
