JetBrains IDE plugin
Use the JetBrains IDE plugin when you are working inside the IDE and need to connect local automation work to Allure TestOps. It covers:
- uploading local
allure-resultsto TestOps; - assigning Allure IDs to existing automated tests after the first upload;
- reserving a new Allure ID for a test you are creating from scratch;
- importing metadata from an existing manual test case into code;
- local Allure Report generation, opening, and serving workflows.
The plugin works best when the codebase already produces valid Allure results. It does not replace the adapter for your test framework.
Before you begin
- a personal TestOps API token;
- access to the TestOps project you want to work with;
- the Allure adapter for your test framework already writing result files;
- a JetBrains IDE supported by the plugin workflow you need.
Supported IDE workflows
| Language | Framework | IDE |
|---|---|---|
| Java | JUnit 4, JUnit 5, TestNG, Cucumber | IntelliJ IDEA |
| Kotlin | JUnit 4, JUnit 5, TestNG | IntelliJ IDEA |
| Groovy | Spock | IntelliJ IDEA |
| Python | pytest, Robot Framework | PyCharm |
| PHP | Codeception | PhpStorm |
Support depth can vary by framework. If an IDE action is missing in a specific project, first confirm that the framework is already producing valid Allure results.
1. Install the plugin
- In the JetBrains IDE, open Settings → Plugins.
- Search for Allure TestOps Support.
- Install the plugin and restart the IDE.

EAP channel — add and remove
Qameta Software publishes feature previews in the Early Access Program (EAP) channel.
EAP builds can expose new plugin features earlier than the stable channel, but they can also introduce fresh defects. Use the EAP repository for targeted validation, not as the default rollout channel for the team.
Add the EAP repository
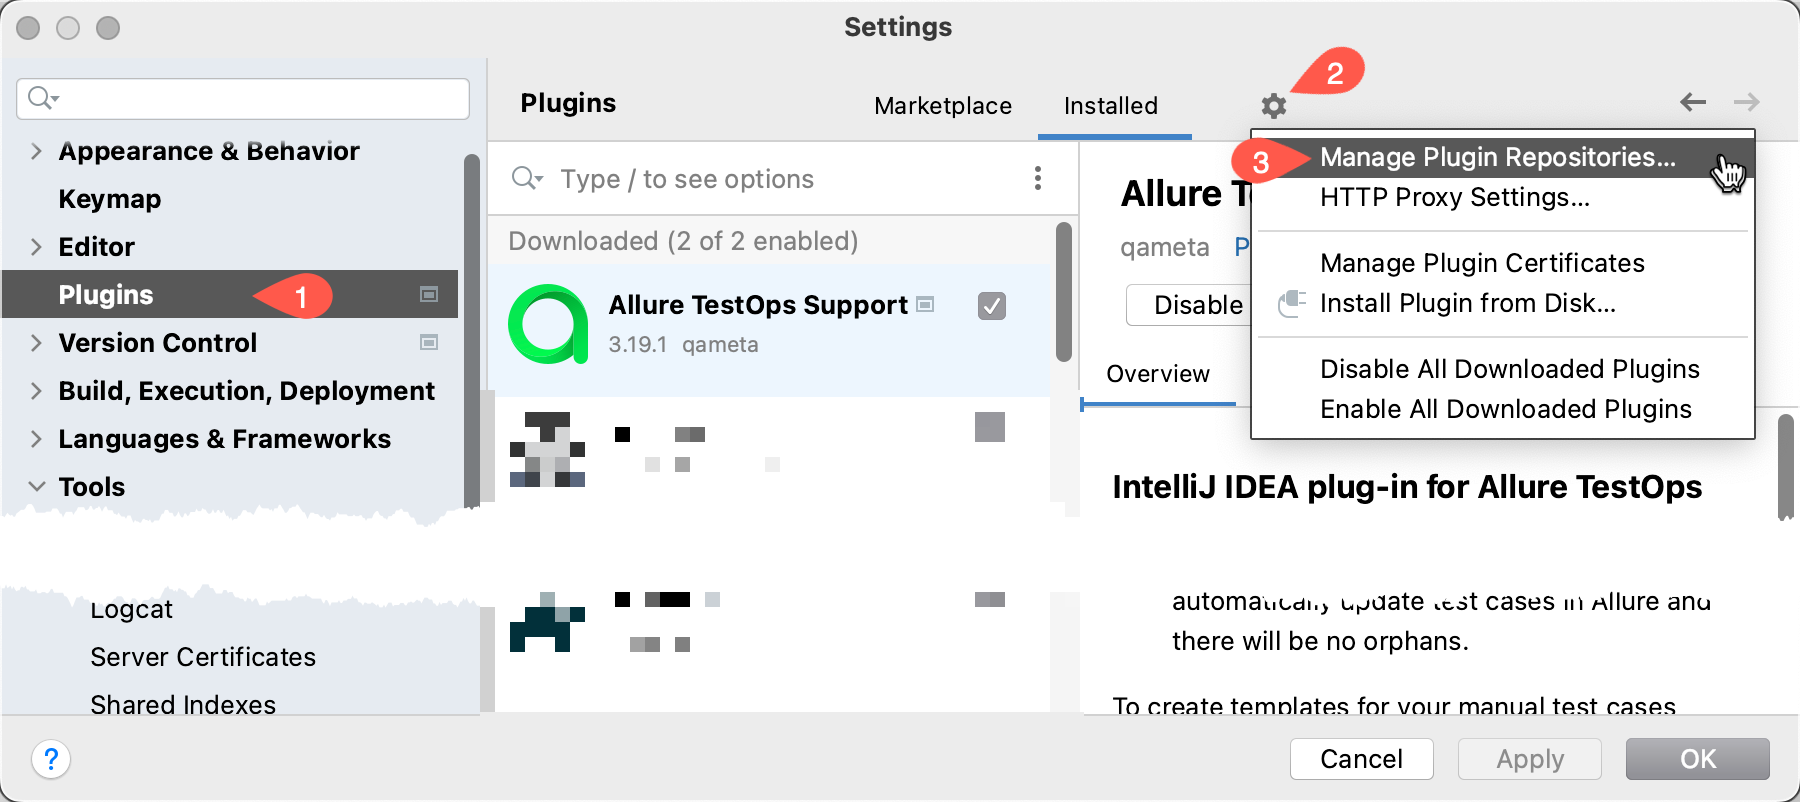
Open Settings → Plugins.
Click the gear icon next to the Installed / Marketplace tabs.
Select Manage Plugin Repositories....
Click +, add
https://plugins.jetbrains.com/plugins/eap/list, and click OK.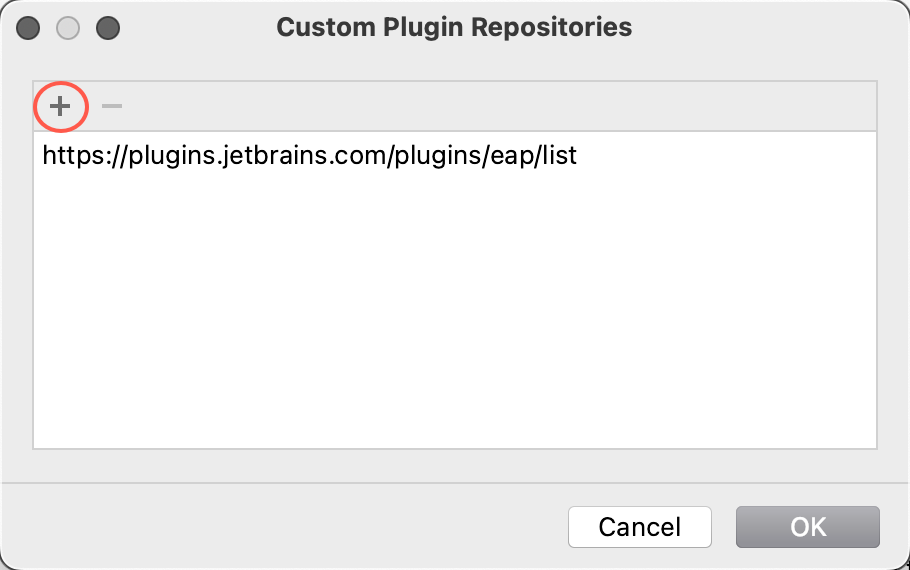
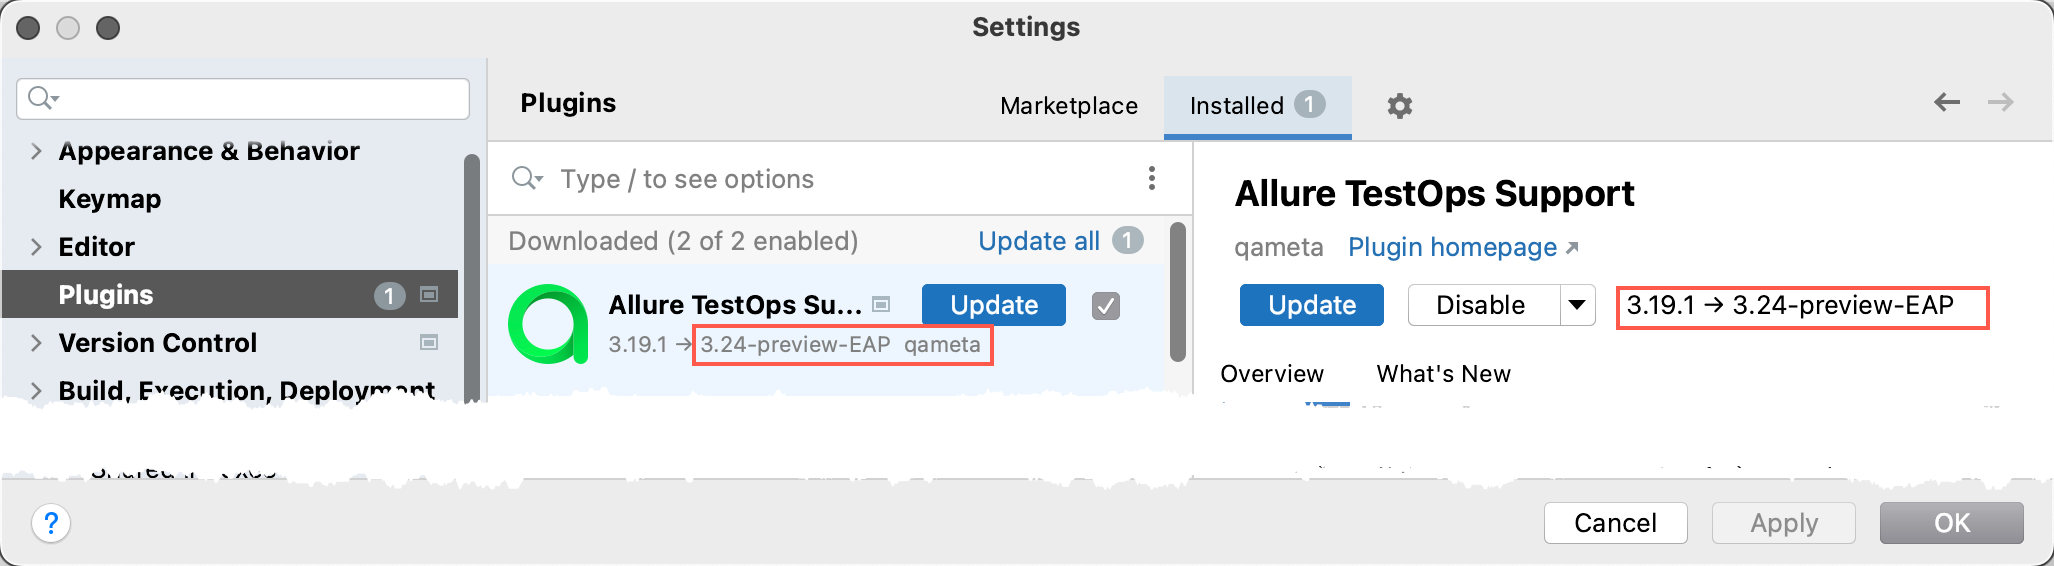
If an EAP version is available, the IDE will offer an upgrade.
Remove the EAP repository
- Open Settings → Plugins → gear icon → Manage Plugin Repositories....
- Remove the EAP channel entry.
- Uninstall the Allure TestOps plugin.
- Reinstall it from the default Marketplace channel.
2. Connect the plugin to TestOps
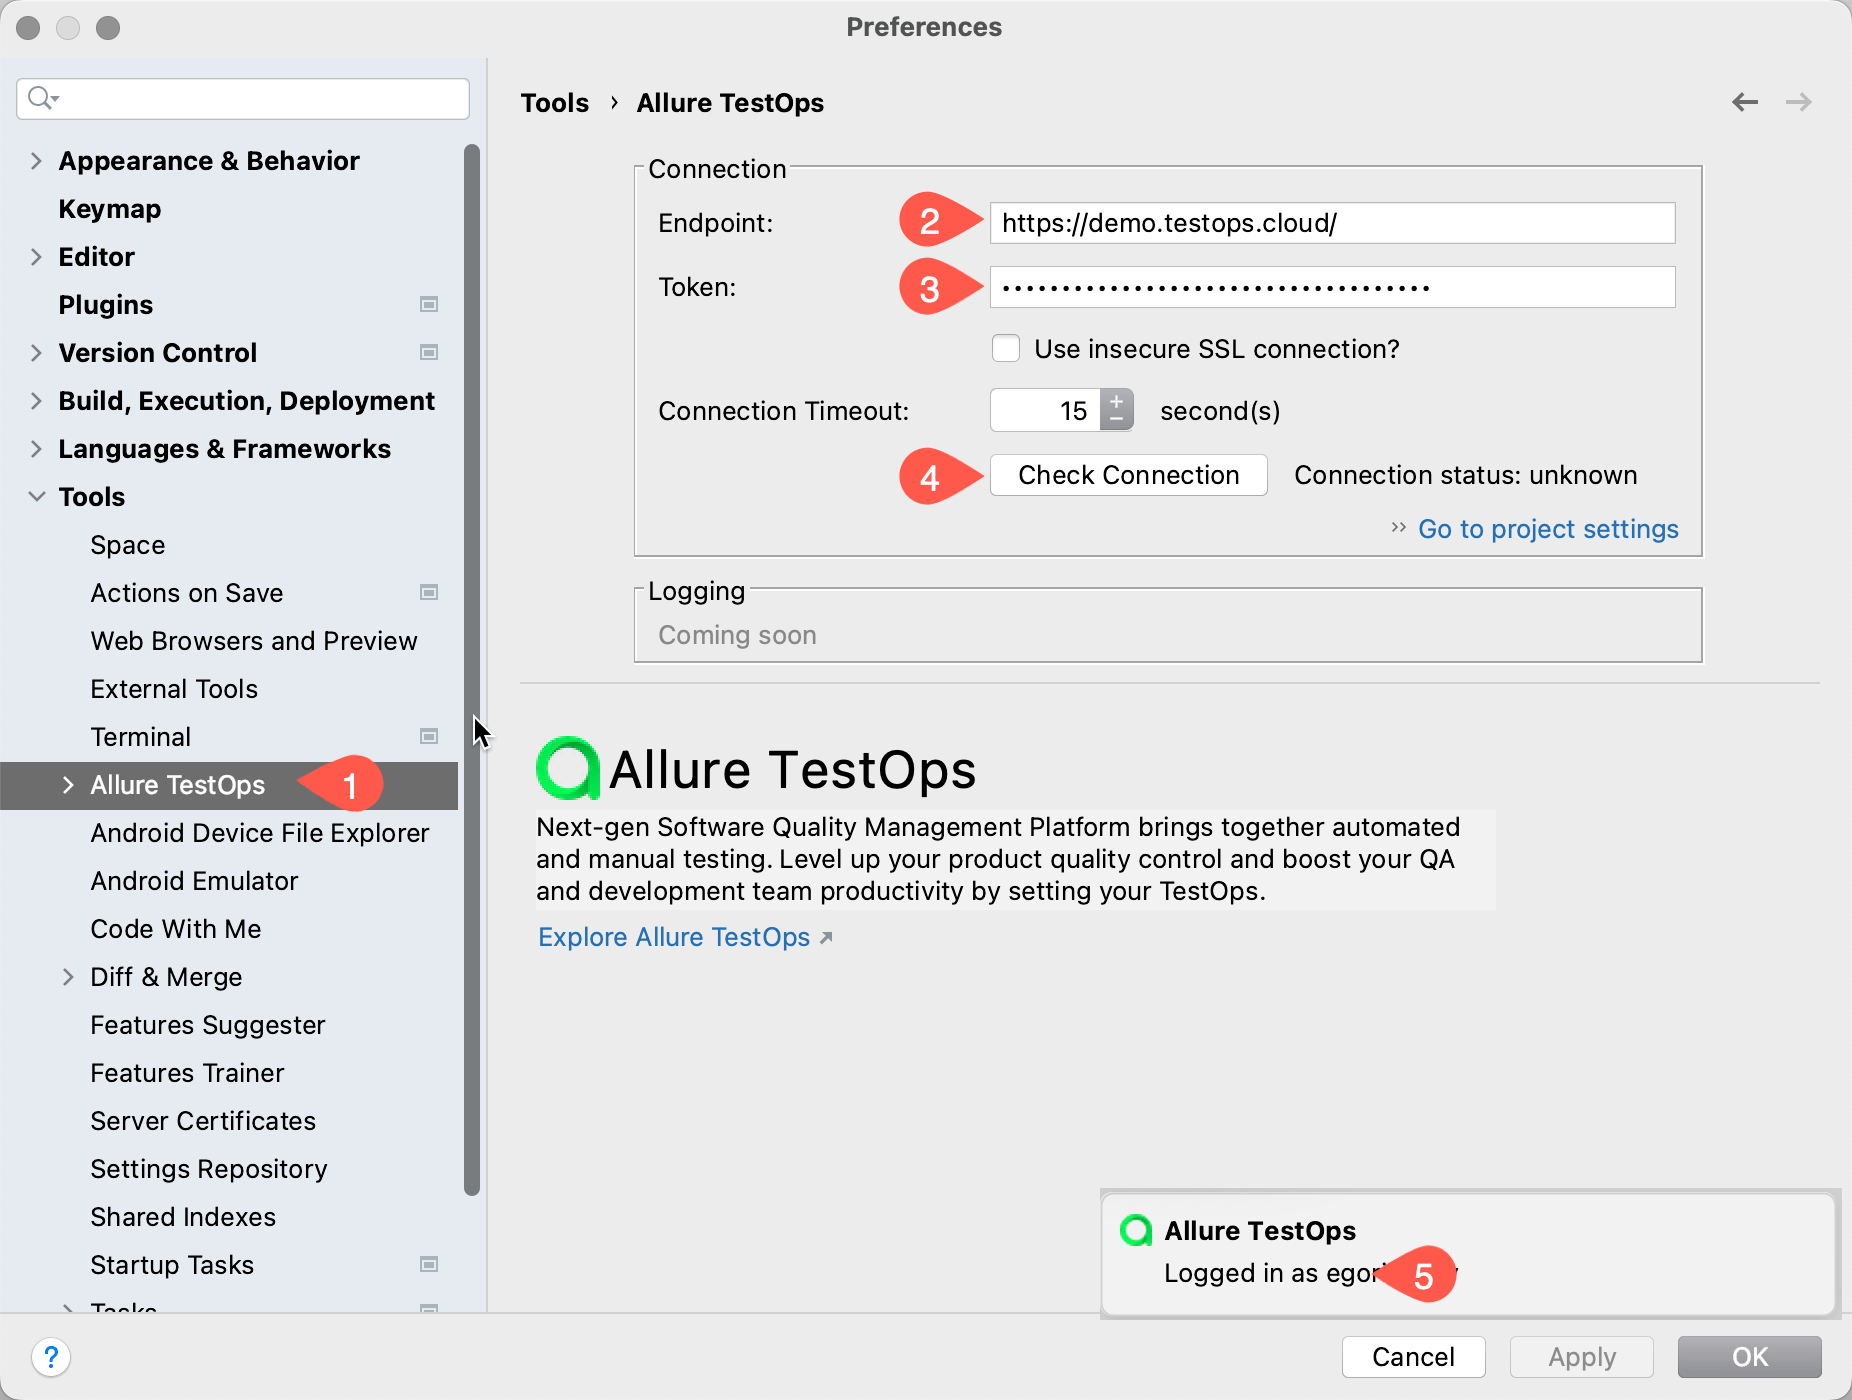
- Open Settings → Tools → Allure TestOps.
- Enter the TestOps URL.
- Paste your personal API token.
- Click Check connection.
For the token workflow, see User menu and API tokens.
The connection must use a TestOps account that can work with the target project. The plugin workflows expect a normal user role and write access to the TestOps project.
If your workflow stays within one TestOps project most of the time, set a default project in the plugin's project settings so upload and ID workflows do not prompt every time.

3. Upload local test results
Run the tests locally so the project produces Allure result files.
In the IDE project tree, right-click the directory that contains
allure-results.Select Allure: Upload results.
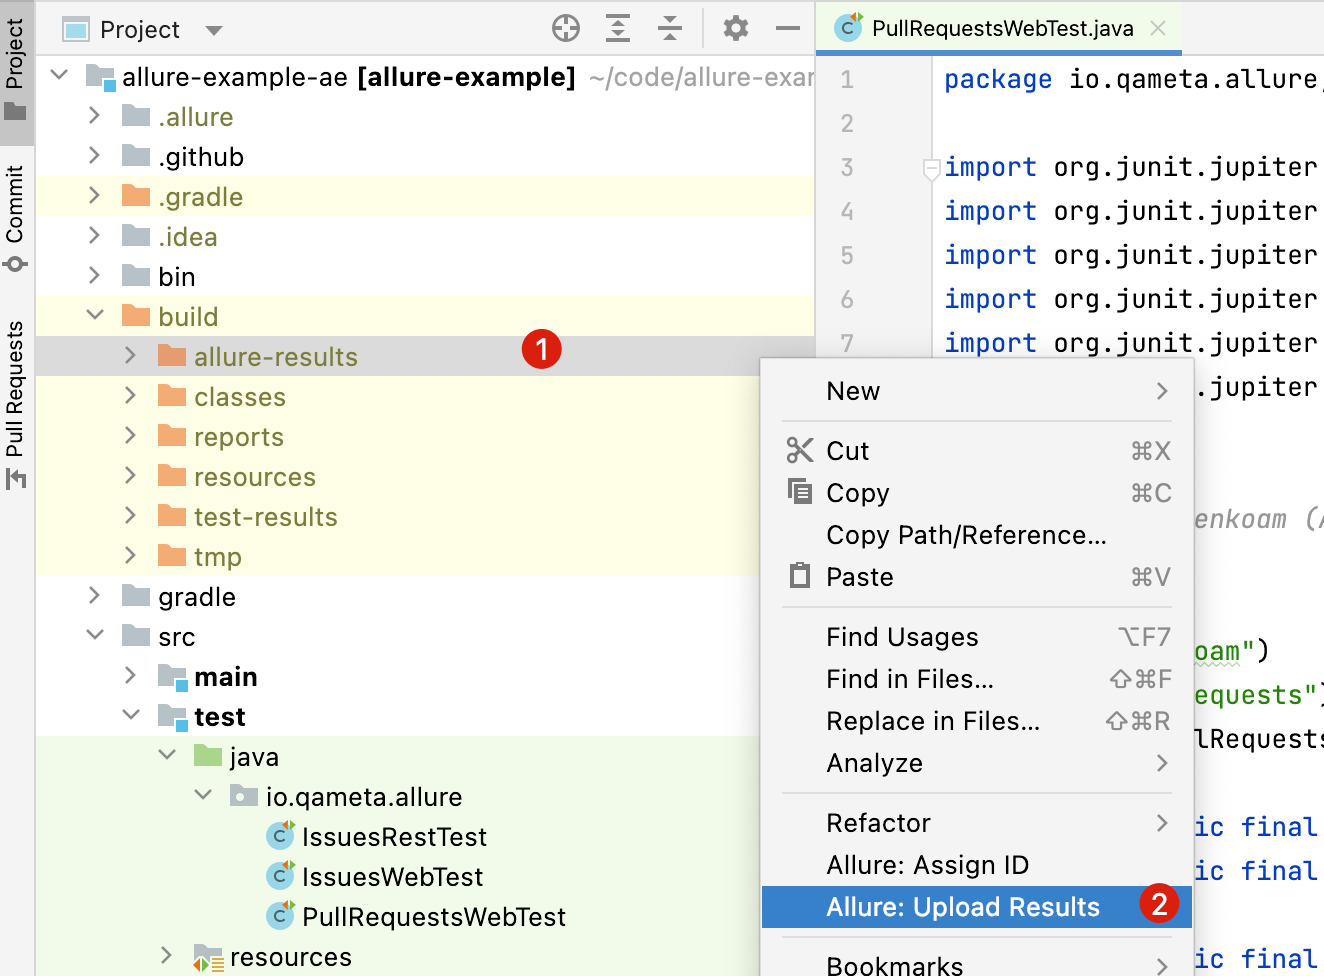
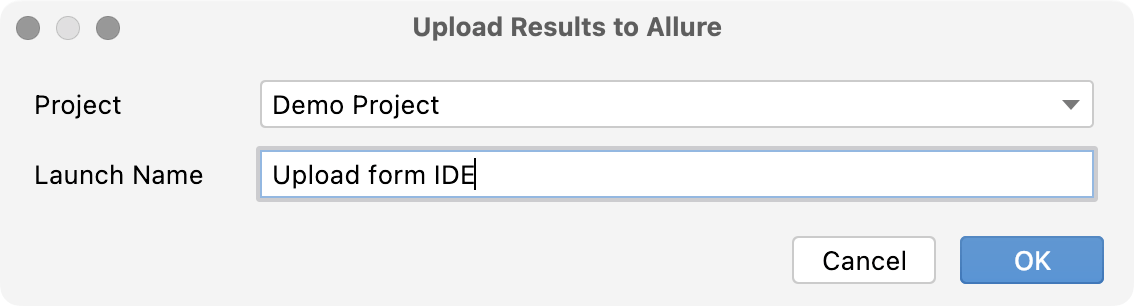
Update the launch name if needed and confirm.
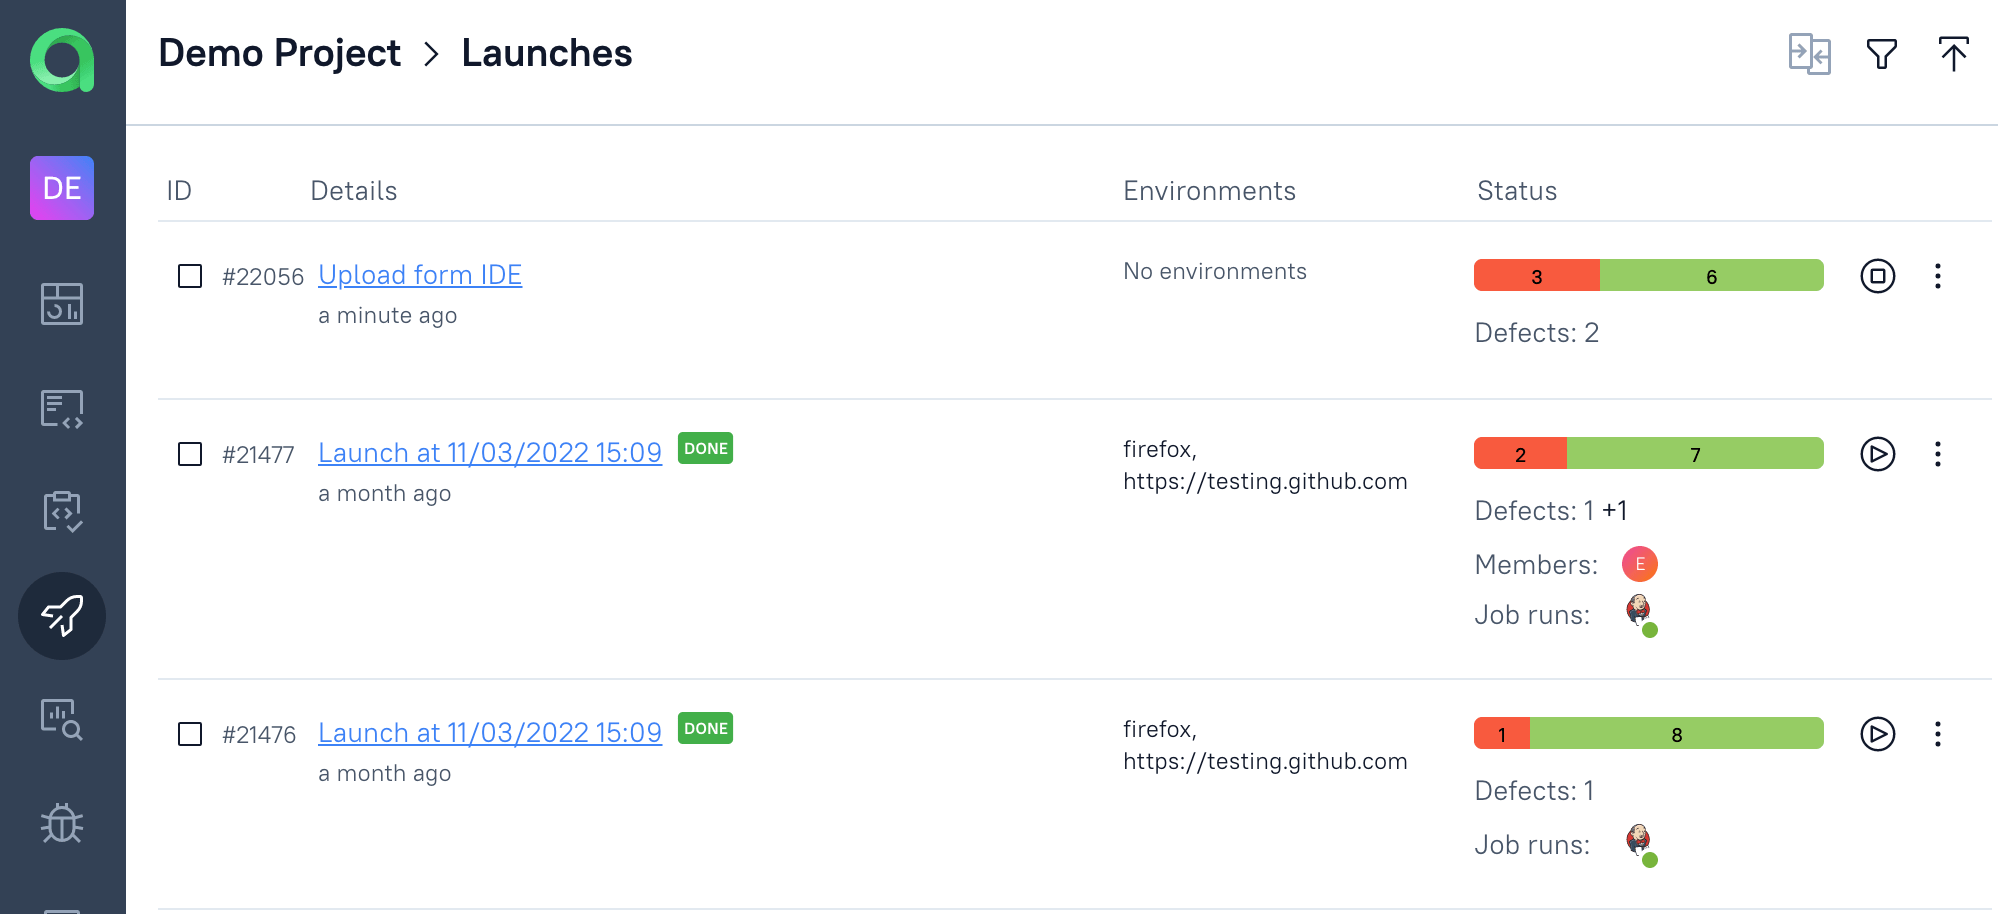
After the upload finishes, the launch appears in TestOps under Launches.
This is the fastest way to inspect a newly automated test before the CI job is ready. The plugin creates a launch directly from the local
allure-resultsdirectory, so you can validate names, labels, links, and attachments before you wire the test into a shared pipeline.
4. Assign Allure IDs to existing automated tests
Use this workflow after the first upload created the test cases in TestOps and you want future refactoring to keep those tests attached to the same case.
Upload the local results to TestOps.
Close the launch in TestOps so the test cases are created and indexed.
In the IDE, right-click the package or class that contains the tests.
Select Allure: Assign ID.
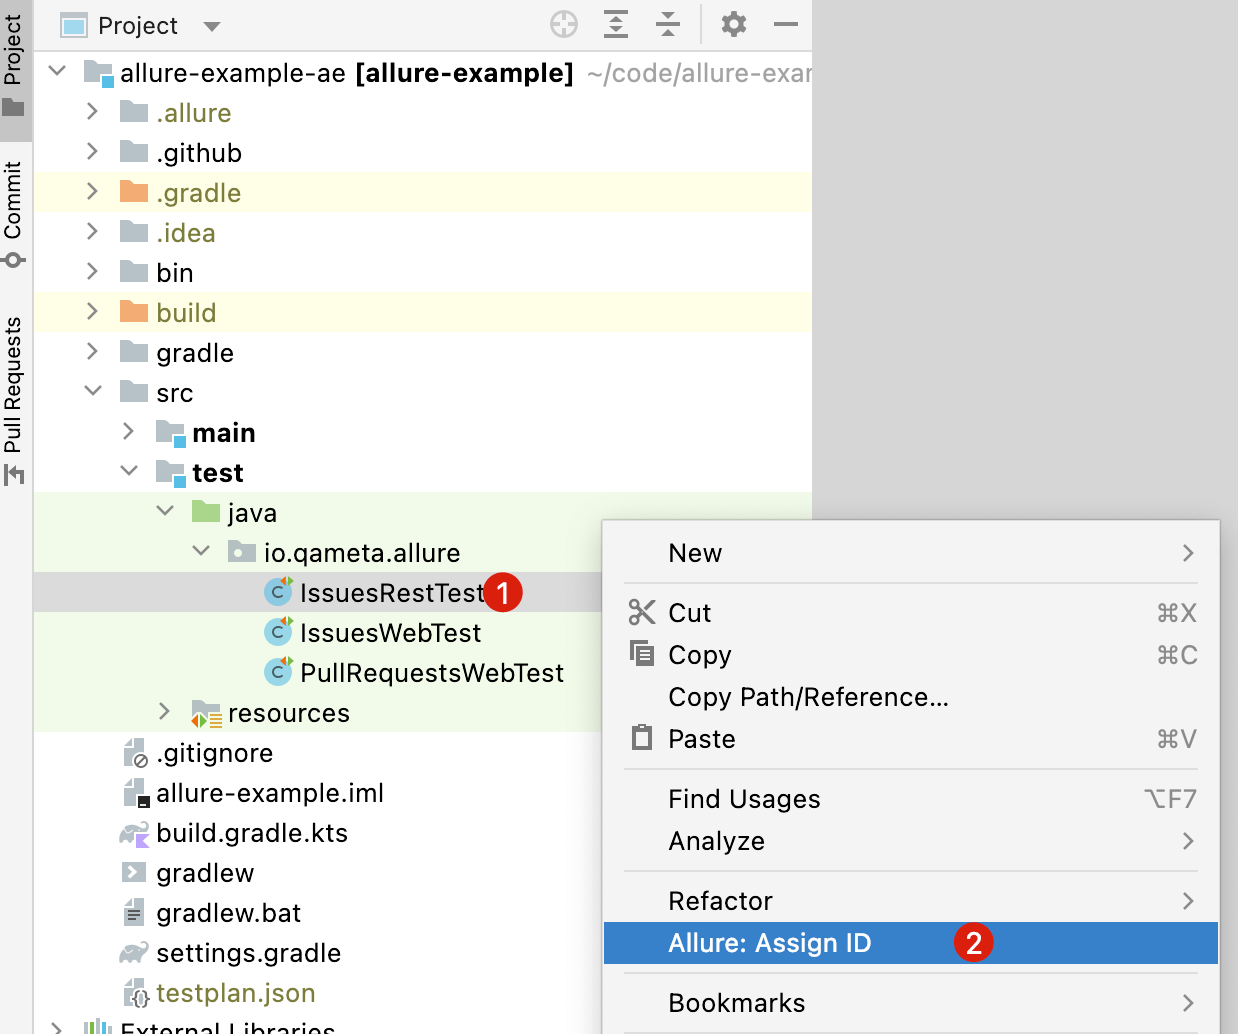
Select the TestOps project that received the upload.
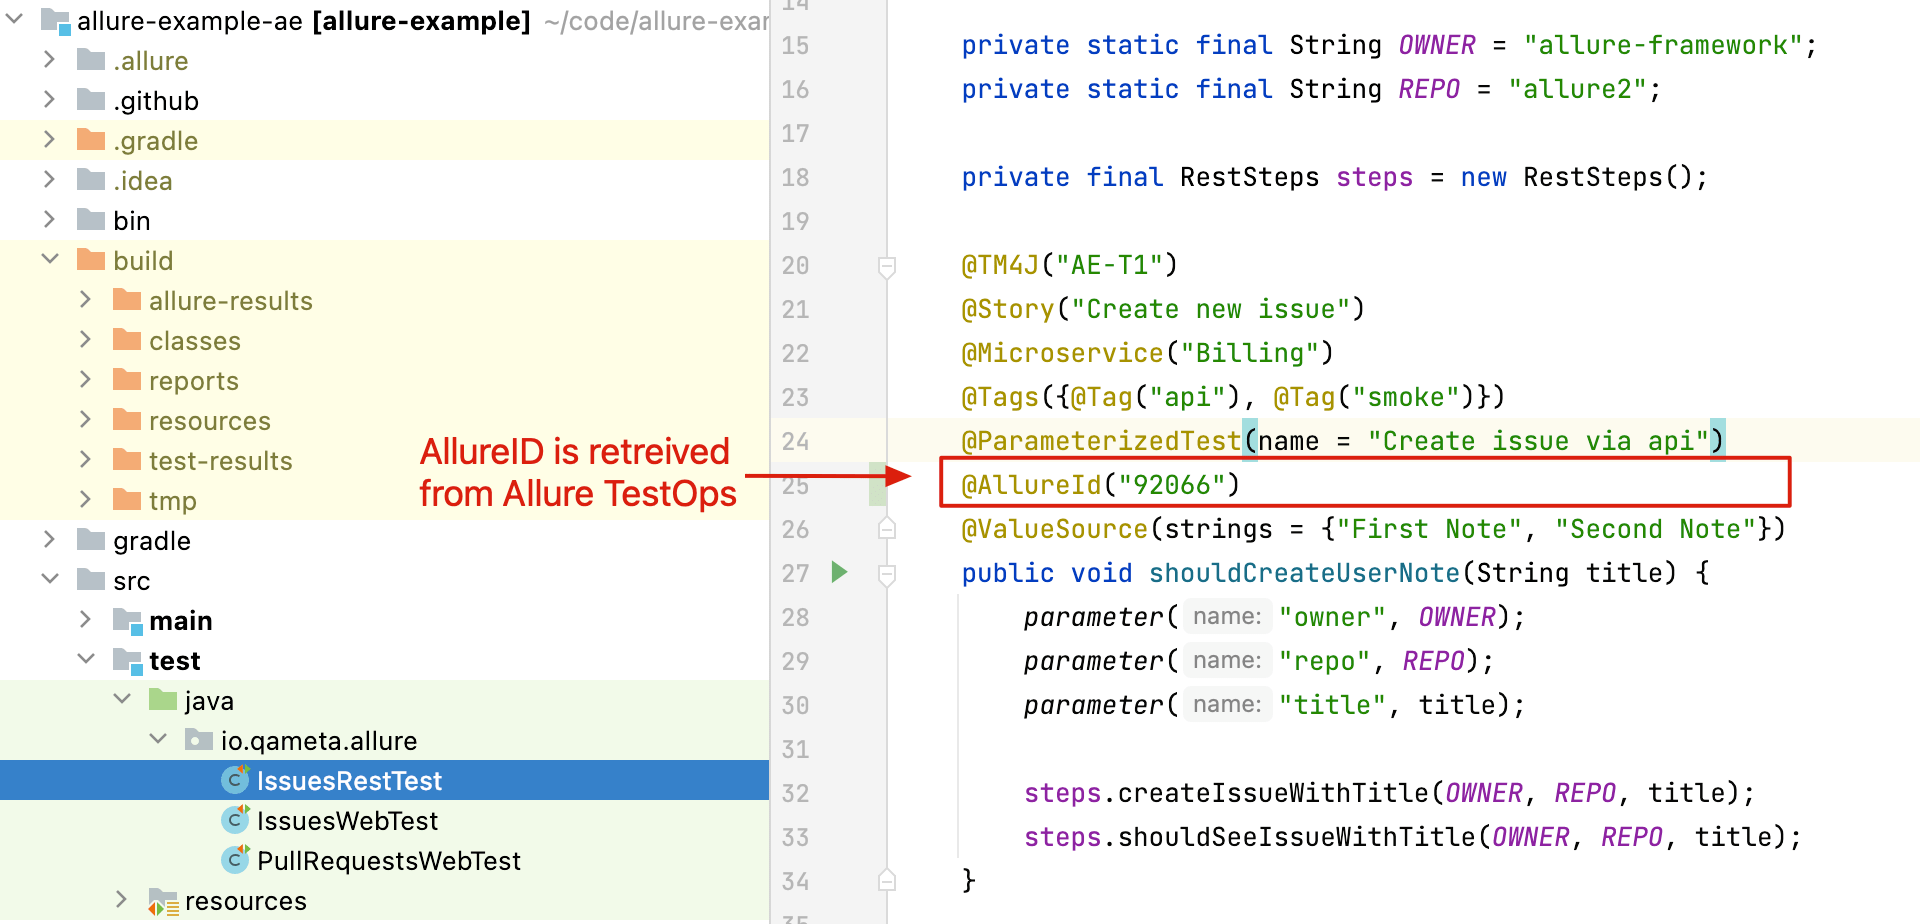
The plugin adds the @AllureId annotation to each matched test method.
The first upload by itself is not enough. TestOps creates and updates test cases only when the launch is closed. If you skip that step, the plugin will not have a stable case to match when it assigns Allure IDs.
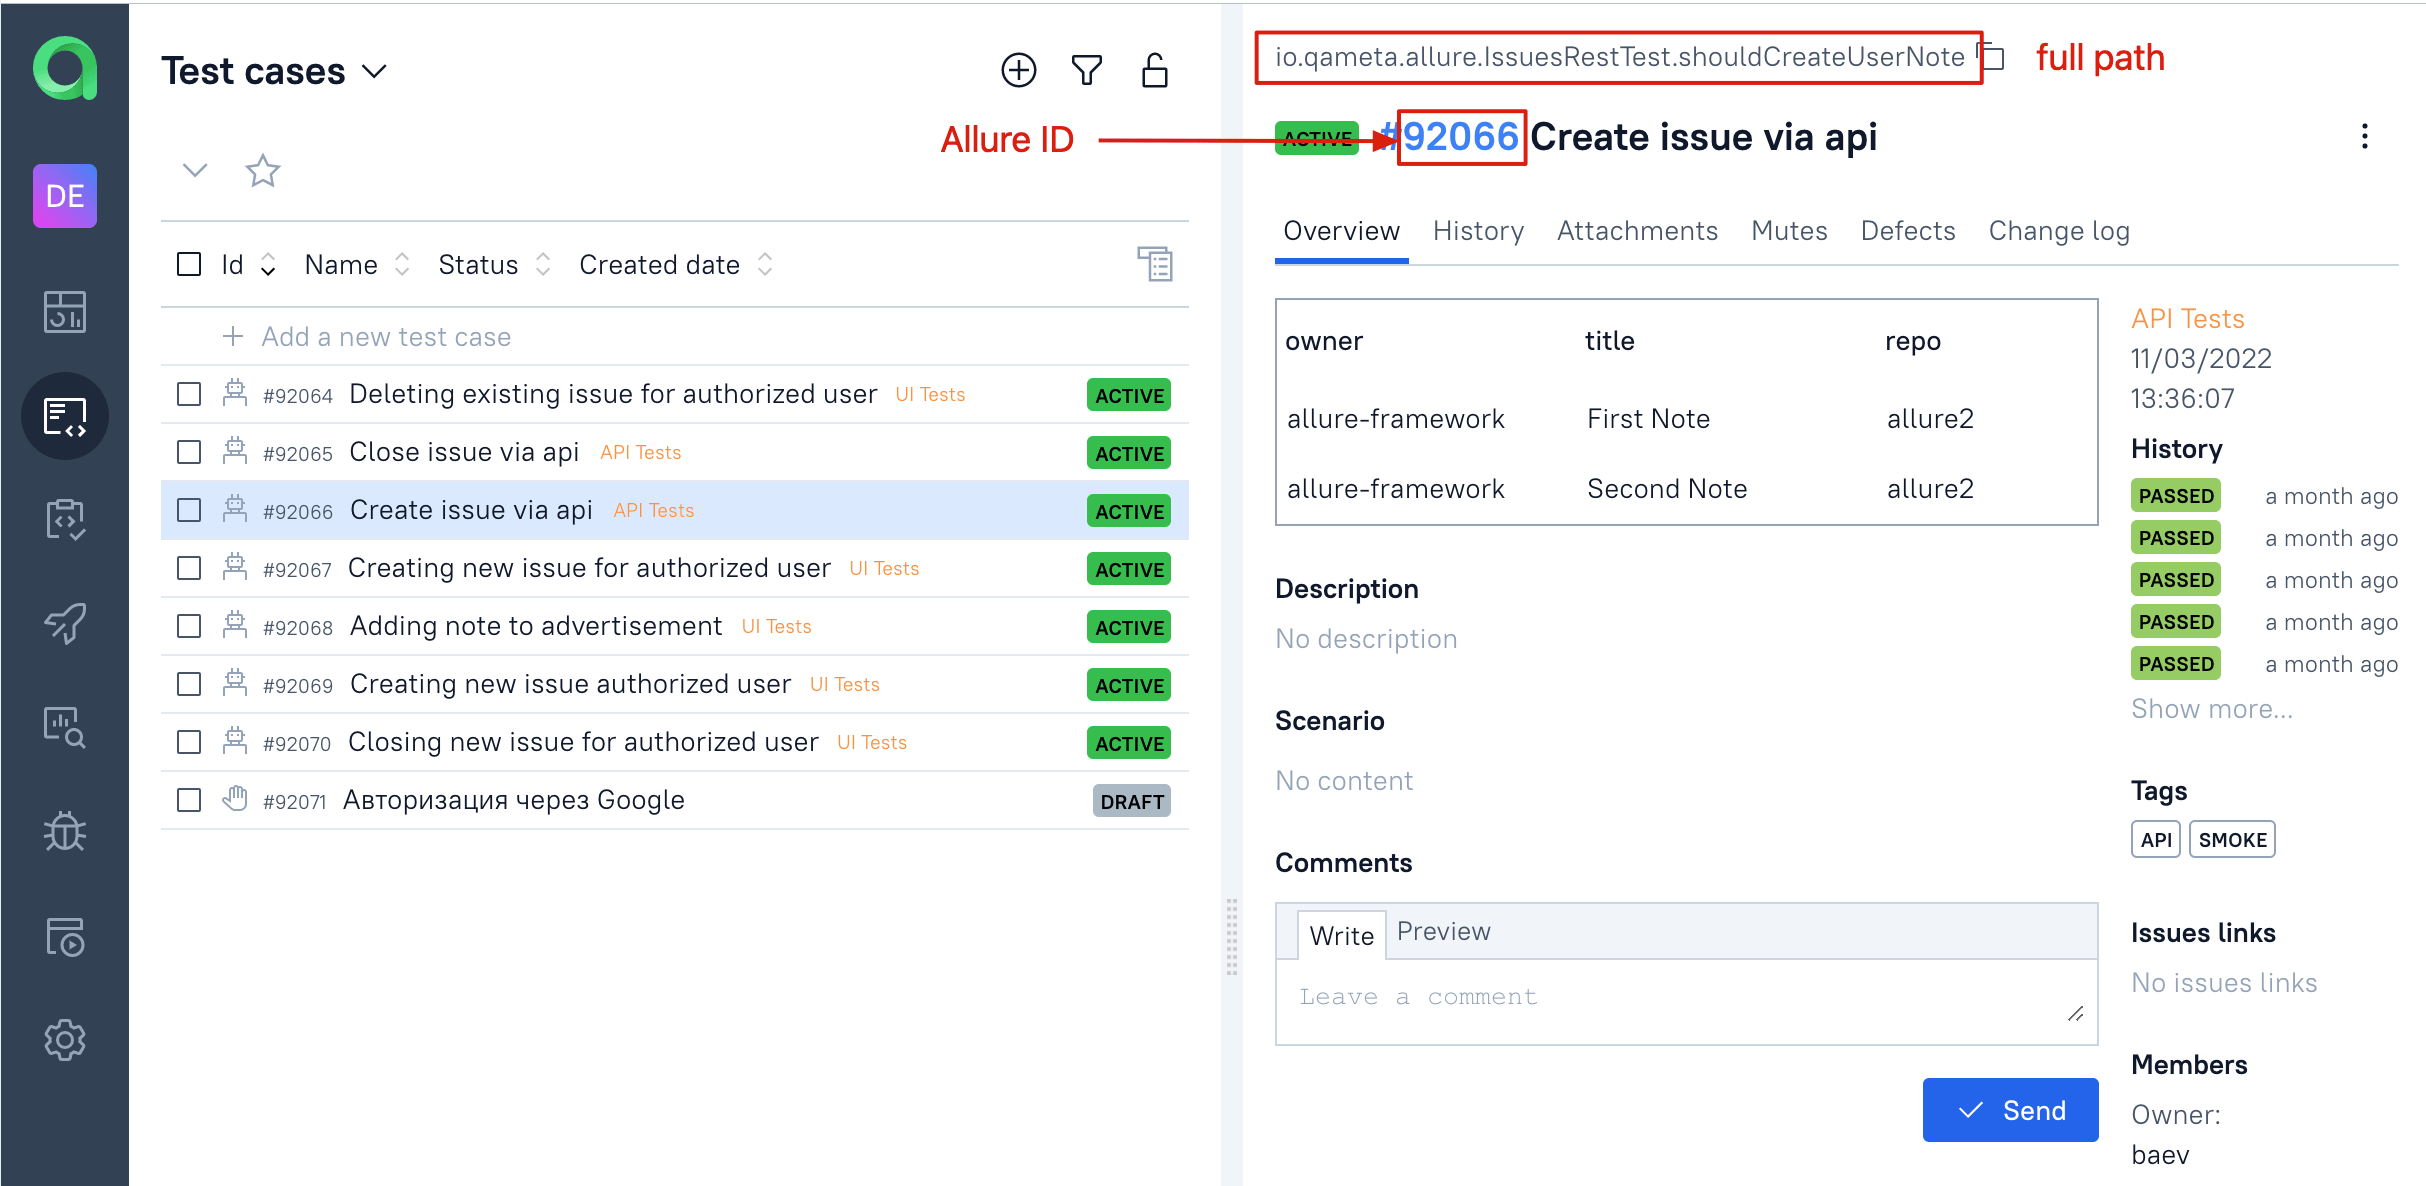
Allure ID assignment matters because TestOps otherwise falls back to the test's structural identity, typically the full path plus parameterization. If you rename the package, class, method, or parameter set without an Allure ID, TestOps can treat the updated test as a new case and leave the old one behind with frozen history.
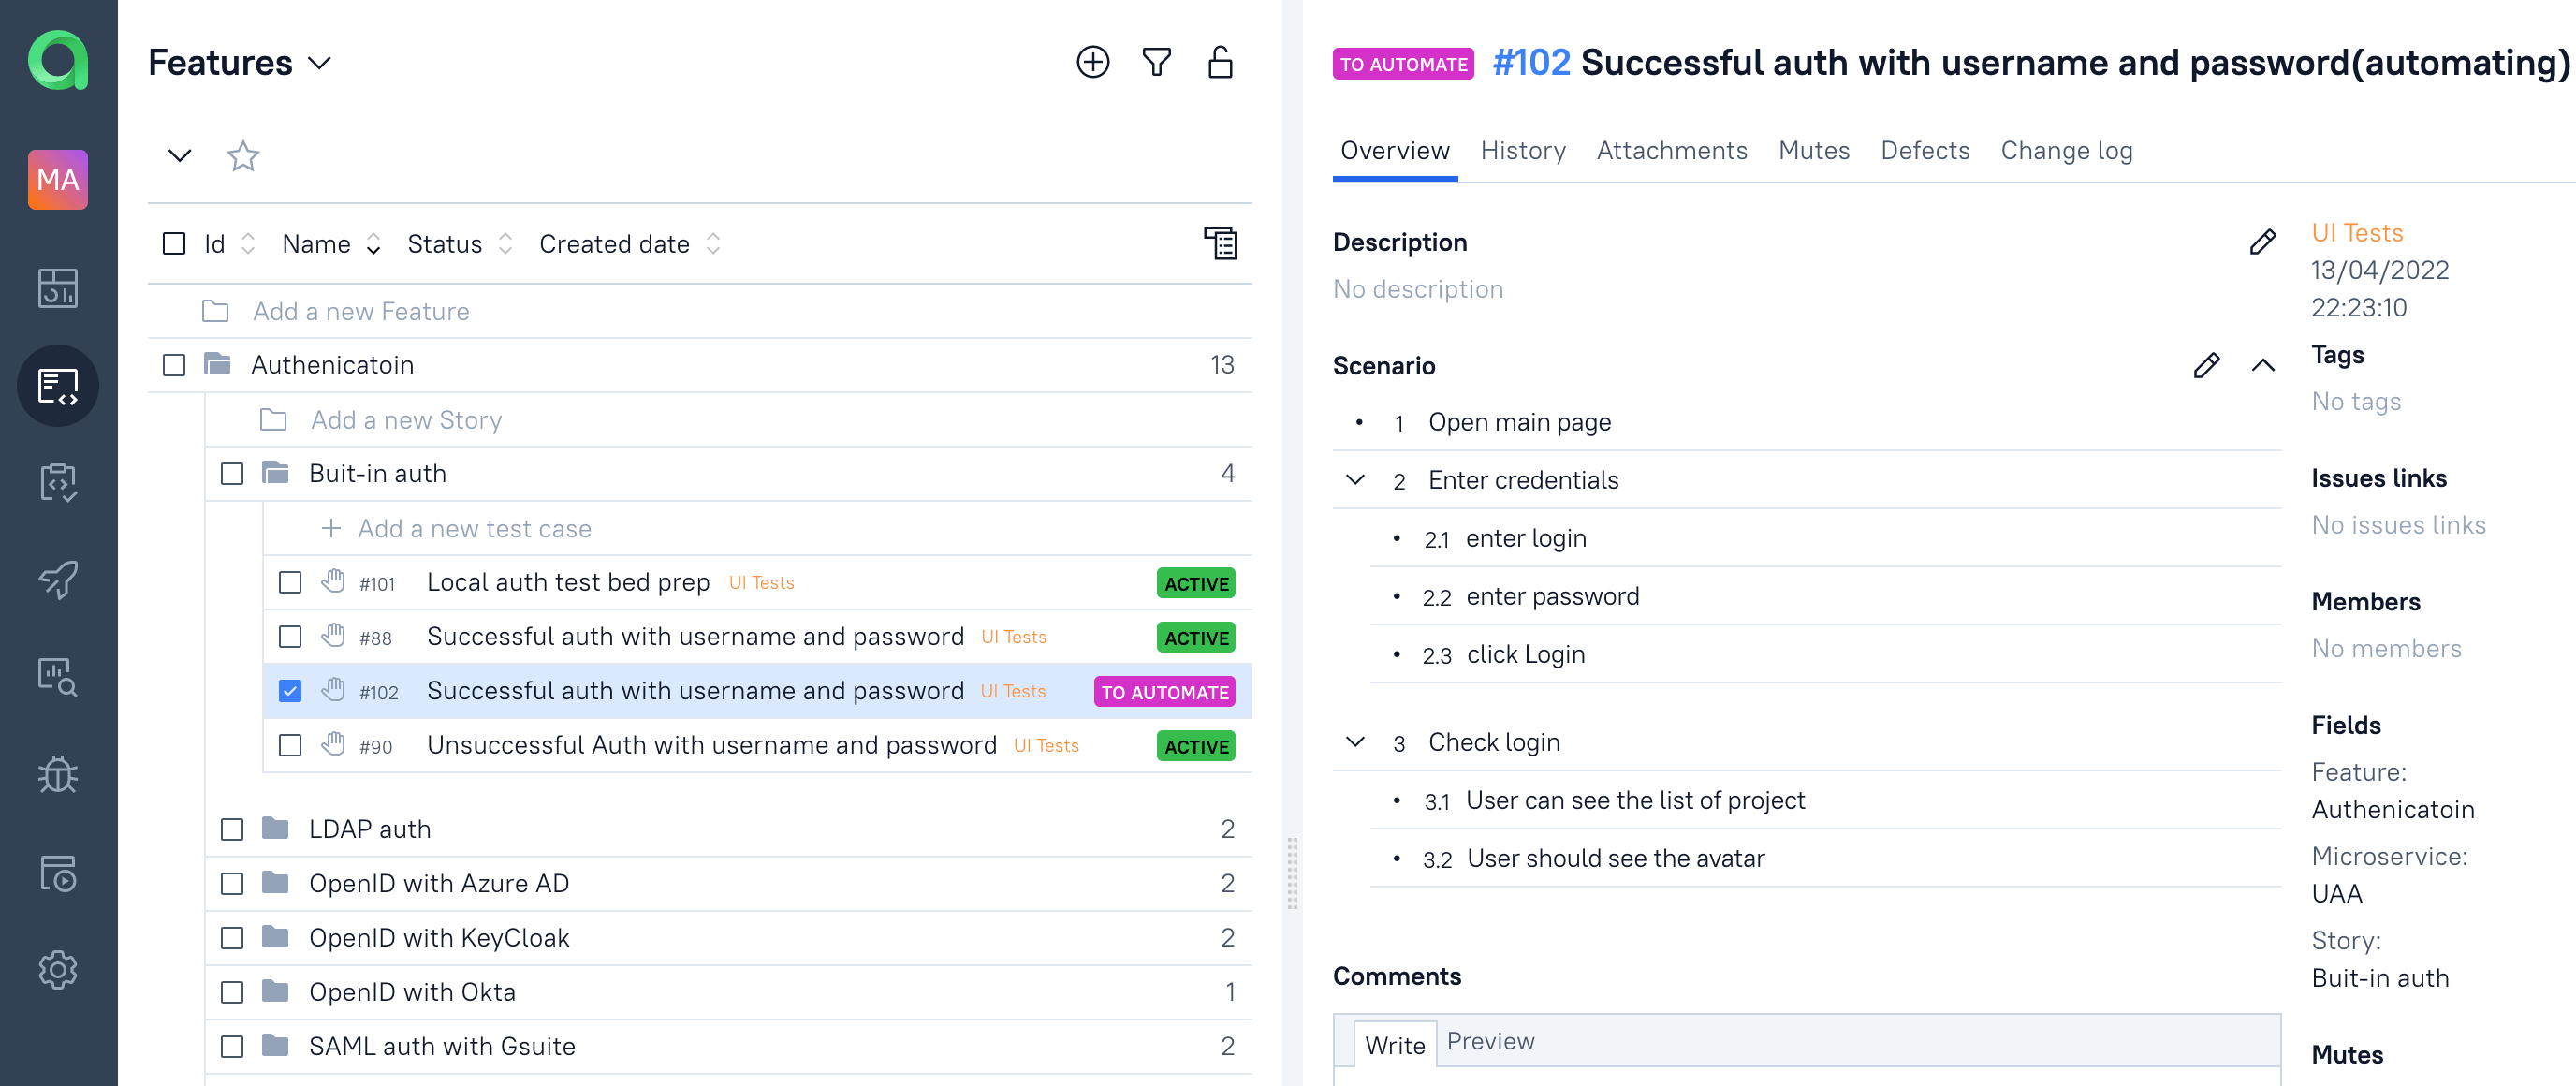
5. Import a manual test case into code
Use this workflow when a manual case already exists in TestOps and you want to turn it into an automated test without recreating the metadata by hand.
In the IDE, open or create the test method that will replace the manual case.
Create or open the test class and add the test method.
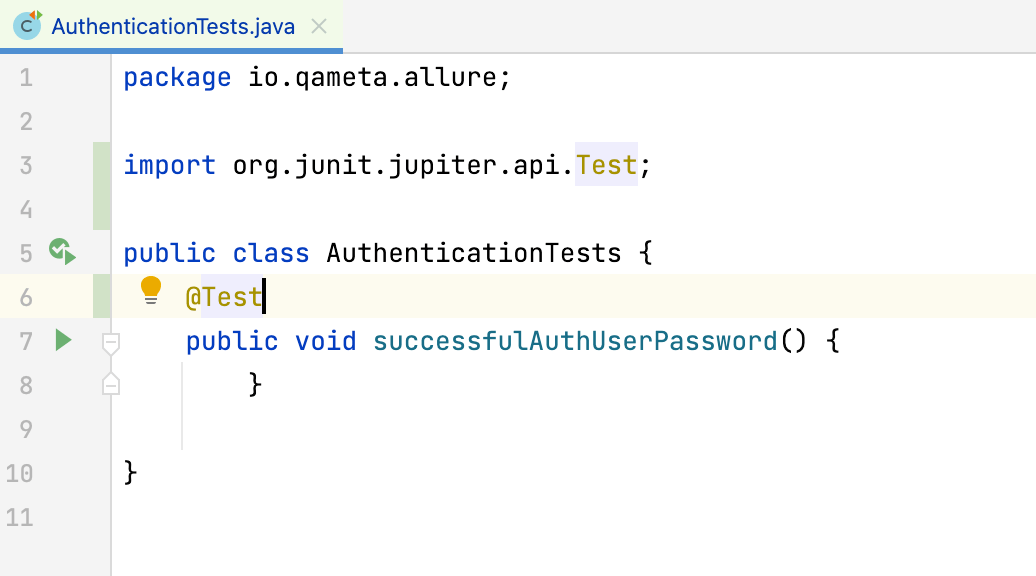
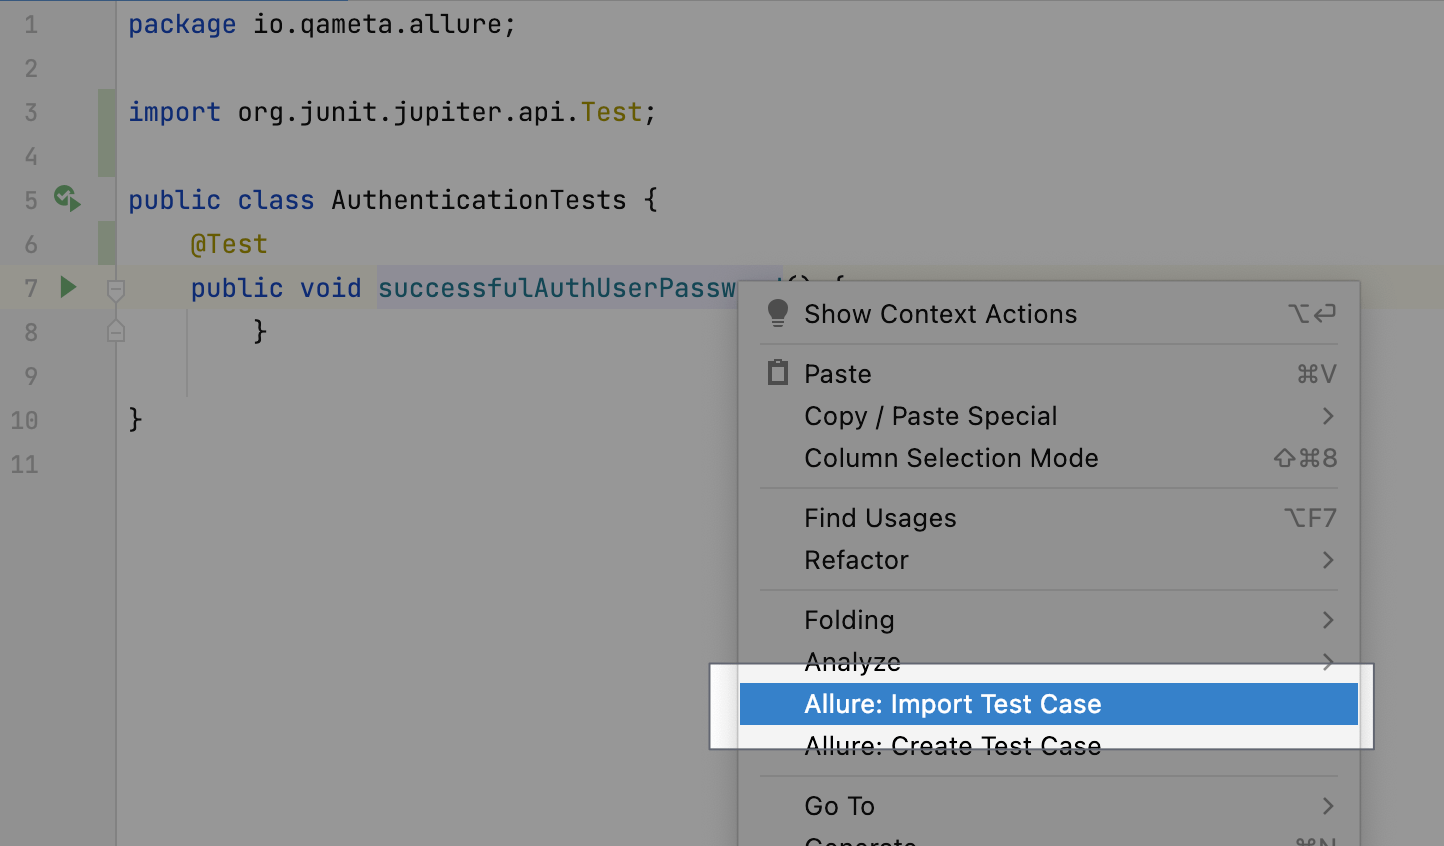
Right-click the method and select Allure: Import test case.
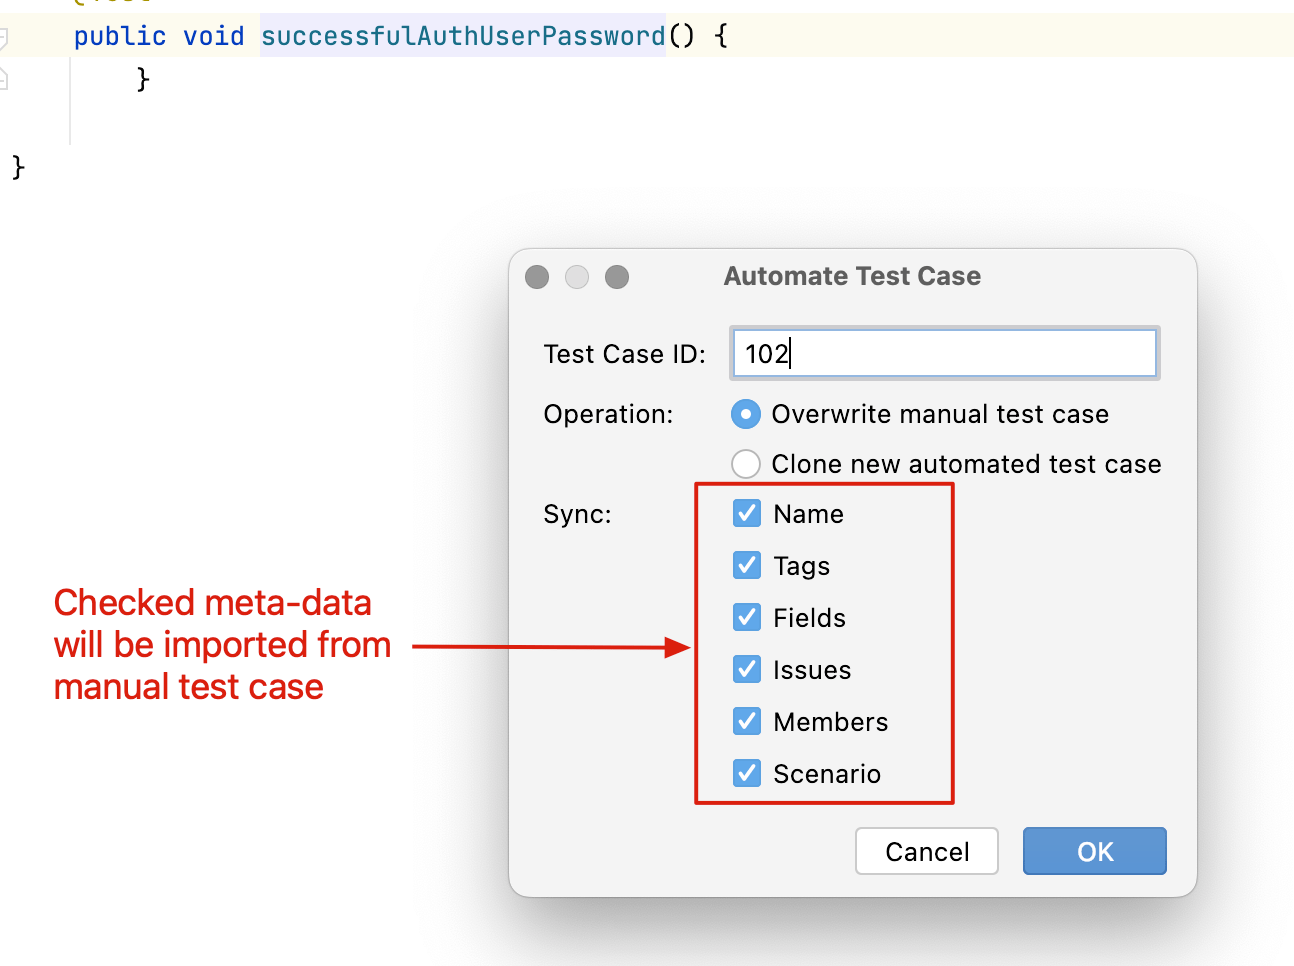
In the dialog, enter the Allure ID of the manual test case in the Test Case ID field and choose which metadata to copy into the code.
The test method is updated with the imported metadata and
@AllureIdis added.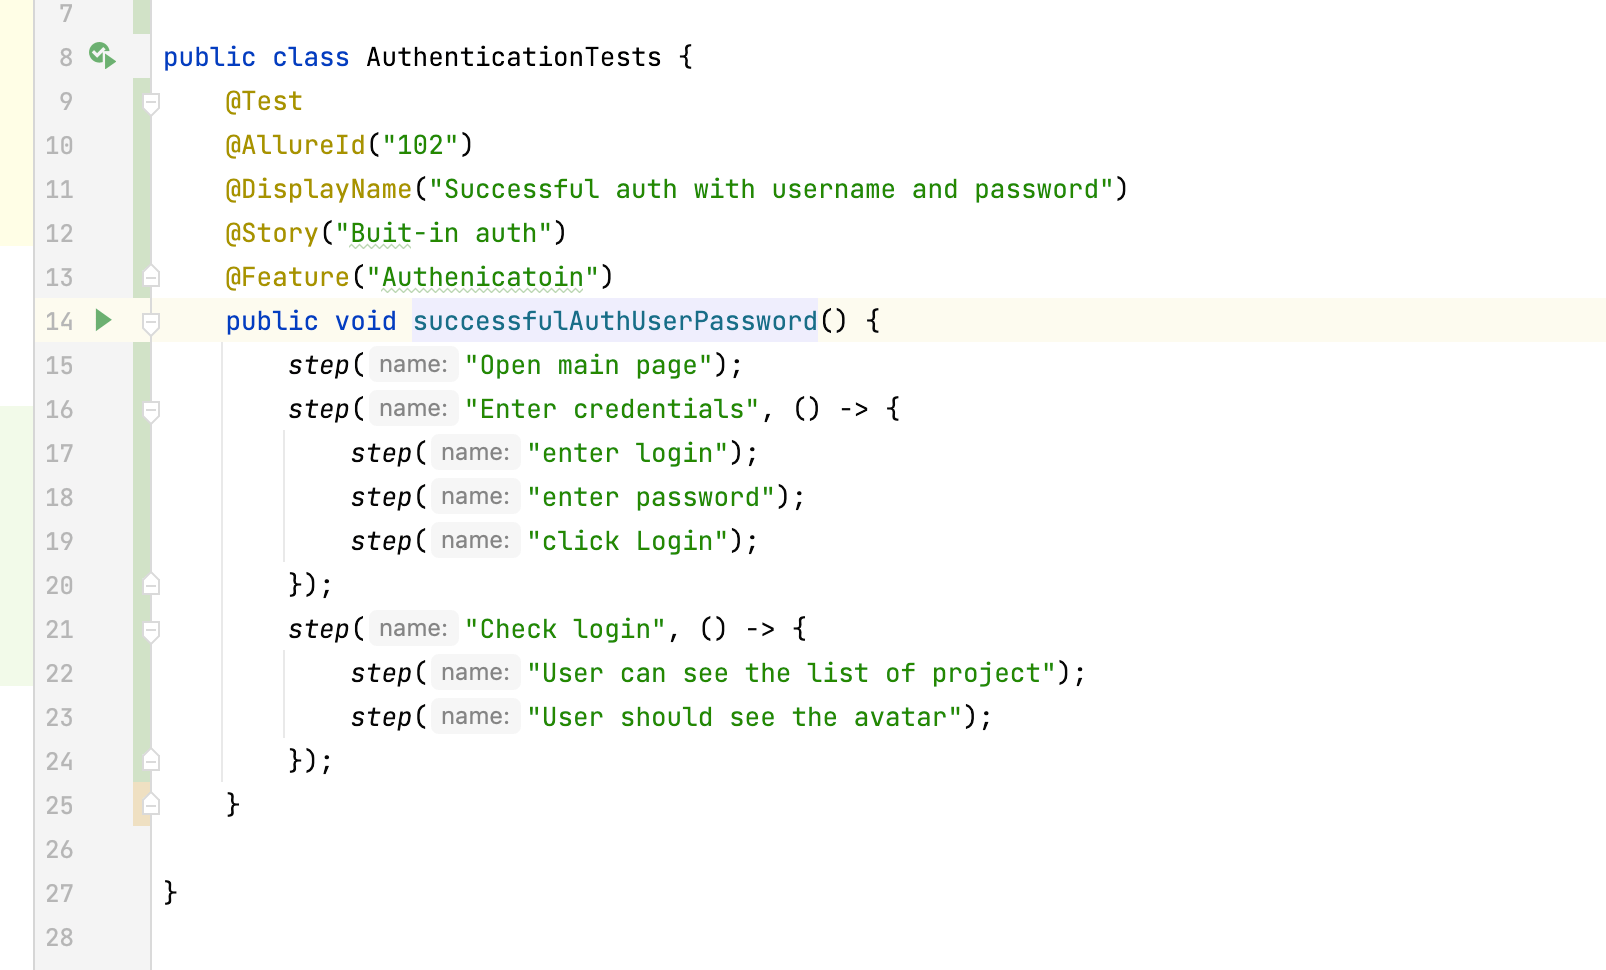
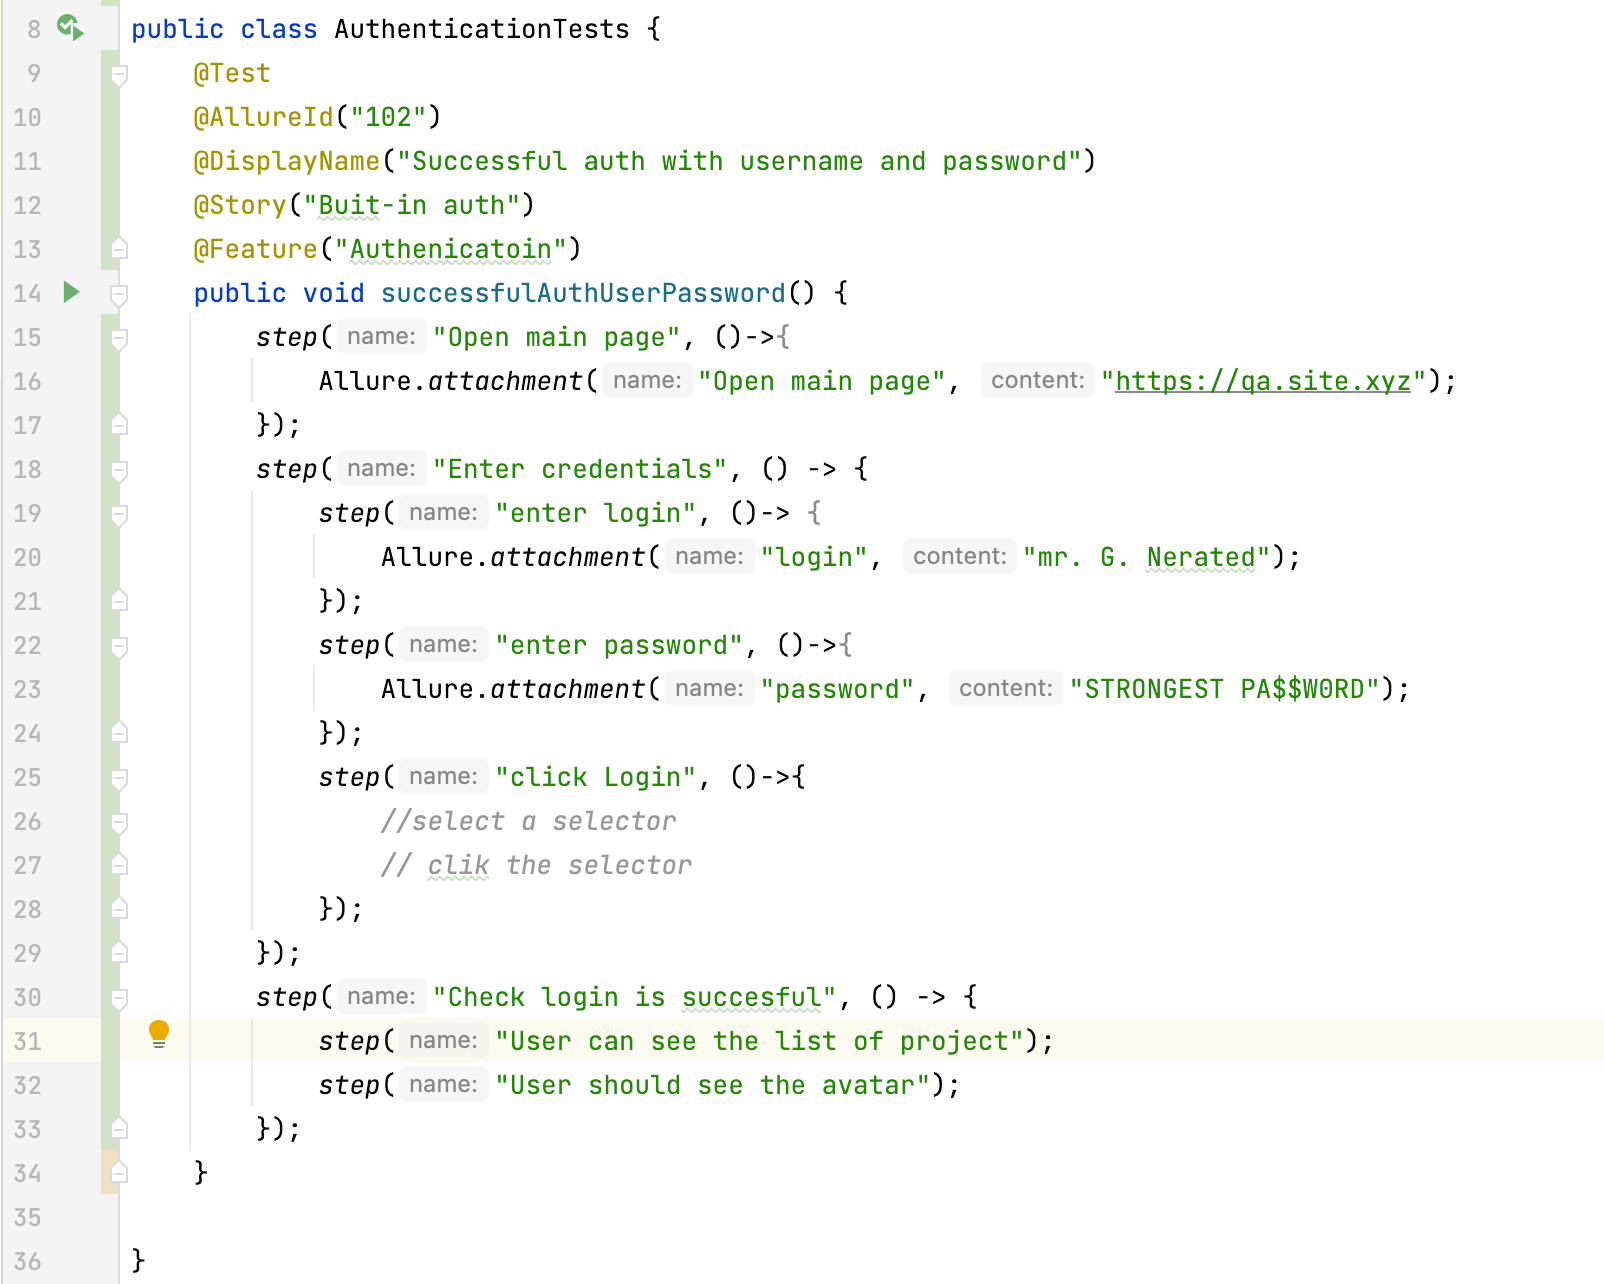
Implement the actual test logic.
Run the test and upload the results.
Close the launch on the TestOps side to process the results.
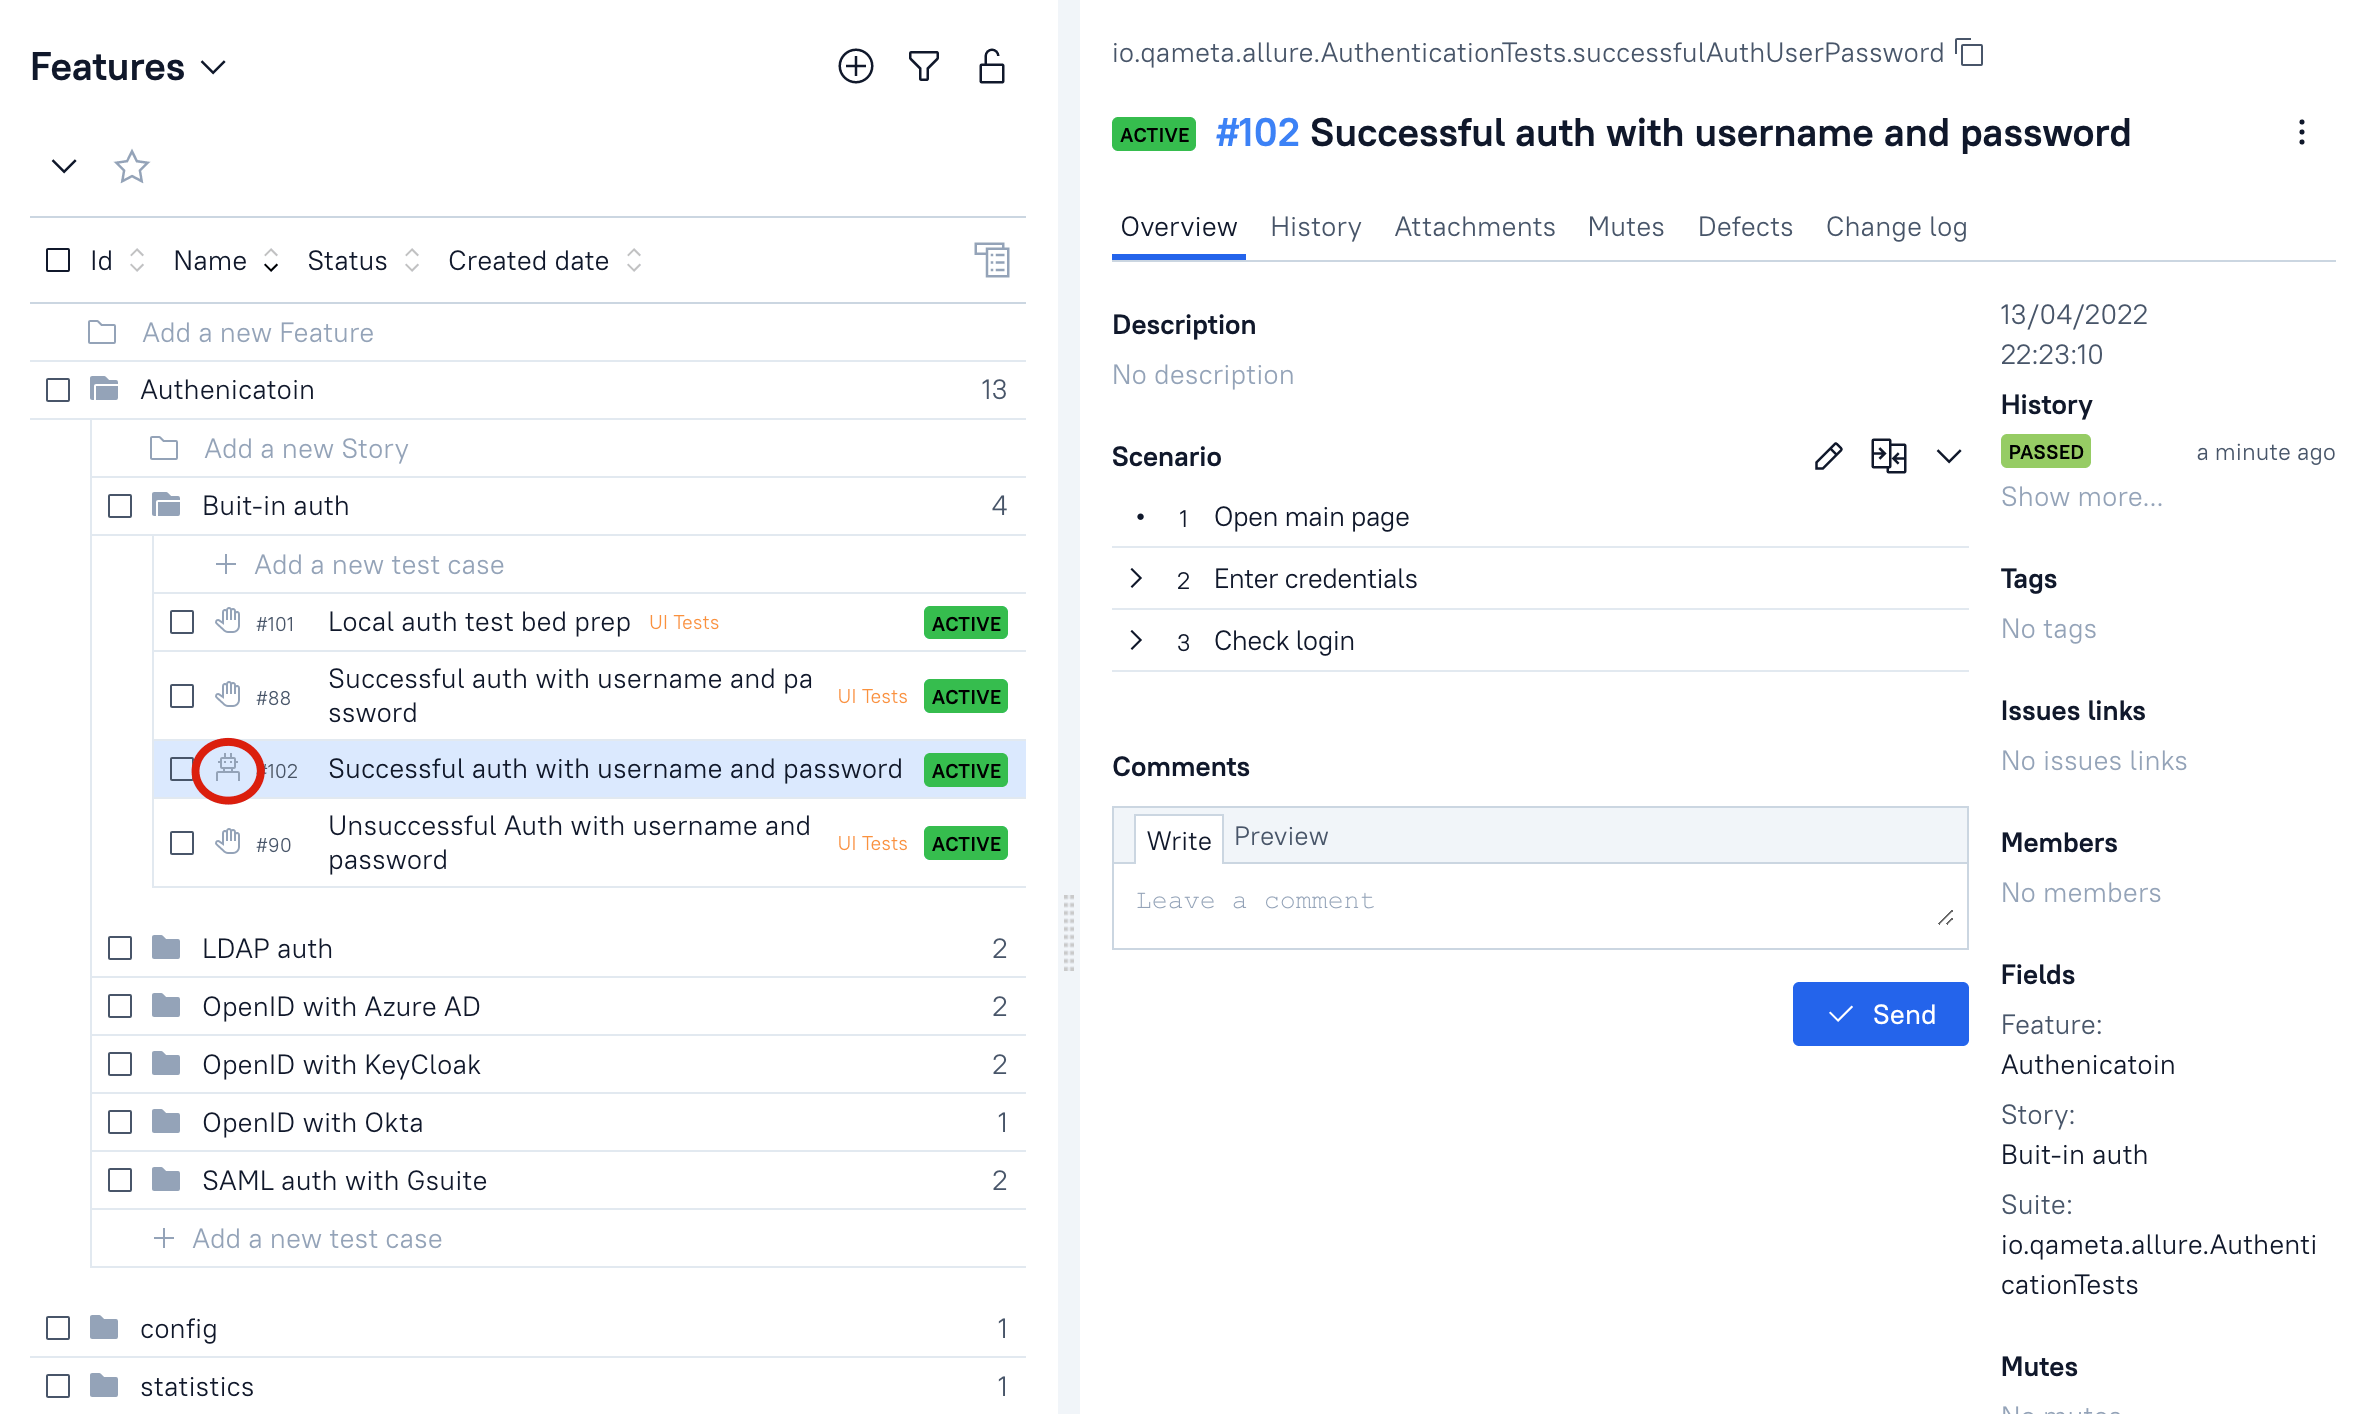
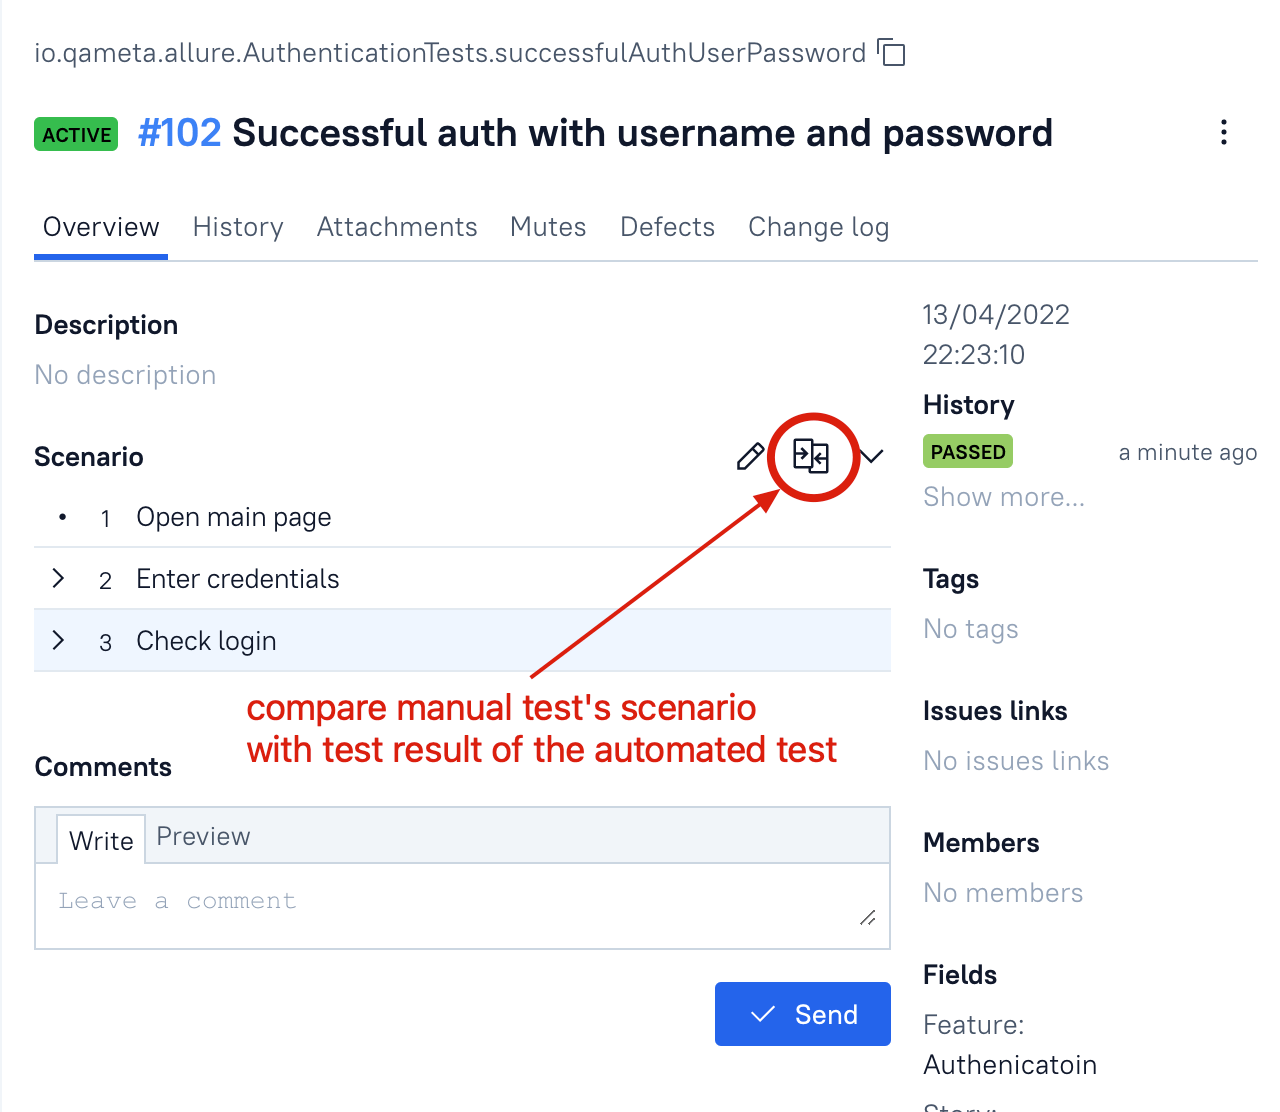
In TestOps, click Compare next to the Scenario field to compare the manual and automated scenarios.
If the automated scenario is correct, remove the manual scenario.
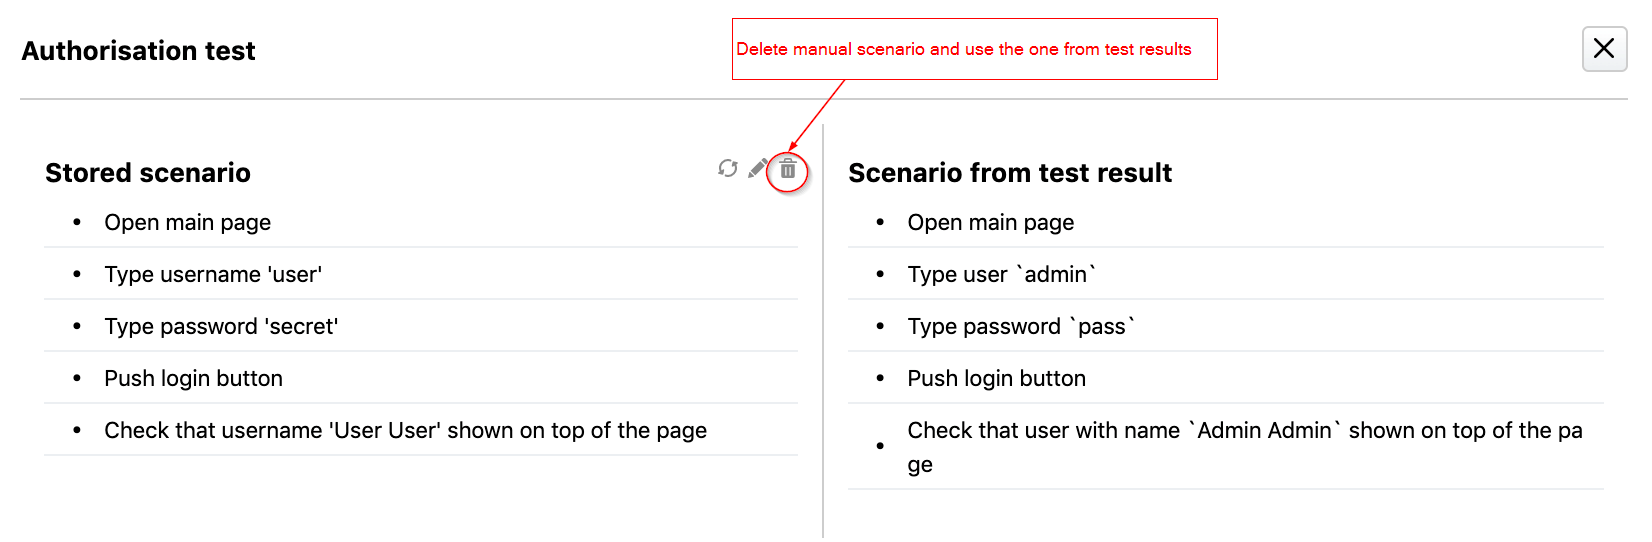
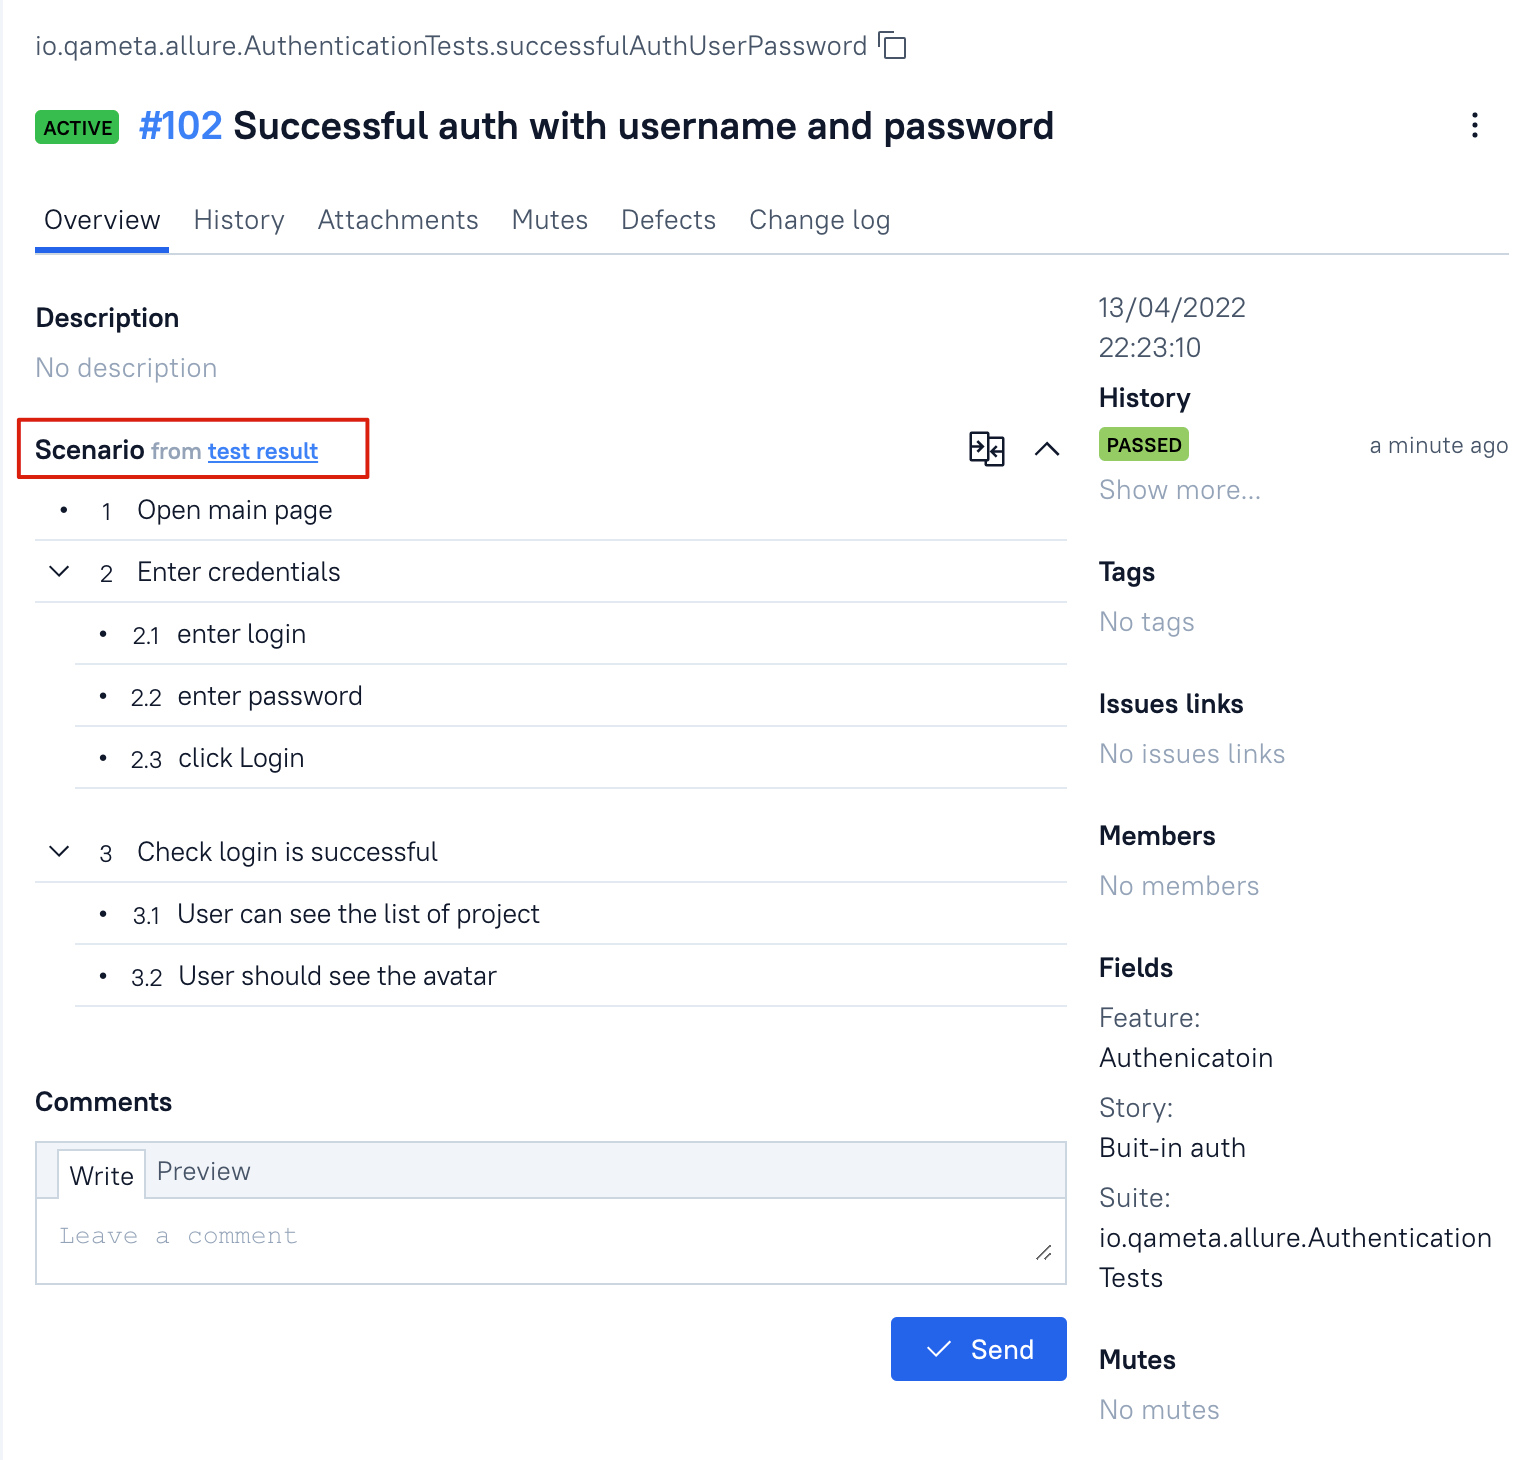
The test case now uses the scenario from the latest test result.
Remove the manual scenario only after you confirm that the automated scenario is the one you want to keep.
6. Reserve a new Allure ID for a new automated test
Use this workflow when you want the test to have a stable Allure ID before its first result is uploaded.
Create the new test method in the IDE.
Right-click the method and select Allure: Create Test Case.
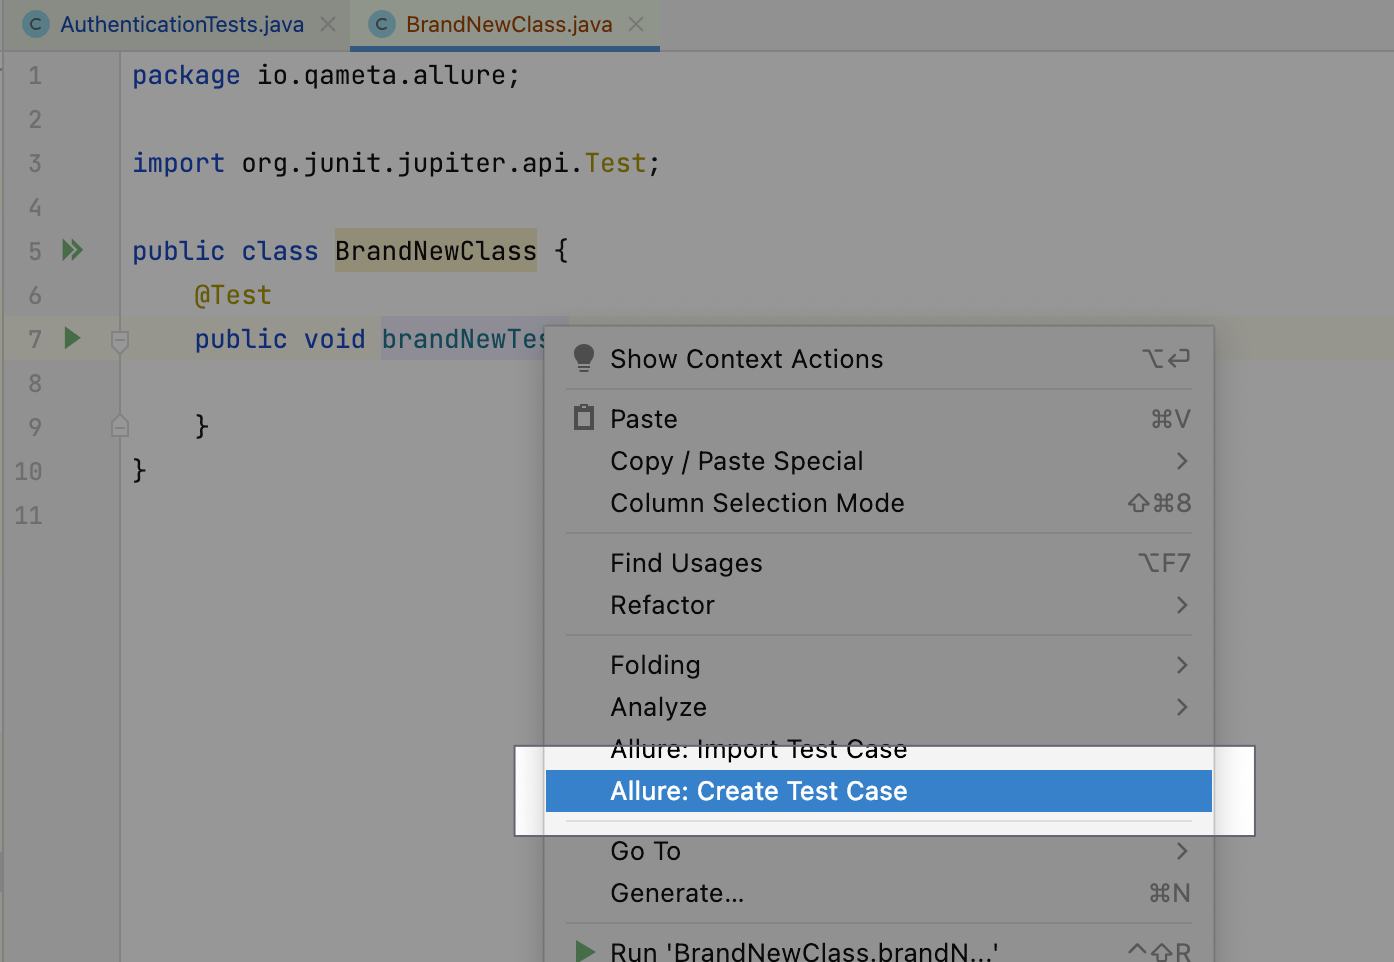
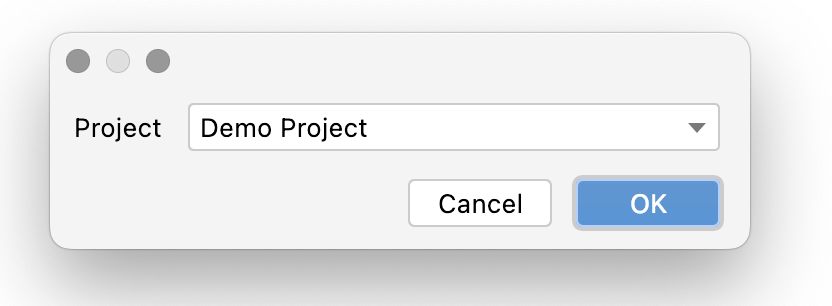
Select the destination TestOps project.
The plugin writes the
@AllureIdannotation into the code.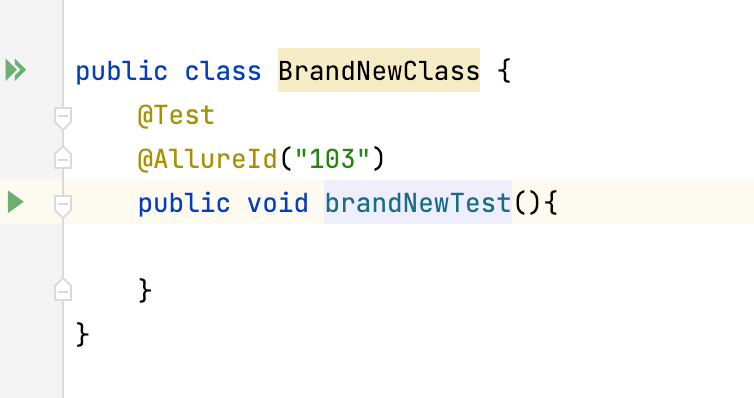
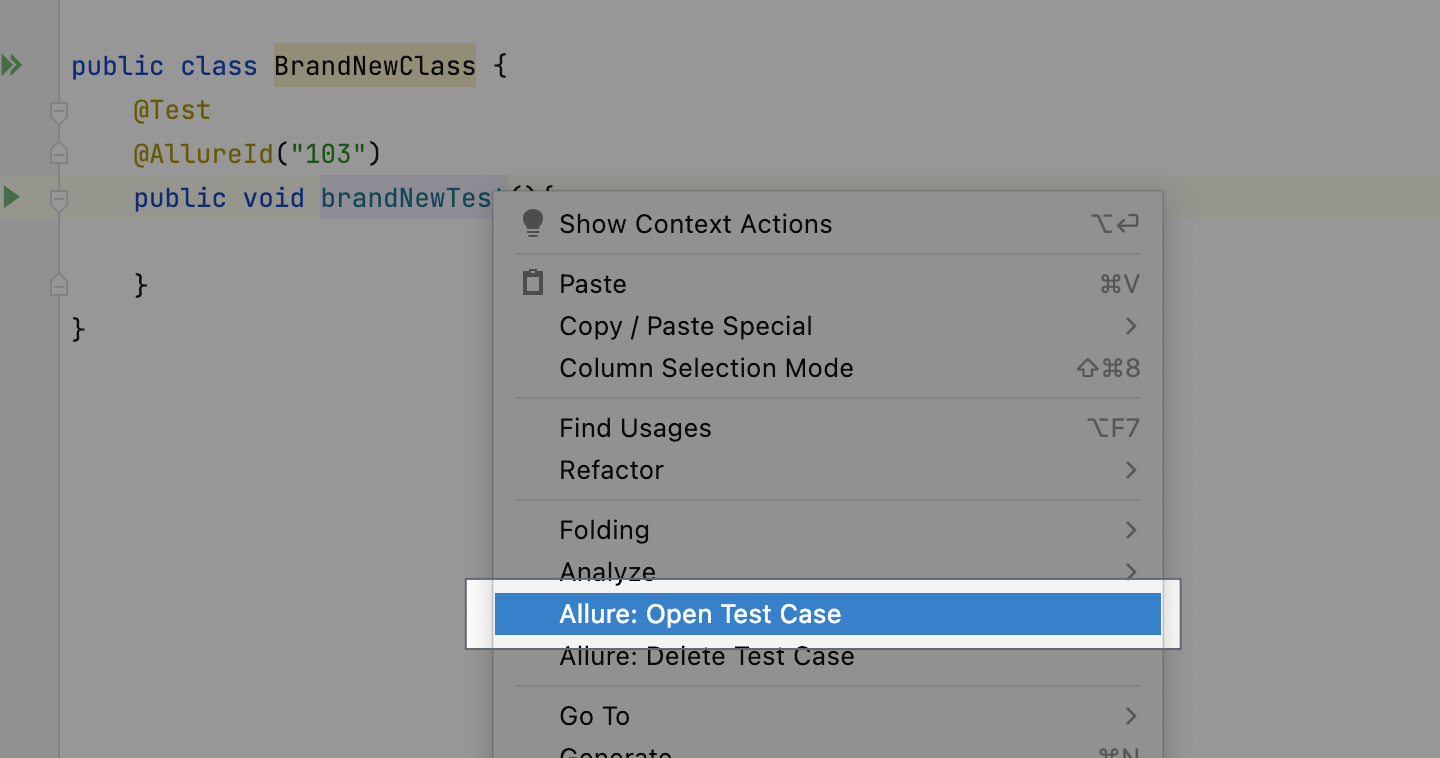
To open the reserved test case in TestOps, right-click the method and select Allure: Open Test Case.
The reserved case appears in TestOps in a deleted state until the first test result is uploaded and the corresponding launch is closed. That is expected: the plugin is reserving the Allure ID before there is an actual execution history behind the new case.
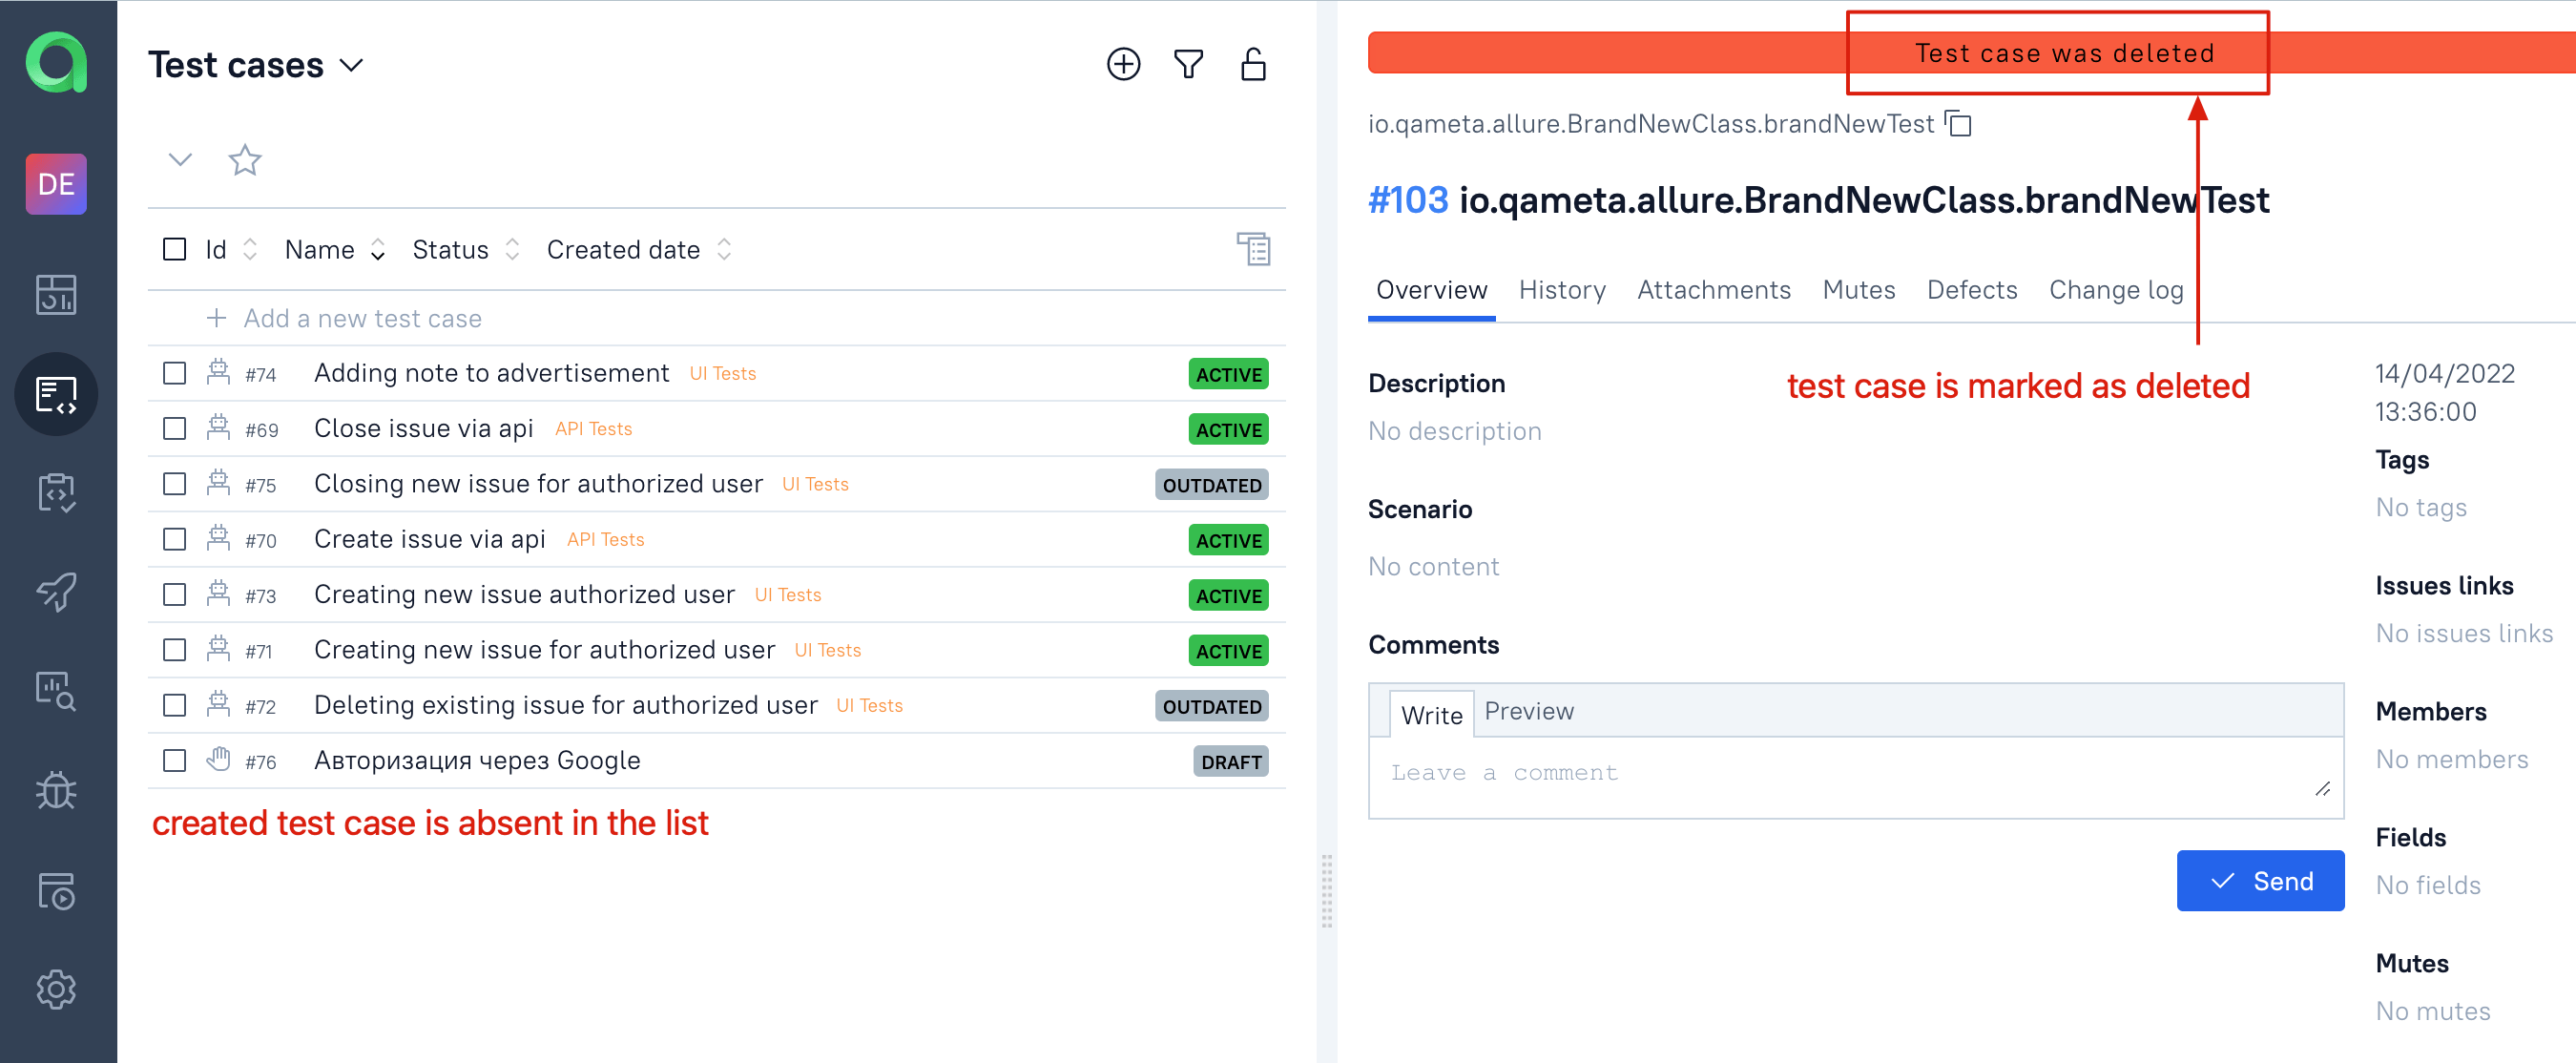
Run the test, upload the results, and close the launch. The deleted state is removed and the test case appears in the regular list.

Verify the plugin
- Check the TestOps connection in the plugin settings.
- Upload a local results directory and confirm that the launch appears in the expected TestOps project.
- Assign or reserve an Allure ID and confirm that the annotation appears in the code as expected.
Limitations
- New test cases and ID-assignment workflows depend on the launch being closed in TestOps after the first upload.
- Available IDE actions depend on the language and framework integration the plugin can understand in that project.
- For IDE-assisted Allure ID assignment, manual-case import, or new automated case creation, use this plugin — not the VS Code plugin.
- Keep CI upload and selective execution on the server-side or CLI path.
Related pages
- VS Code plugin for the lighter VS Code path.
- Command-line tool - allurectl if you need a CLI workflow instead of an IDE workflow.
