Release information
Launches can carry a release identifier — a version number, branch name, or any delivery marker — that becomes available for filtering, comparison, and dashboards. The value is supplied from CI through an environment variable mapped at the project level.
In the examples below, the CI variable is named RELEASE, but the name can be different in your environment.
How to set it up
The setup has four parts:
- Add an environment variable on a CI pipeline level.
- Declare the corresponding Environment variable in Allure TestOps.
- Map the CI variable to the Allure TestOps environment variable at project level.
- Run the pipeline and verify that the launch now shows the release value.
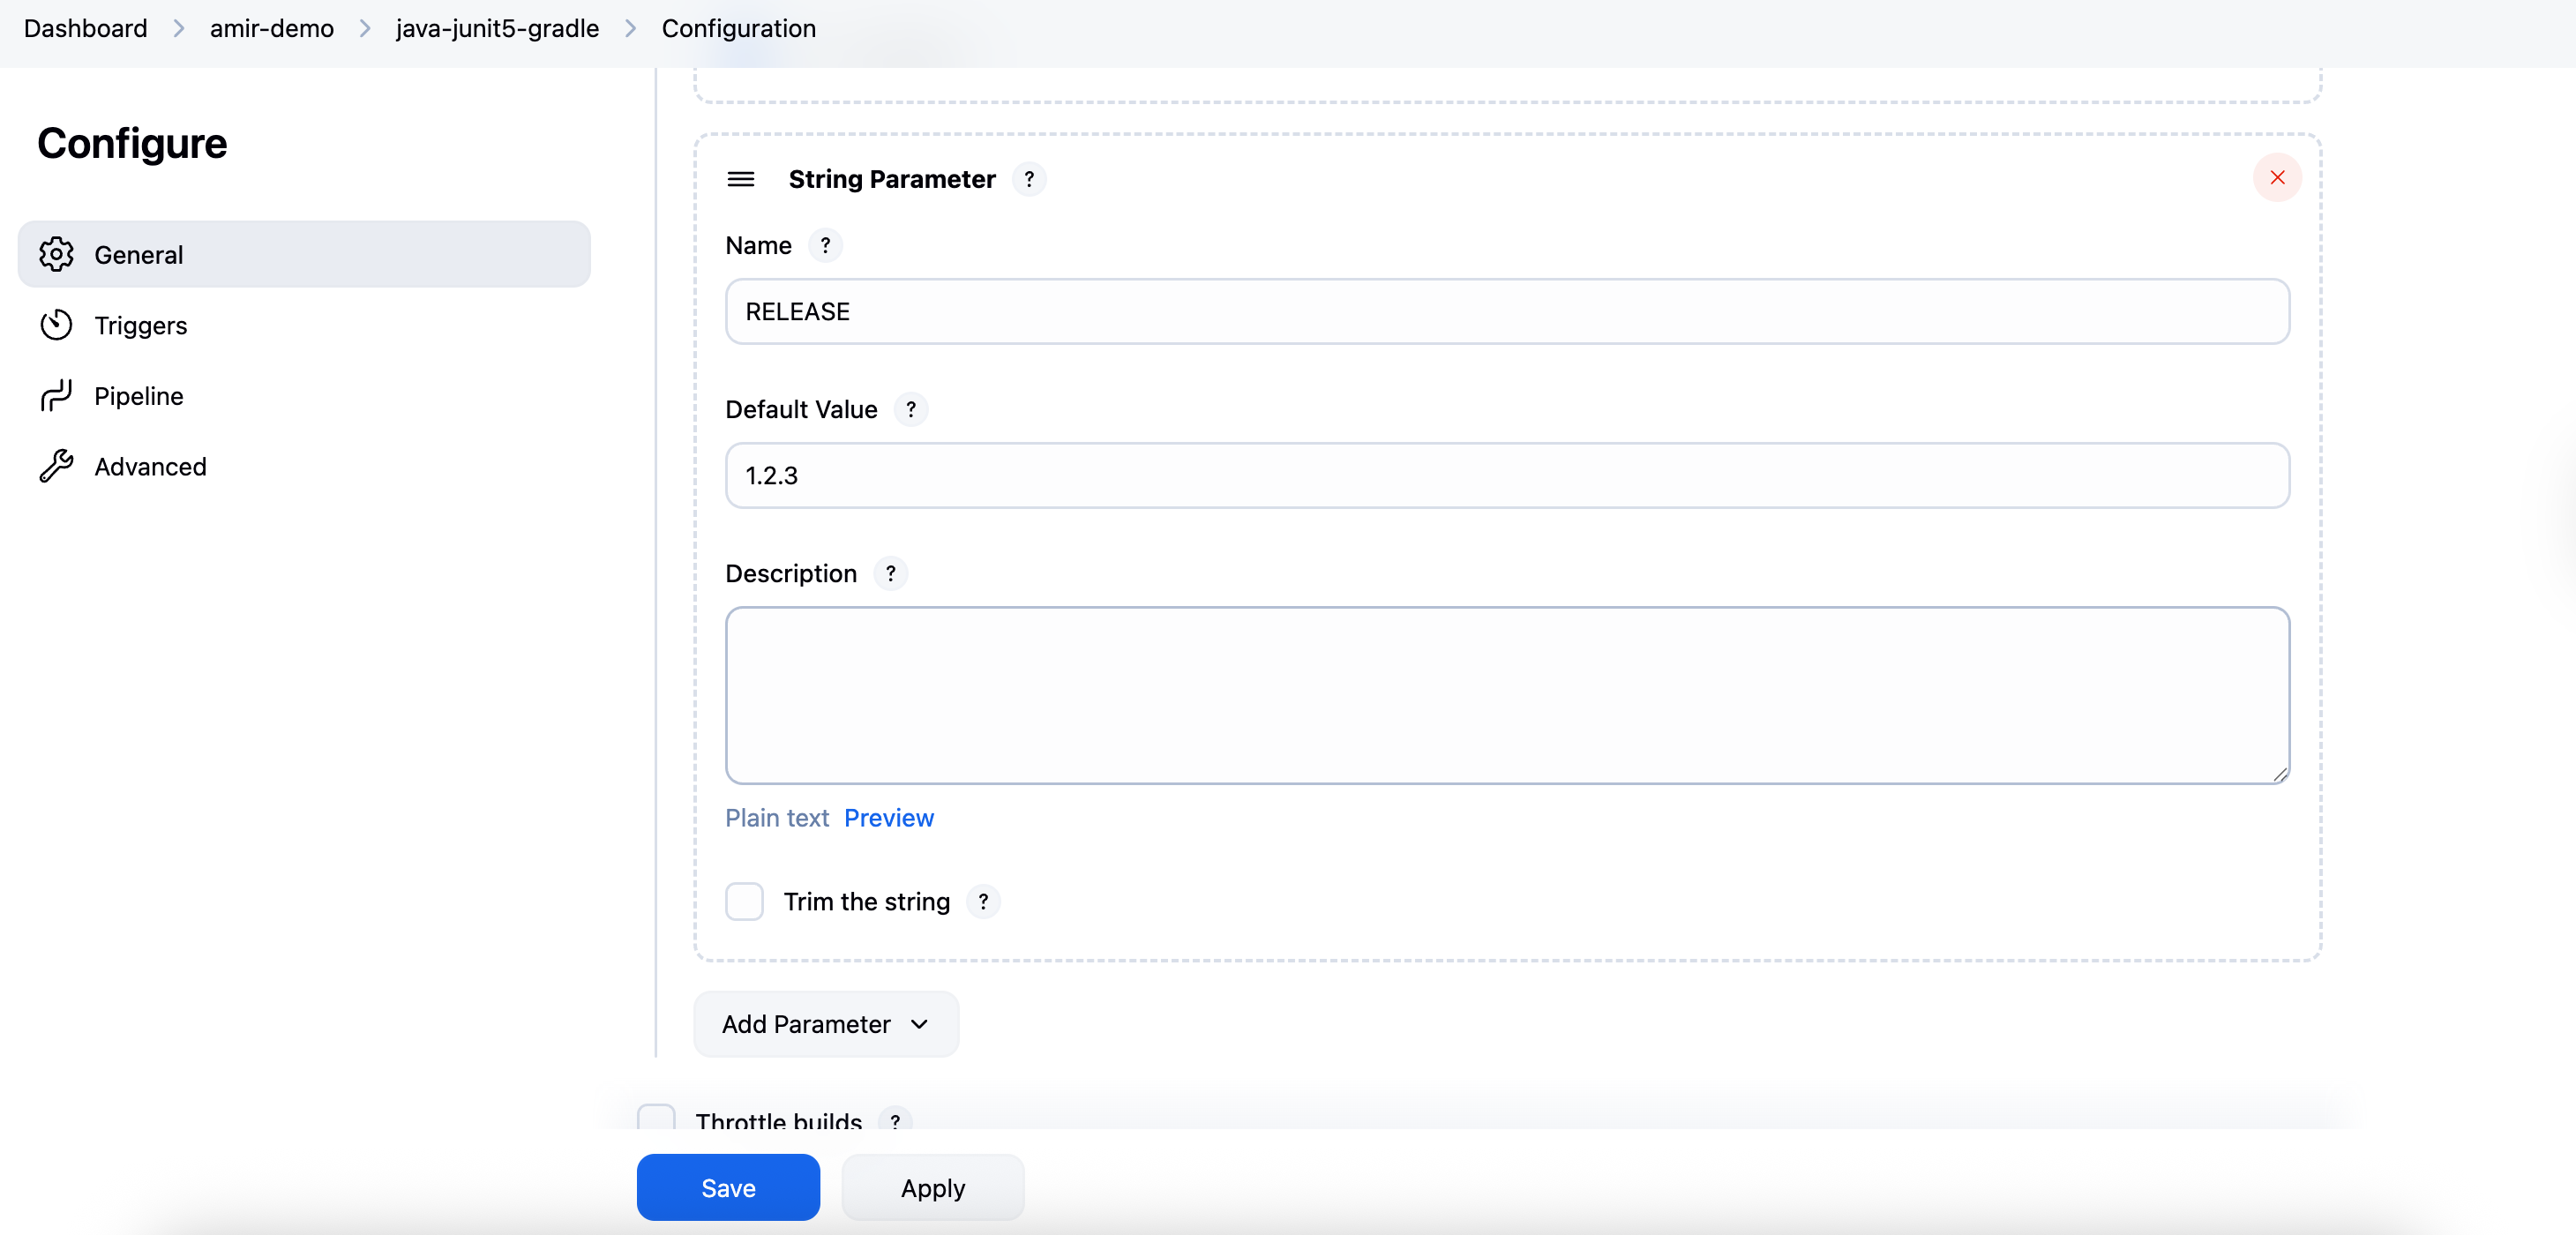
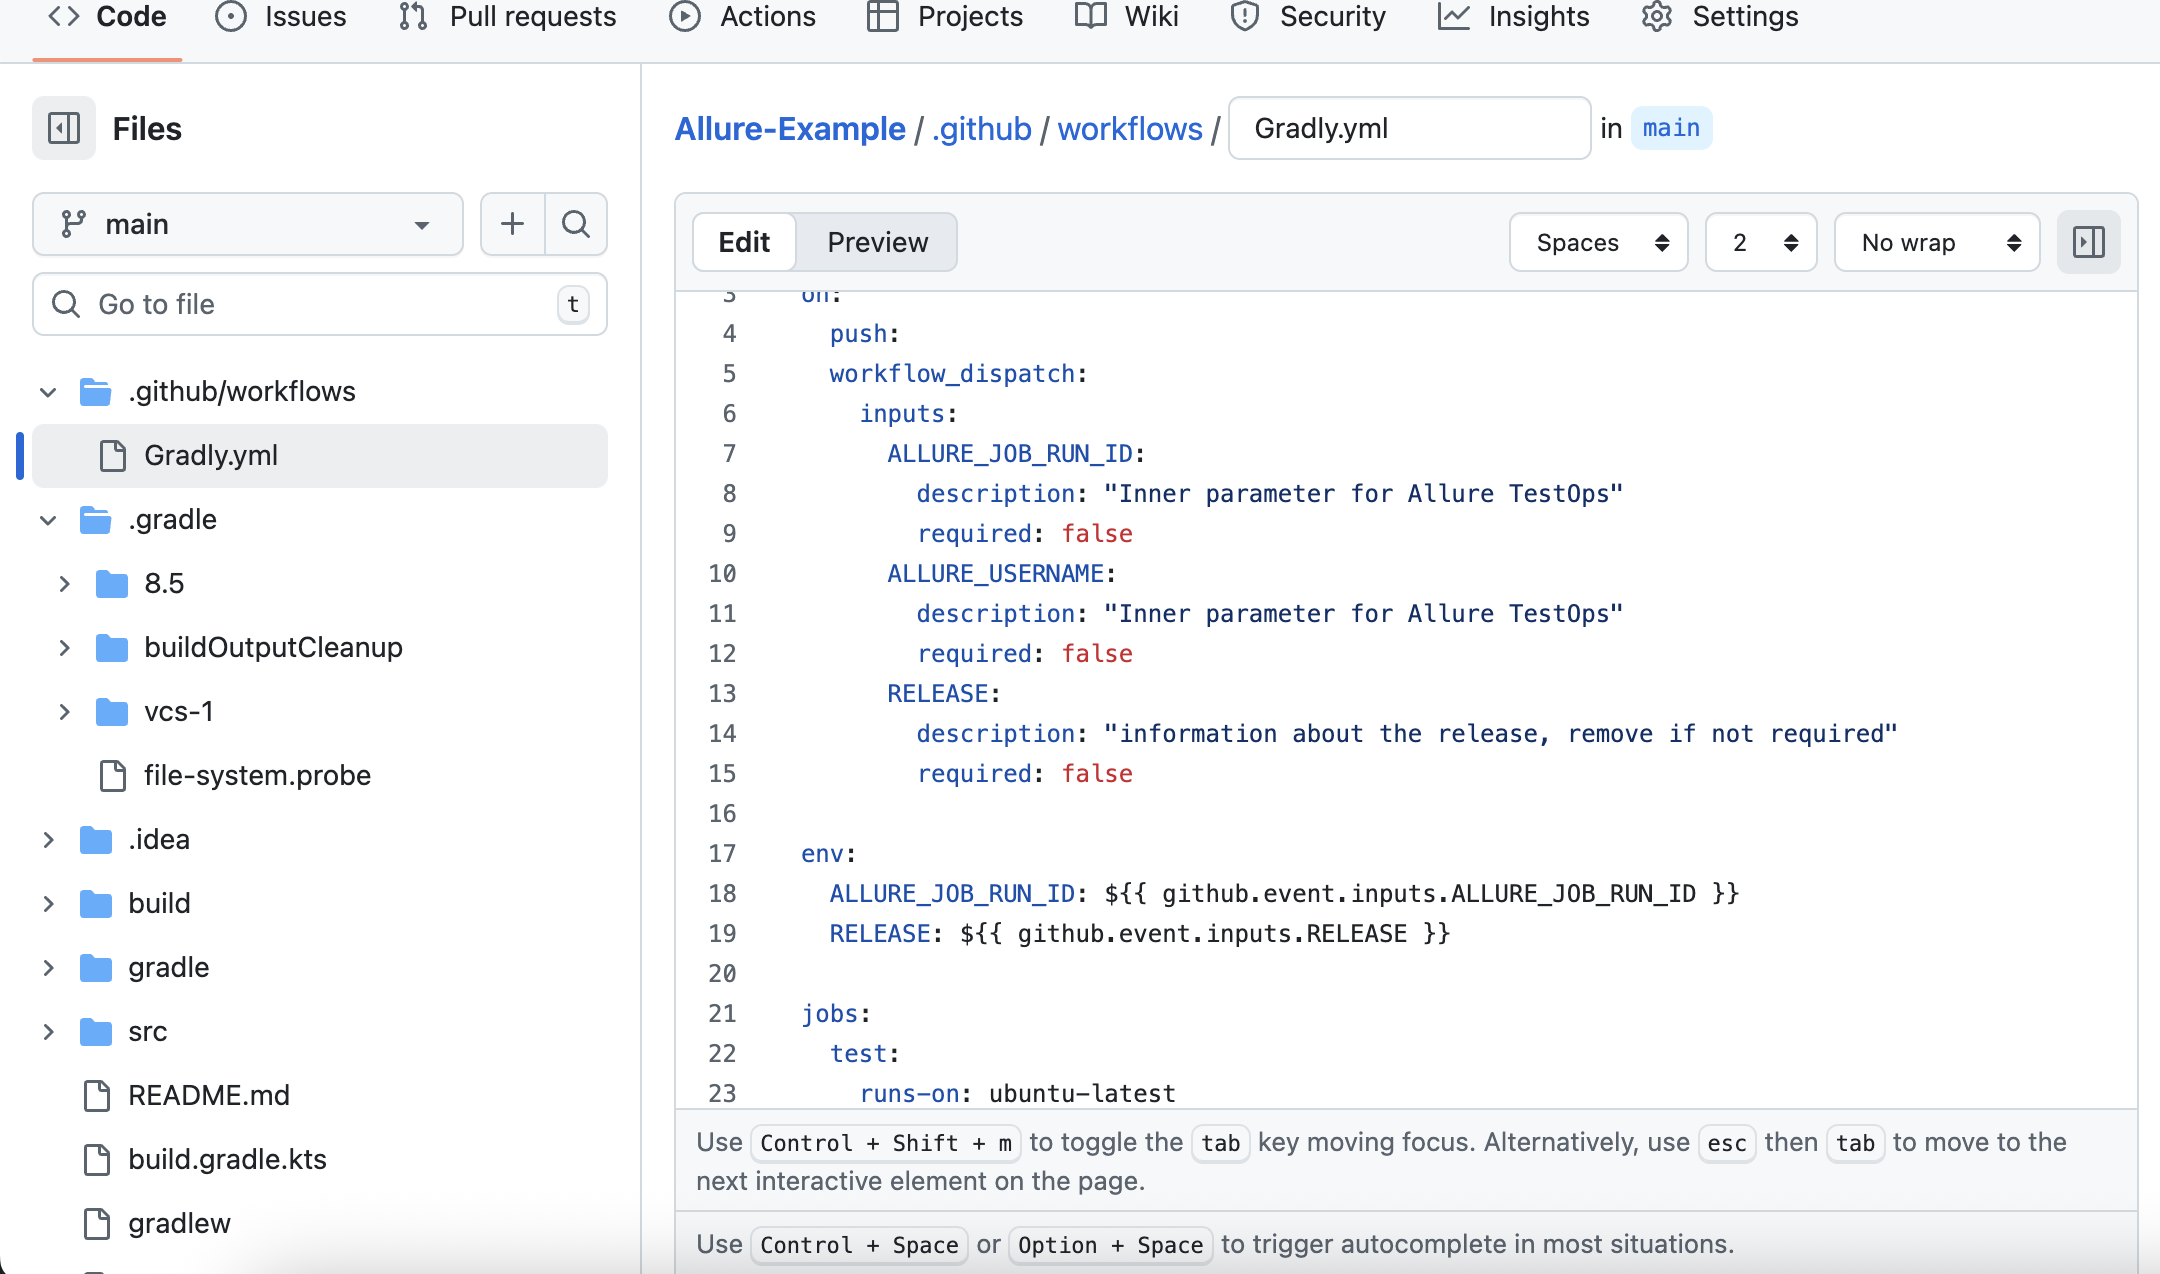
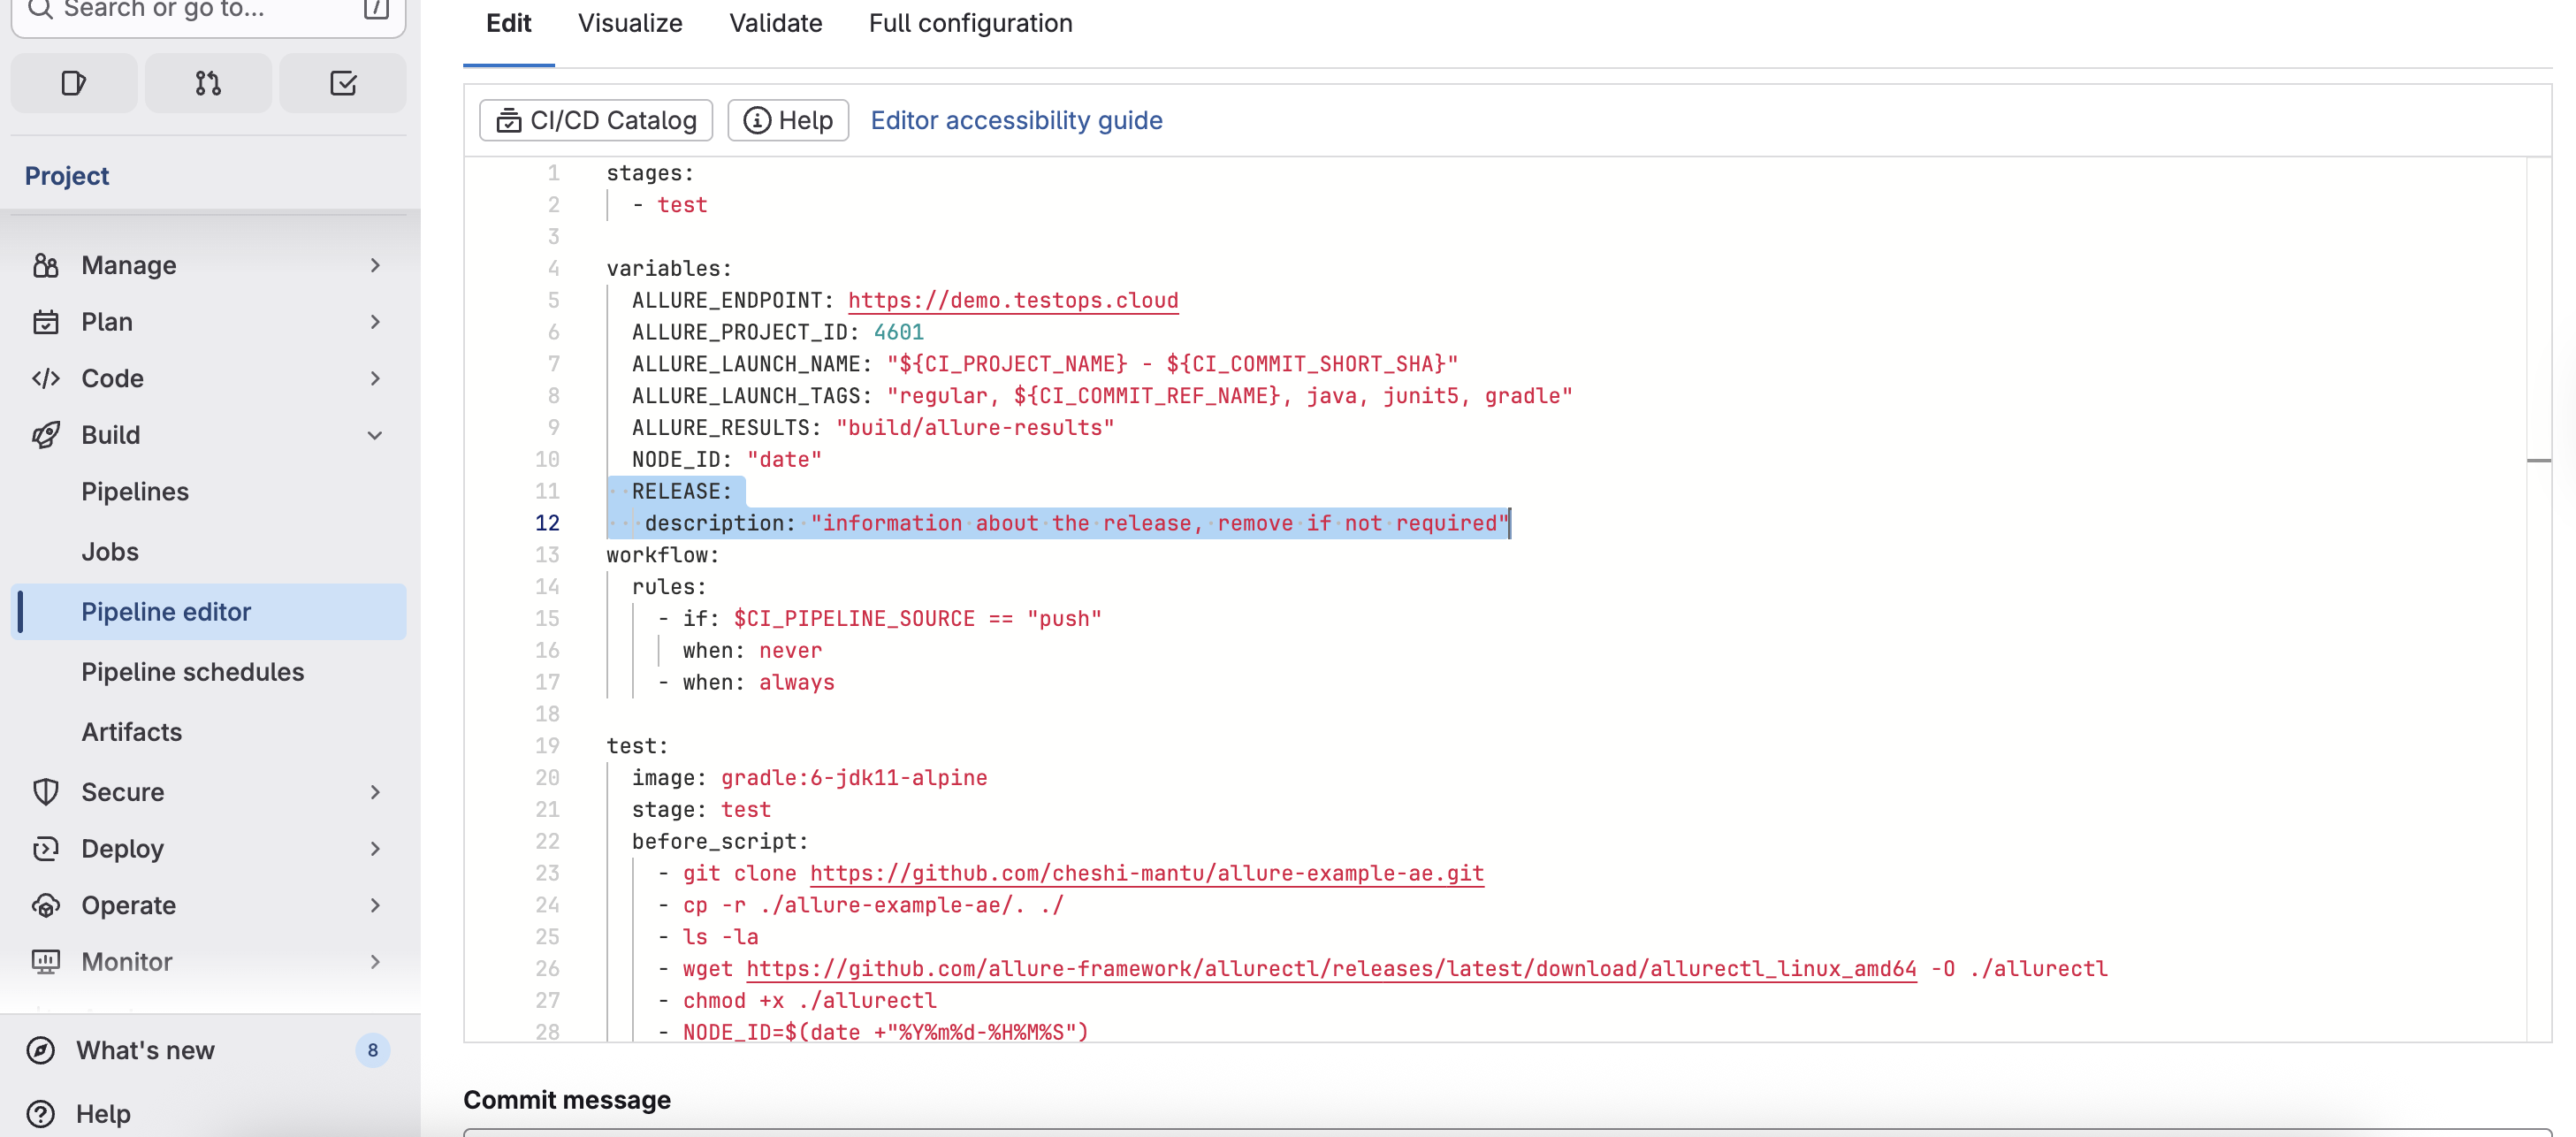
1. Add the variable in CI
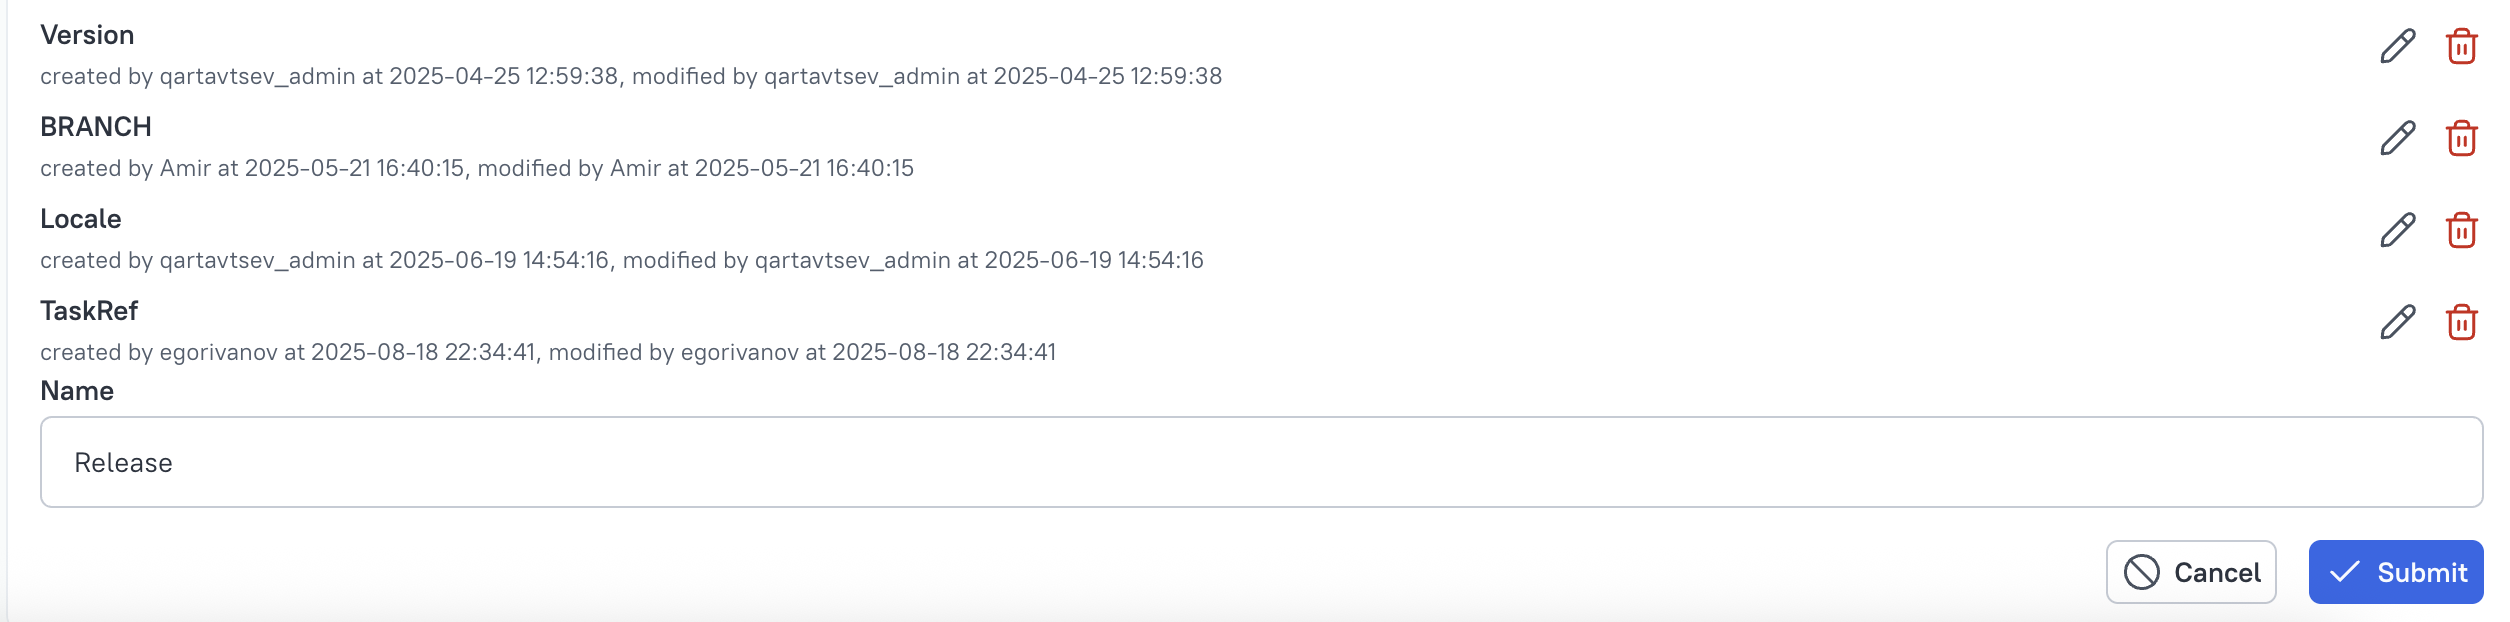
2. Declare the environment variable in Allure TestOps
You need to be Allure TestOps administrator.
- Go to Administration > Environment settings.
- Click Add variable.
- Name it Release (any name works).
- Save it.
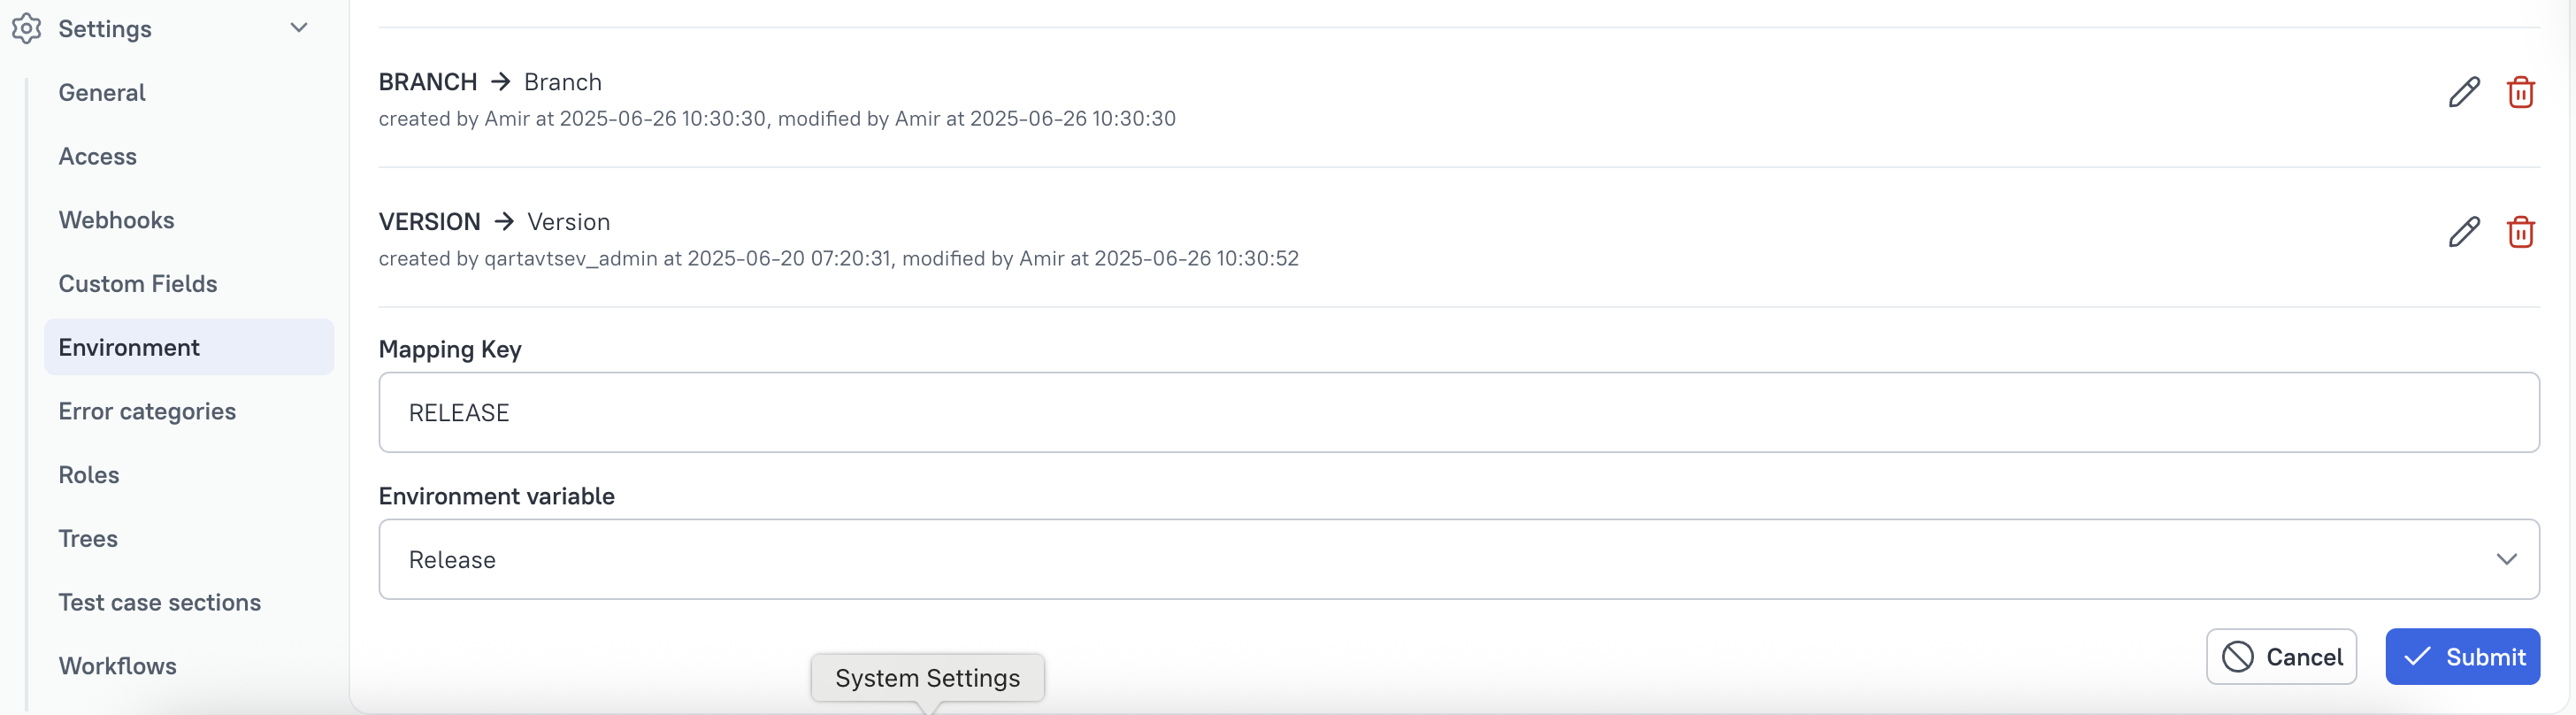
3. Map the CI variable in the project
- In your project go to Settings → Environment.
- Click Create mapping and set the following:
- Mapping key: RELEASE (the variable name as received from the pipeline).
- Environment variable: the Release variable created in step 2.
- Save the mapping.
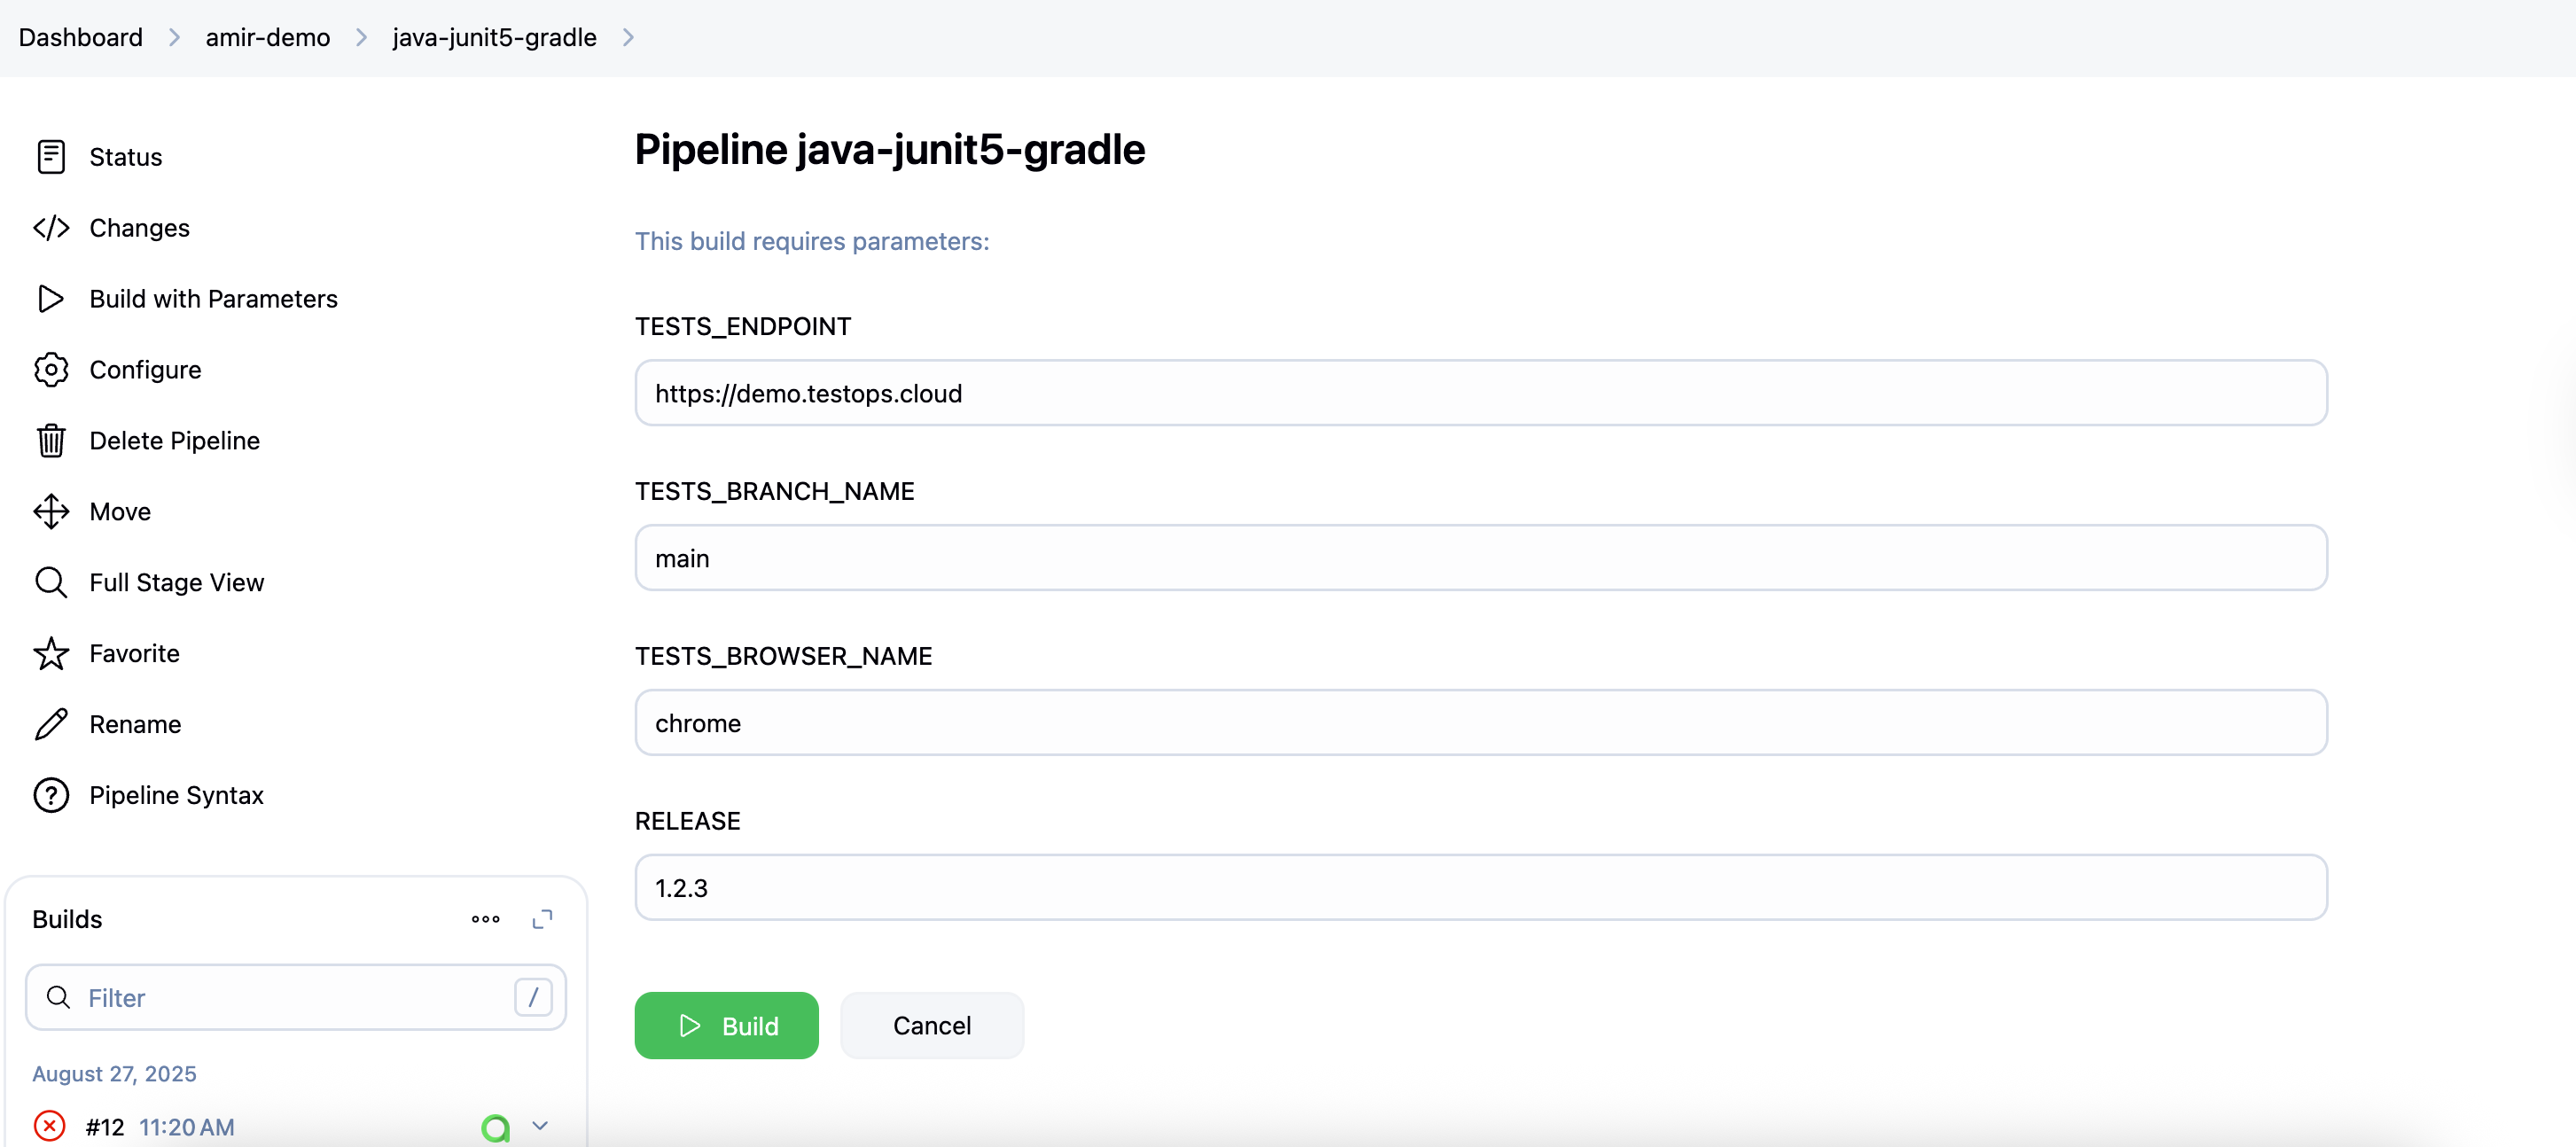
4. Run the pipeline and verify the launch
Trigger your CI pipeline and set the value of RELEASE to the release identifier being tested.
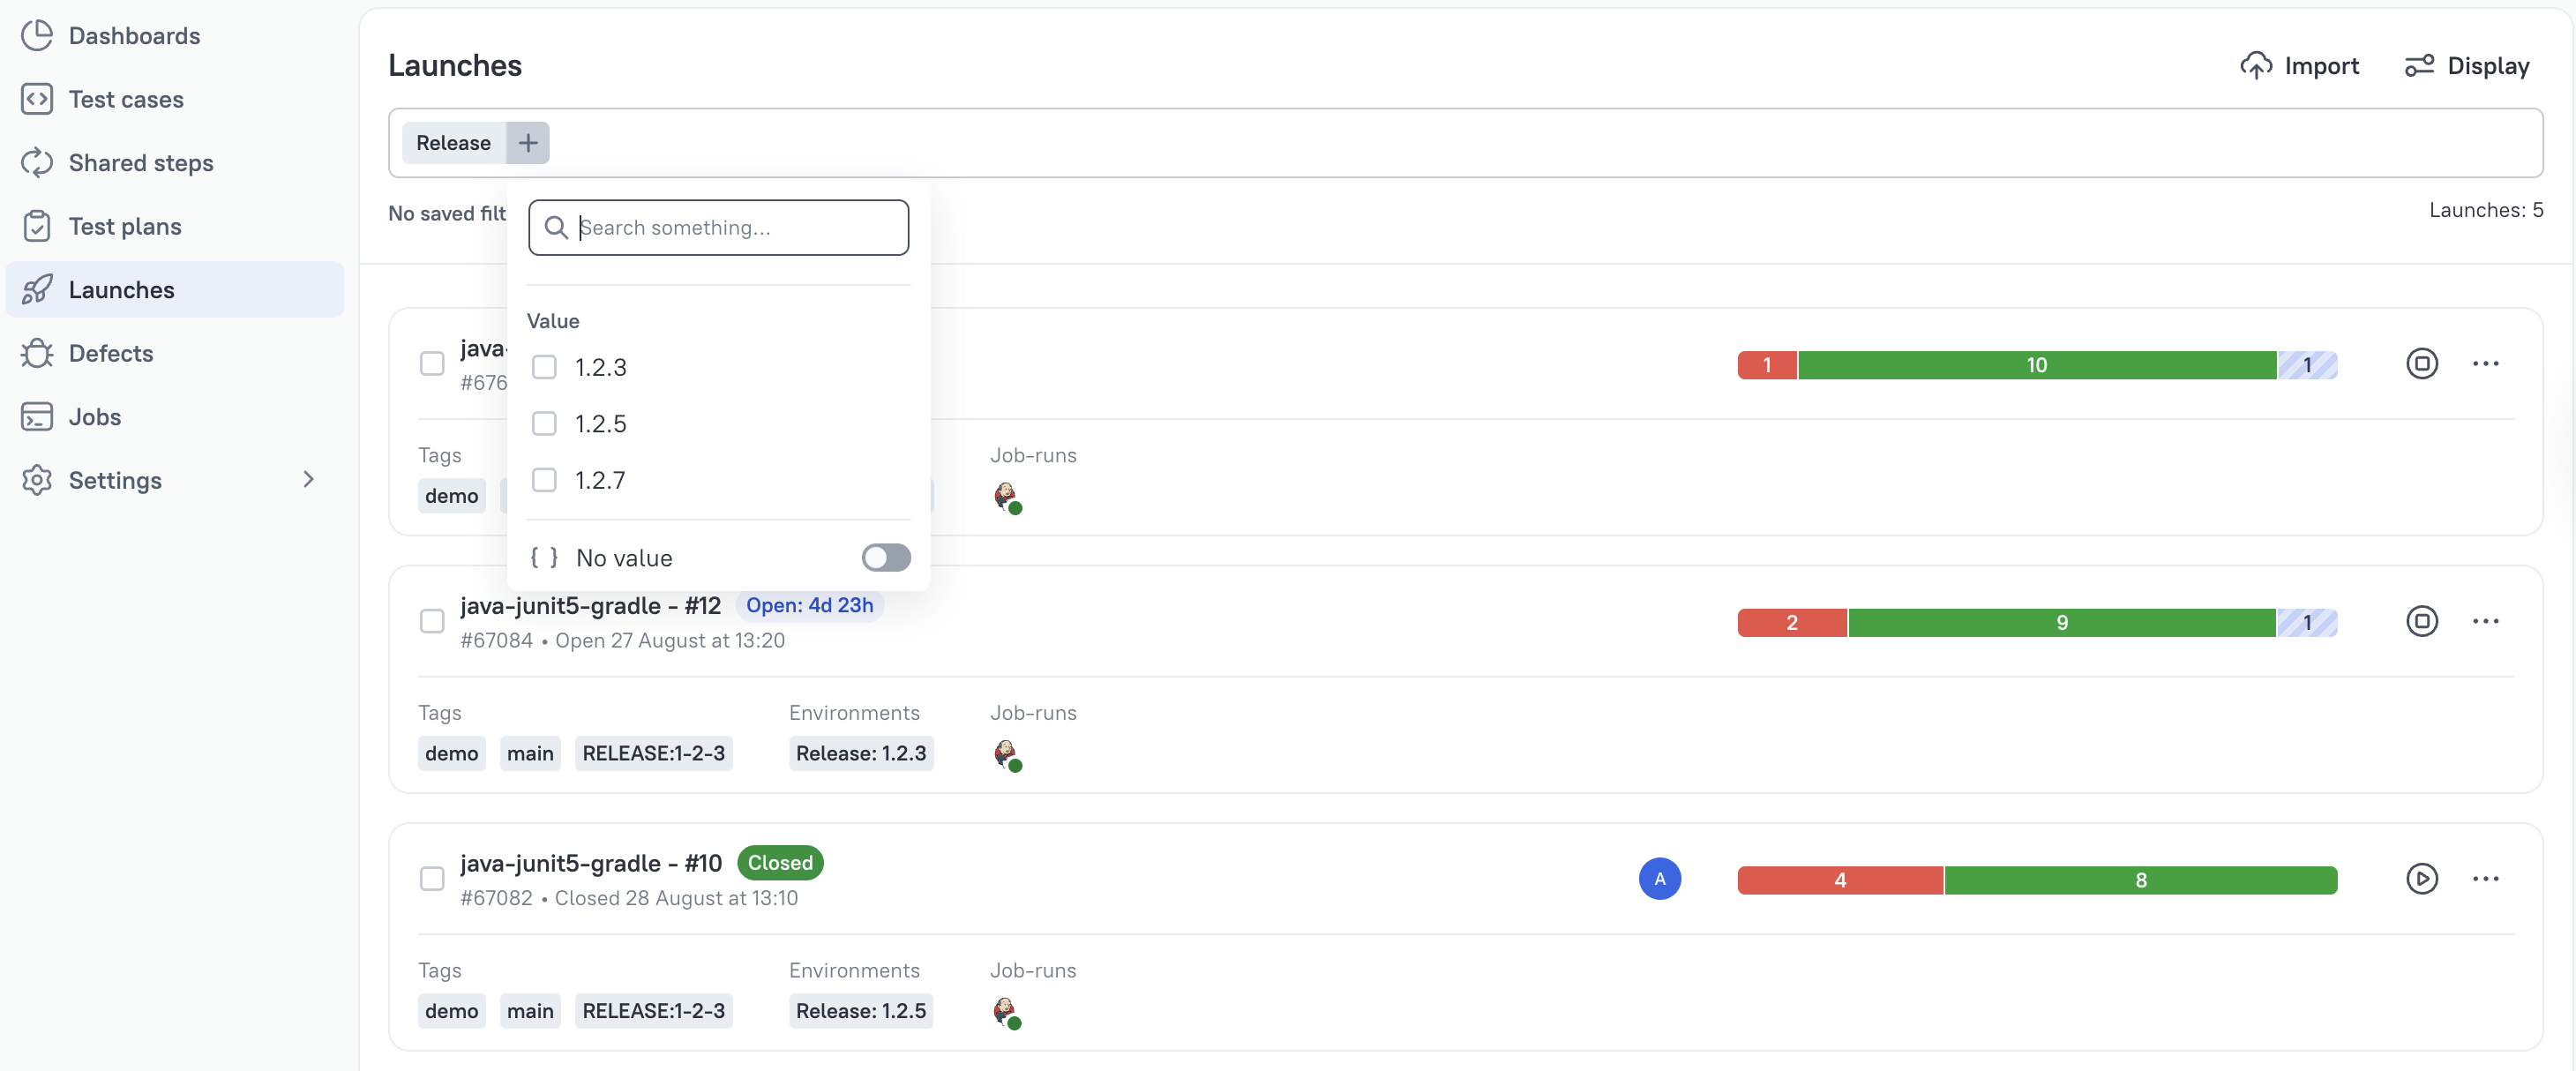
Open Launches and check the launch created by the pipeline run. The Environment field shows Release: X.Y.Z.

You can now filter launches by release:
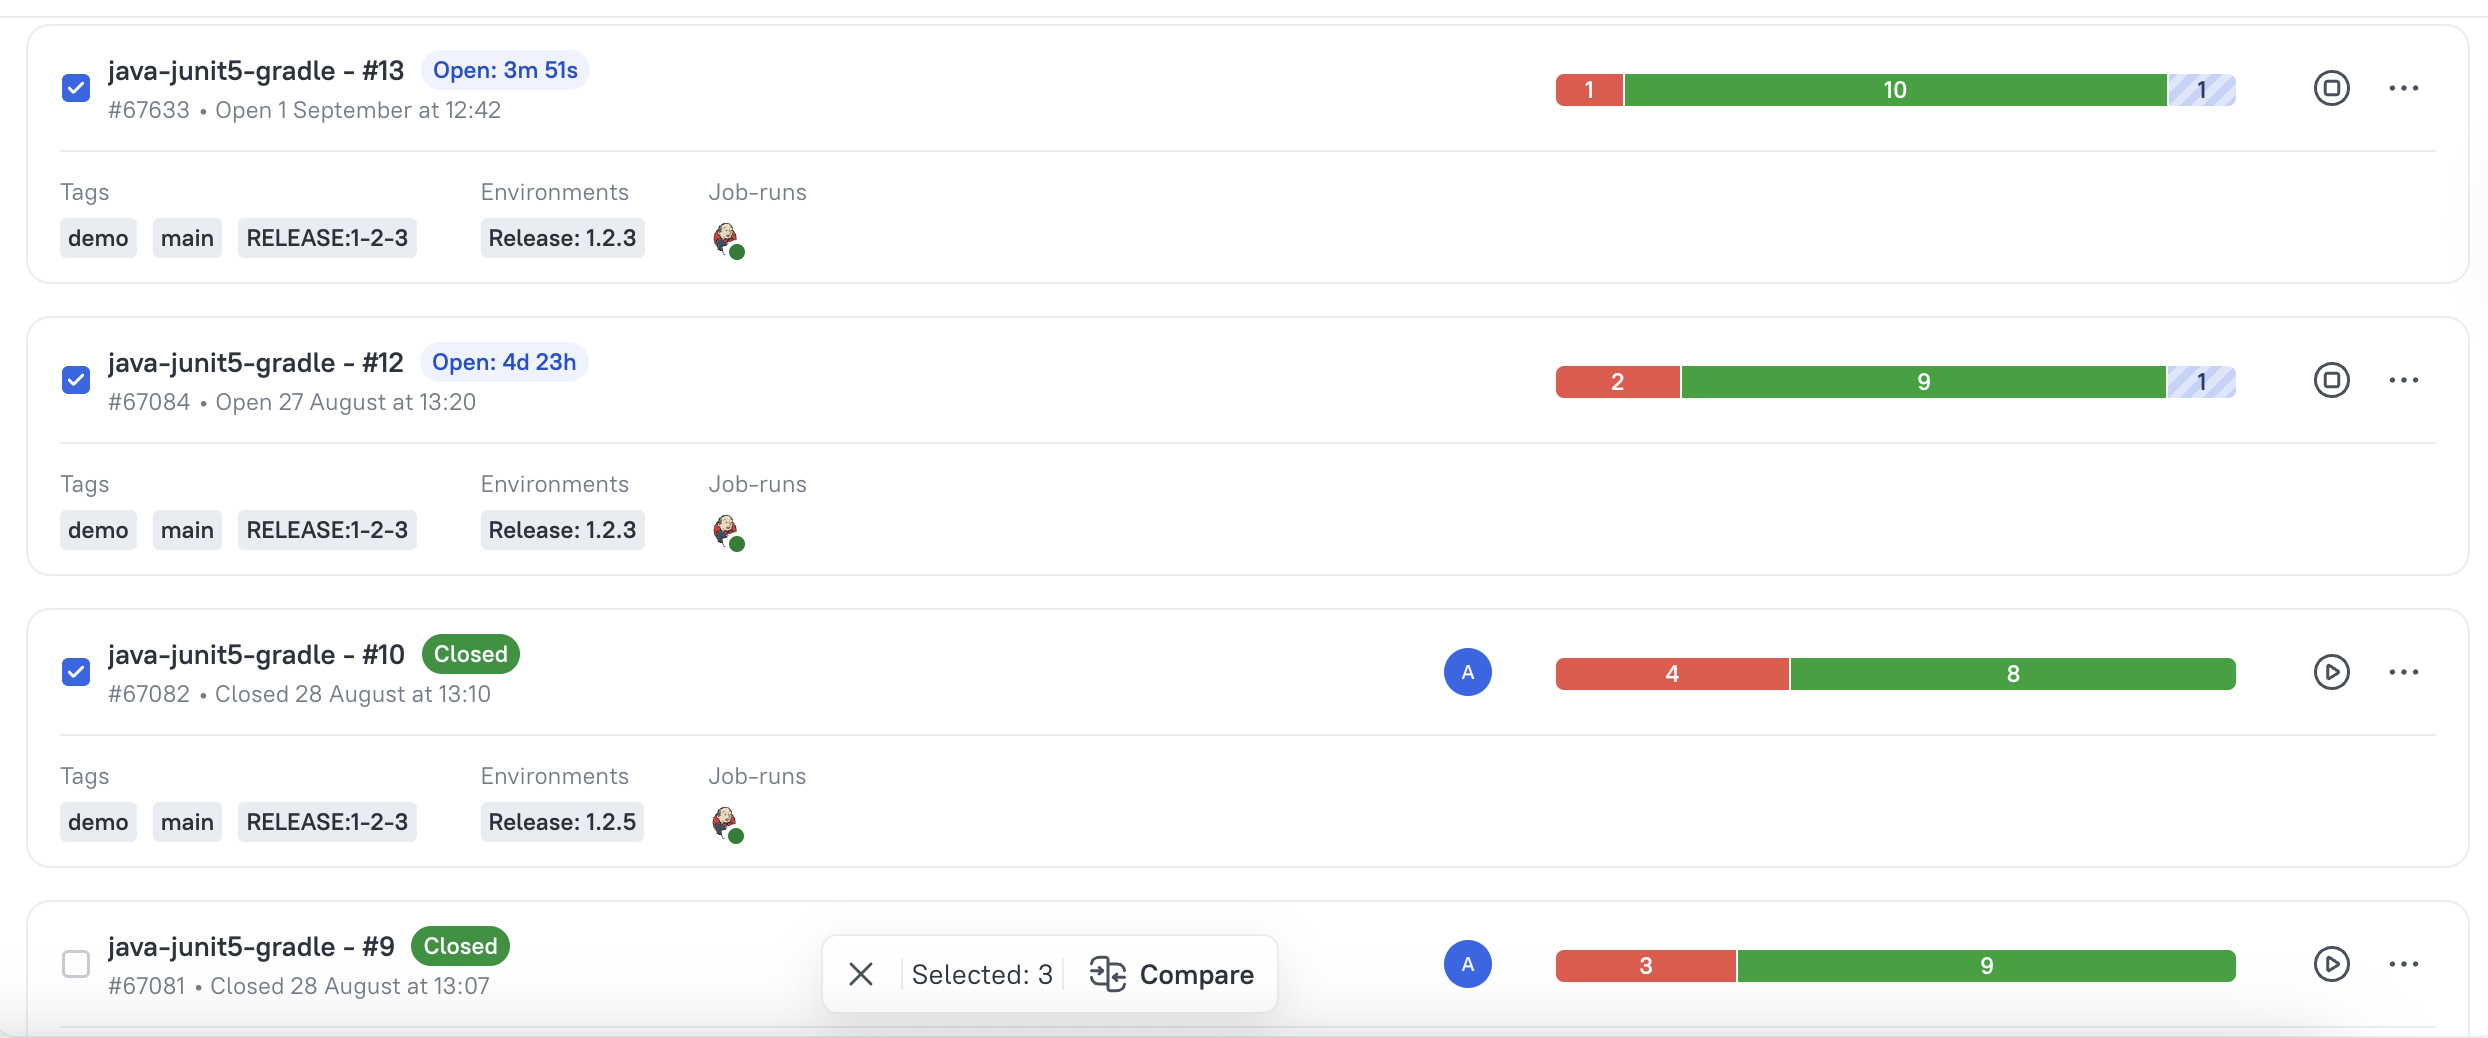
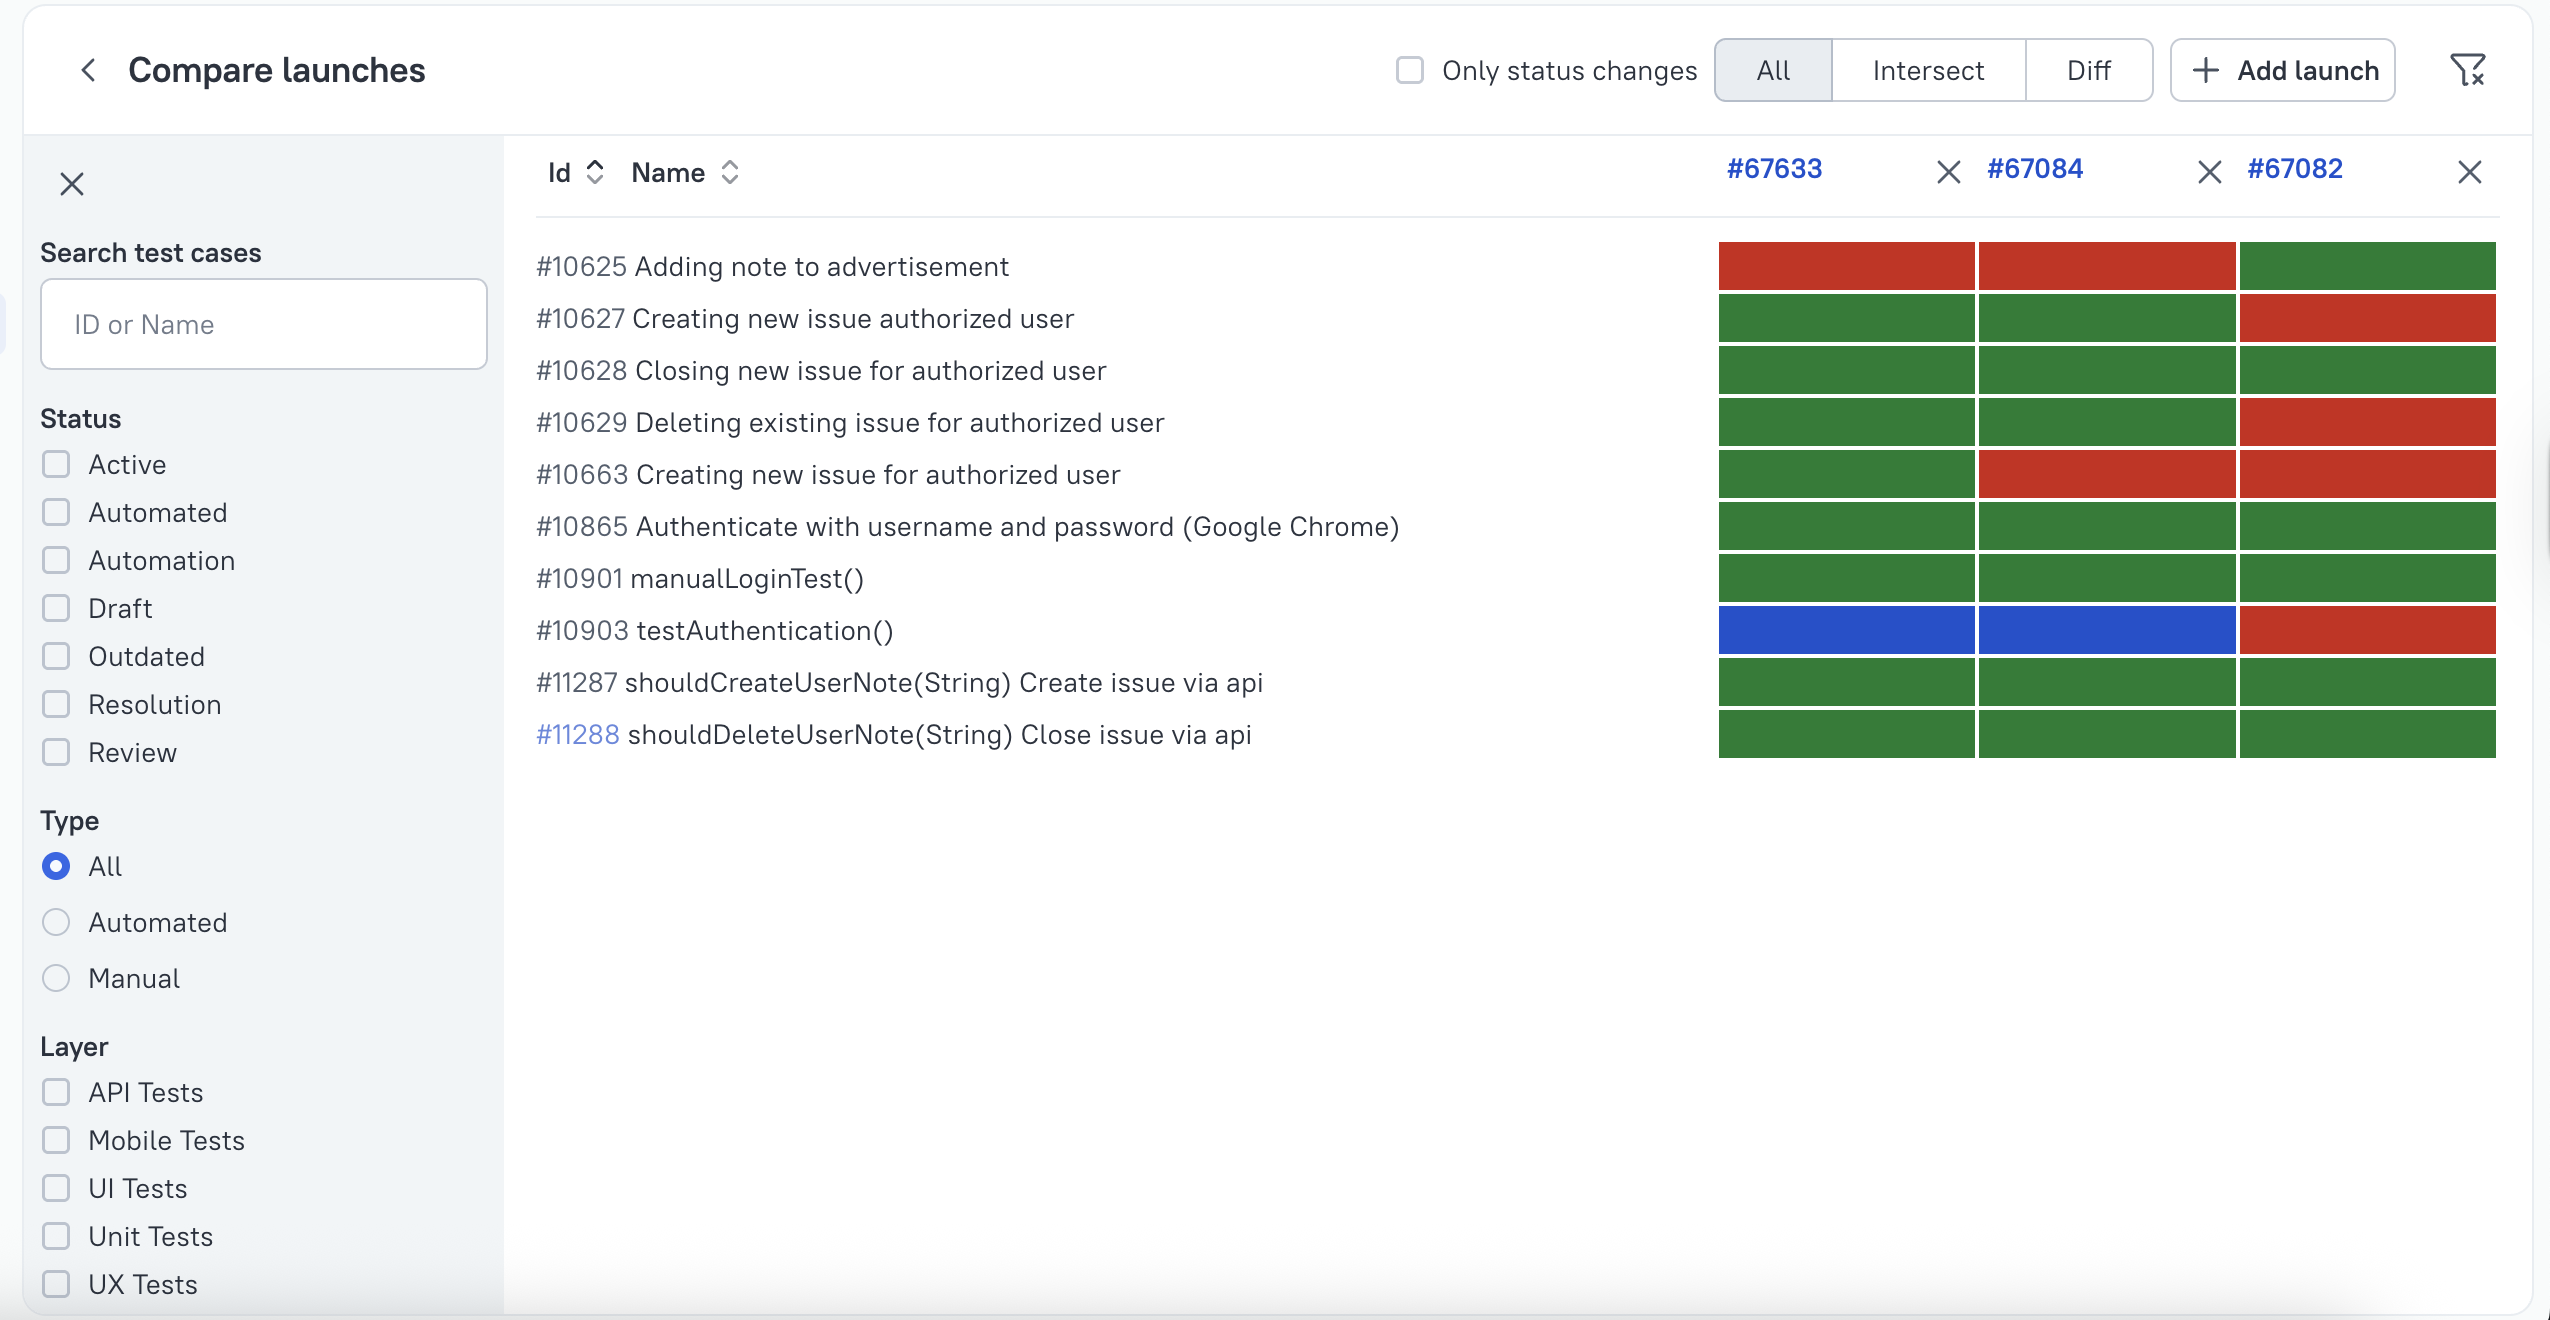
And compare launches from different releases:
Use release information in dashboards
In the Dashboards section, create a widget and configure it with AQL to scope it to a specific release.
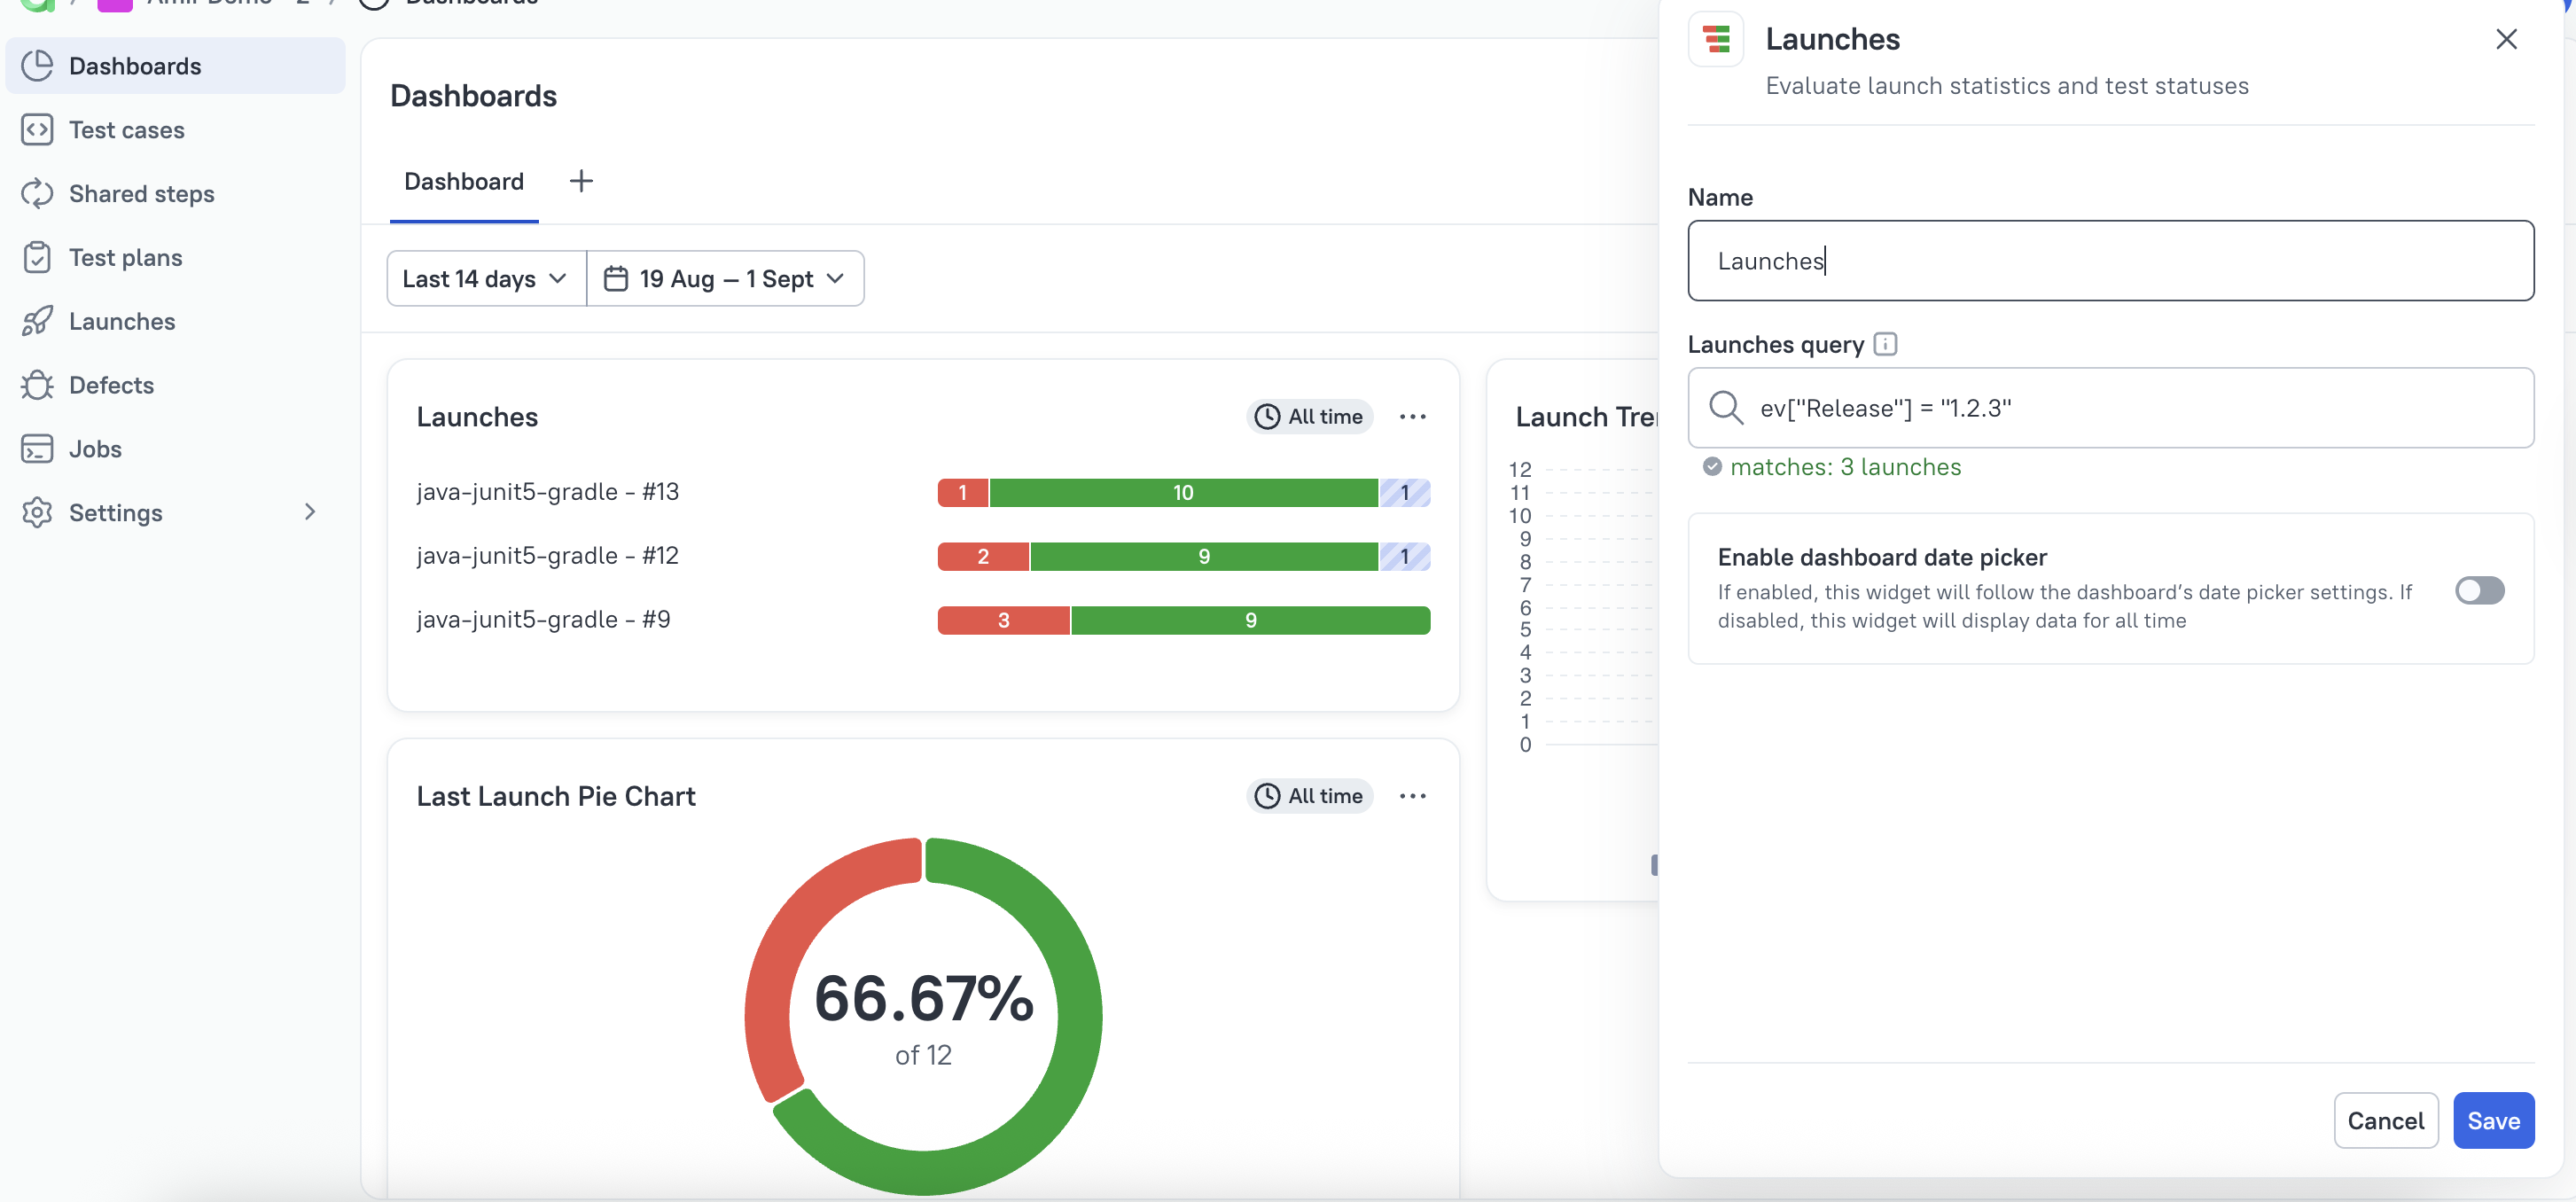
For dashboard setup, see Dashboards.
Caveats
- The variable must exist both in CI and in the Allure TestOps environment mapping, otherwise the release value will not appear in the launch.
- Release information is most useful when the naming stays consistent across pipelines and projects.
Next steps
- Launch environments for the general environment model.
- Compare launches for cross-release analysis.
- Dashboards for reusable release views.
