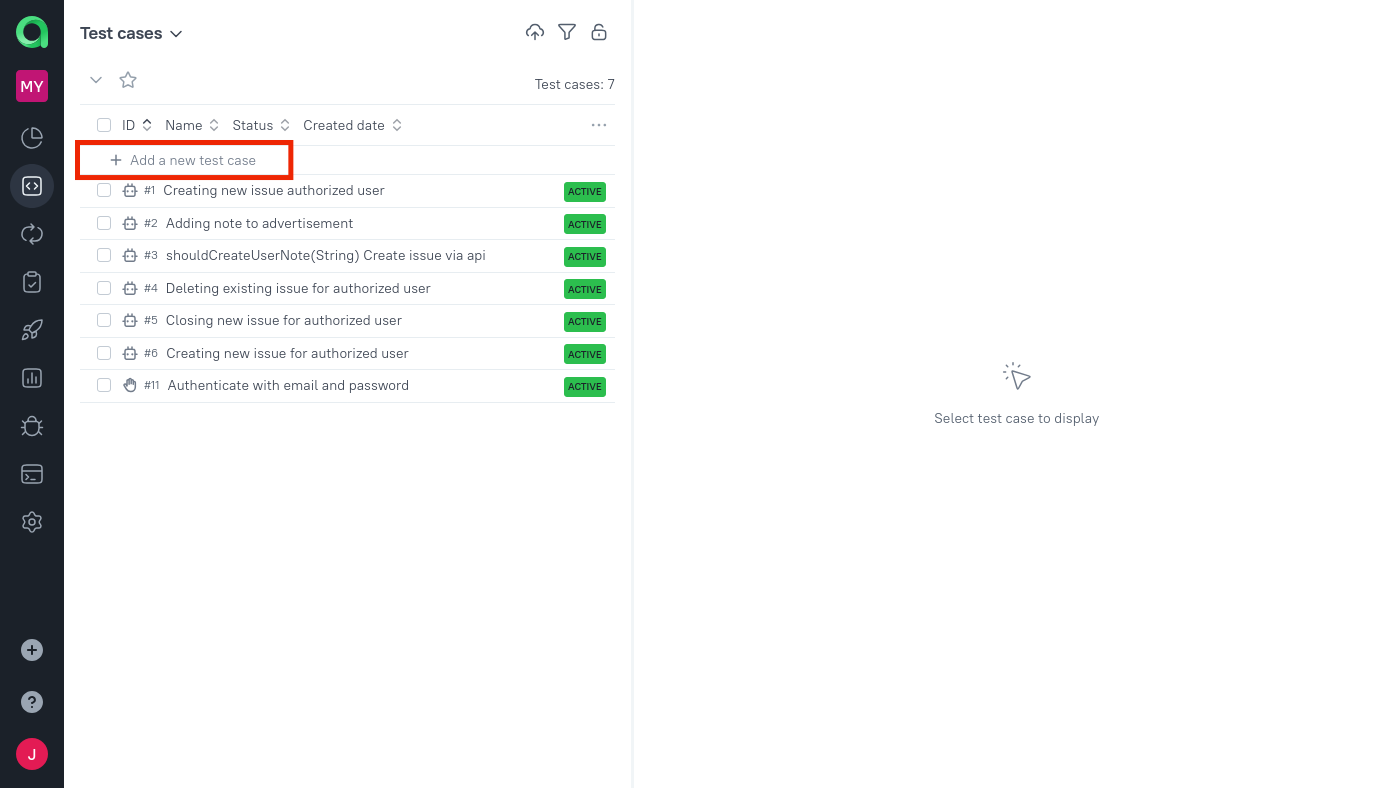
Test cases
Allure TestOps treats manual and automated tests as equal first-class test assets with a shared data model. Metadata, ownership, links, workflow status, and history stay attached to one test case, regardless of how the test is executed or maintained.
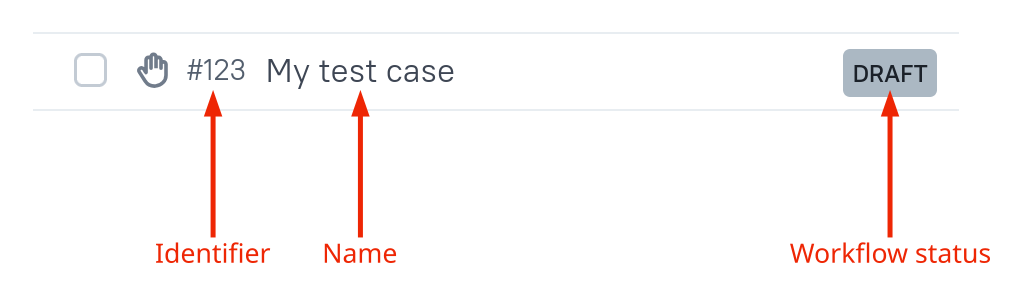
Each test case has a name, an automatically assigned AllureID, and a workflow status that shows where the case is in its lifecycle. Manual test cases are created and maintained in TestOps. Automated test cases and their metadata are generated and updated automatically from uploaded test results.
Start with the job you need
Create or bring in test cases
Create manual cases directly in TestOps and add manual scenarios, parameters, and attachments.
Import existing work from CSV by using Import test cases.
Turn manual coverage into automation by using Automate manual tests.
Add structure and metadata at scale
Tags, labels, layers, and custom fields for classification, automation-owned metadata, governed fields, and scalable test structure.
Links, issues, and relations for connecting test cases to external context, issue trackers, and related test cases.
Control ownership and lifecycle
Create manual test cases
- Go to Test cases.
- At the bottom of the screen, click + Test Case, type a name for the new test case, and press Enter.
- Select the new test case and add the description, scenario, and metadata on the right side of the page.
- To rename or delete the selected case, click
⋯in the upper-right corner of the page or next to the case name in the list.
If you need to create several cases in sequence, press Shift+Enter instead of Enter. You can change this behavior in Display -> Creation settings.
Understand how automated test cases are created
Automated test cases are created or updated when automated test results are uploaded to TestOps and the corresponding launch is closed. In practice, the flow is:
- Generate Allure-compatible test results in your test framework.
- Upload them from CI, an IDE plugin,
allurectl, or the TestOps UI. - Close the launch so TestOps can create missing test cases or update the existing ones.
If you upload results manually, open Launches, click Import, choose individual files or a ZIP archive, optionally add attributes, and click Upload files.
Parameterized automated tests
TestOps creates one automated test case for the same test even when that test produces several parameter sets and several results. In a launch you will see separate results for each parameter set, but in Test cases those results stay attached to one case with parameters.
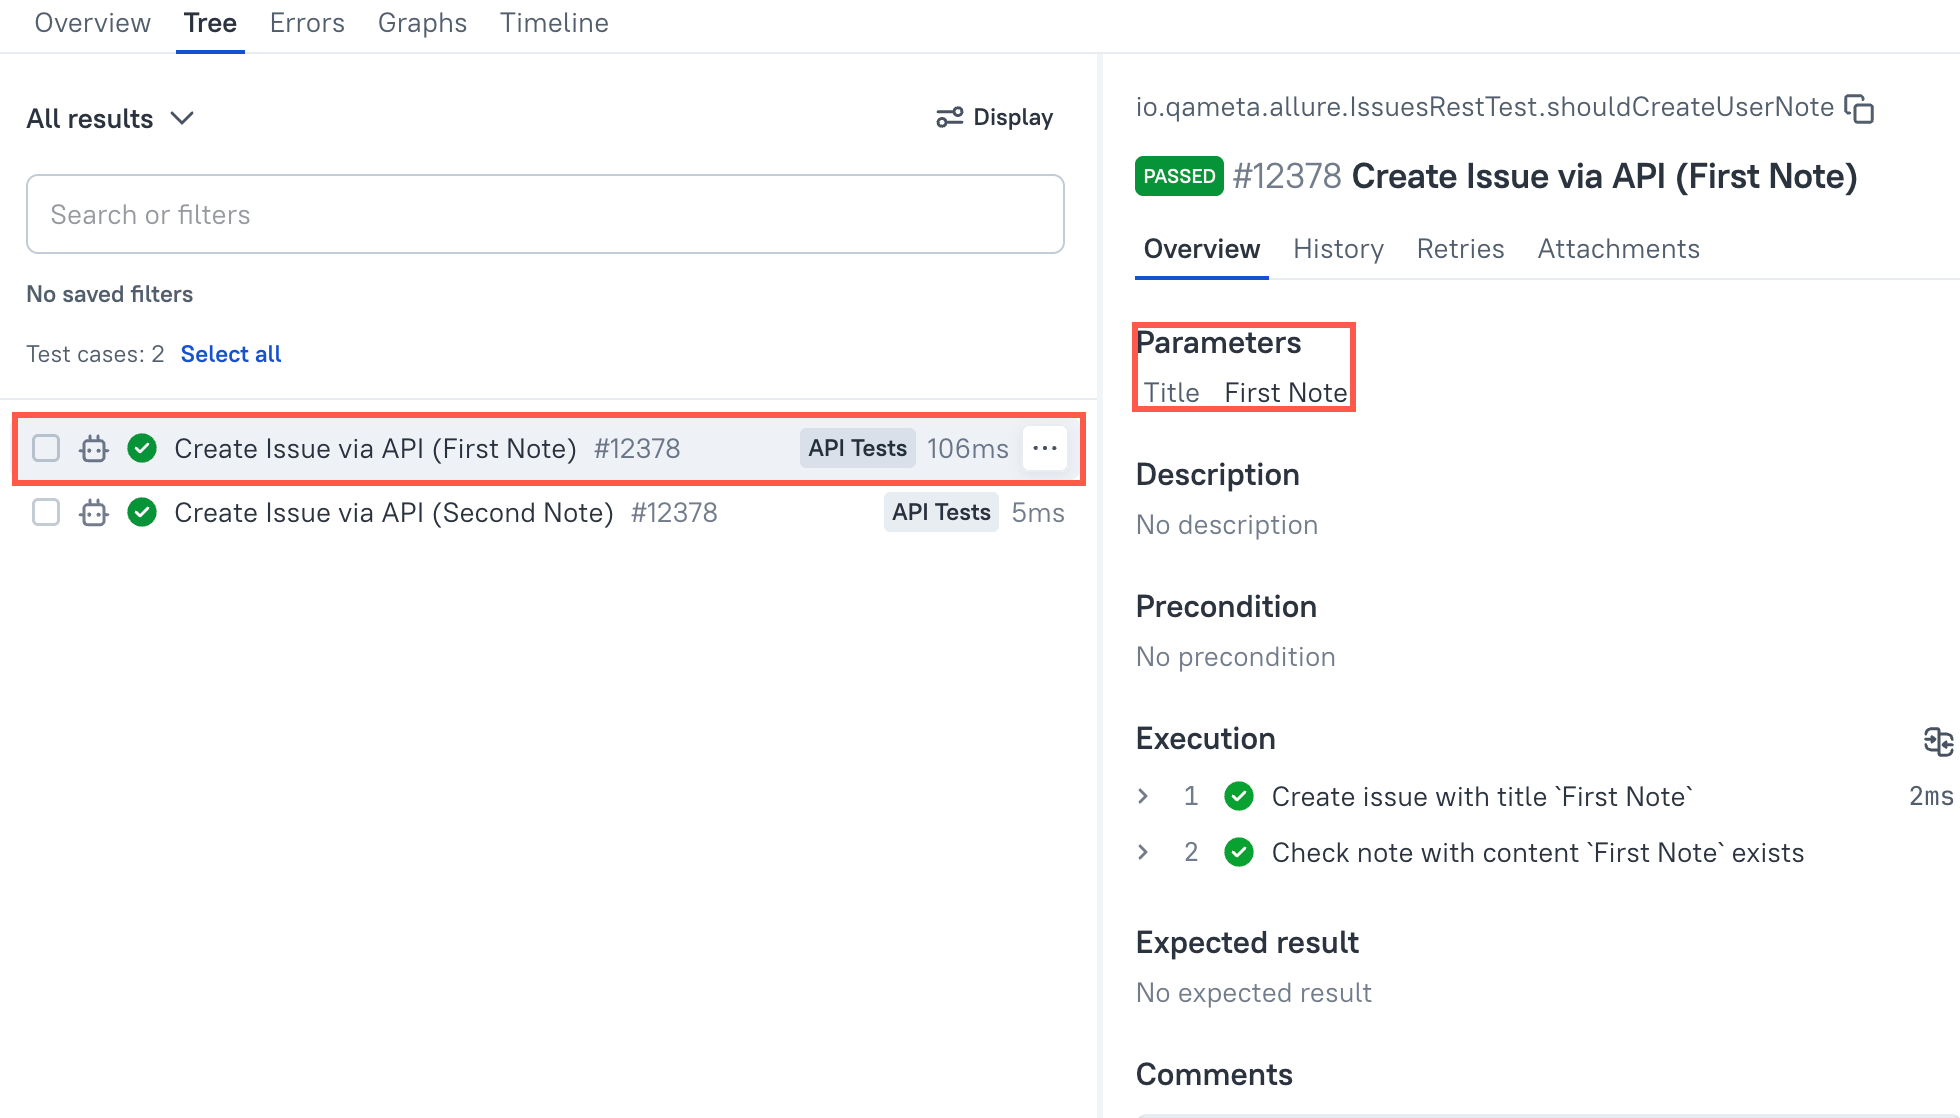
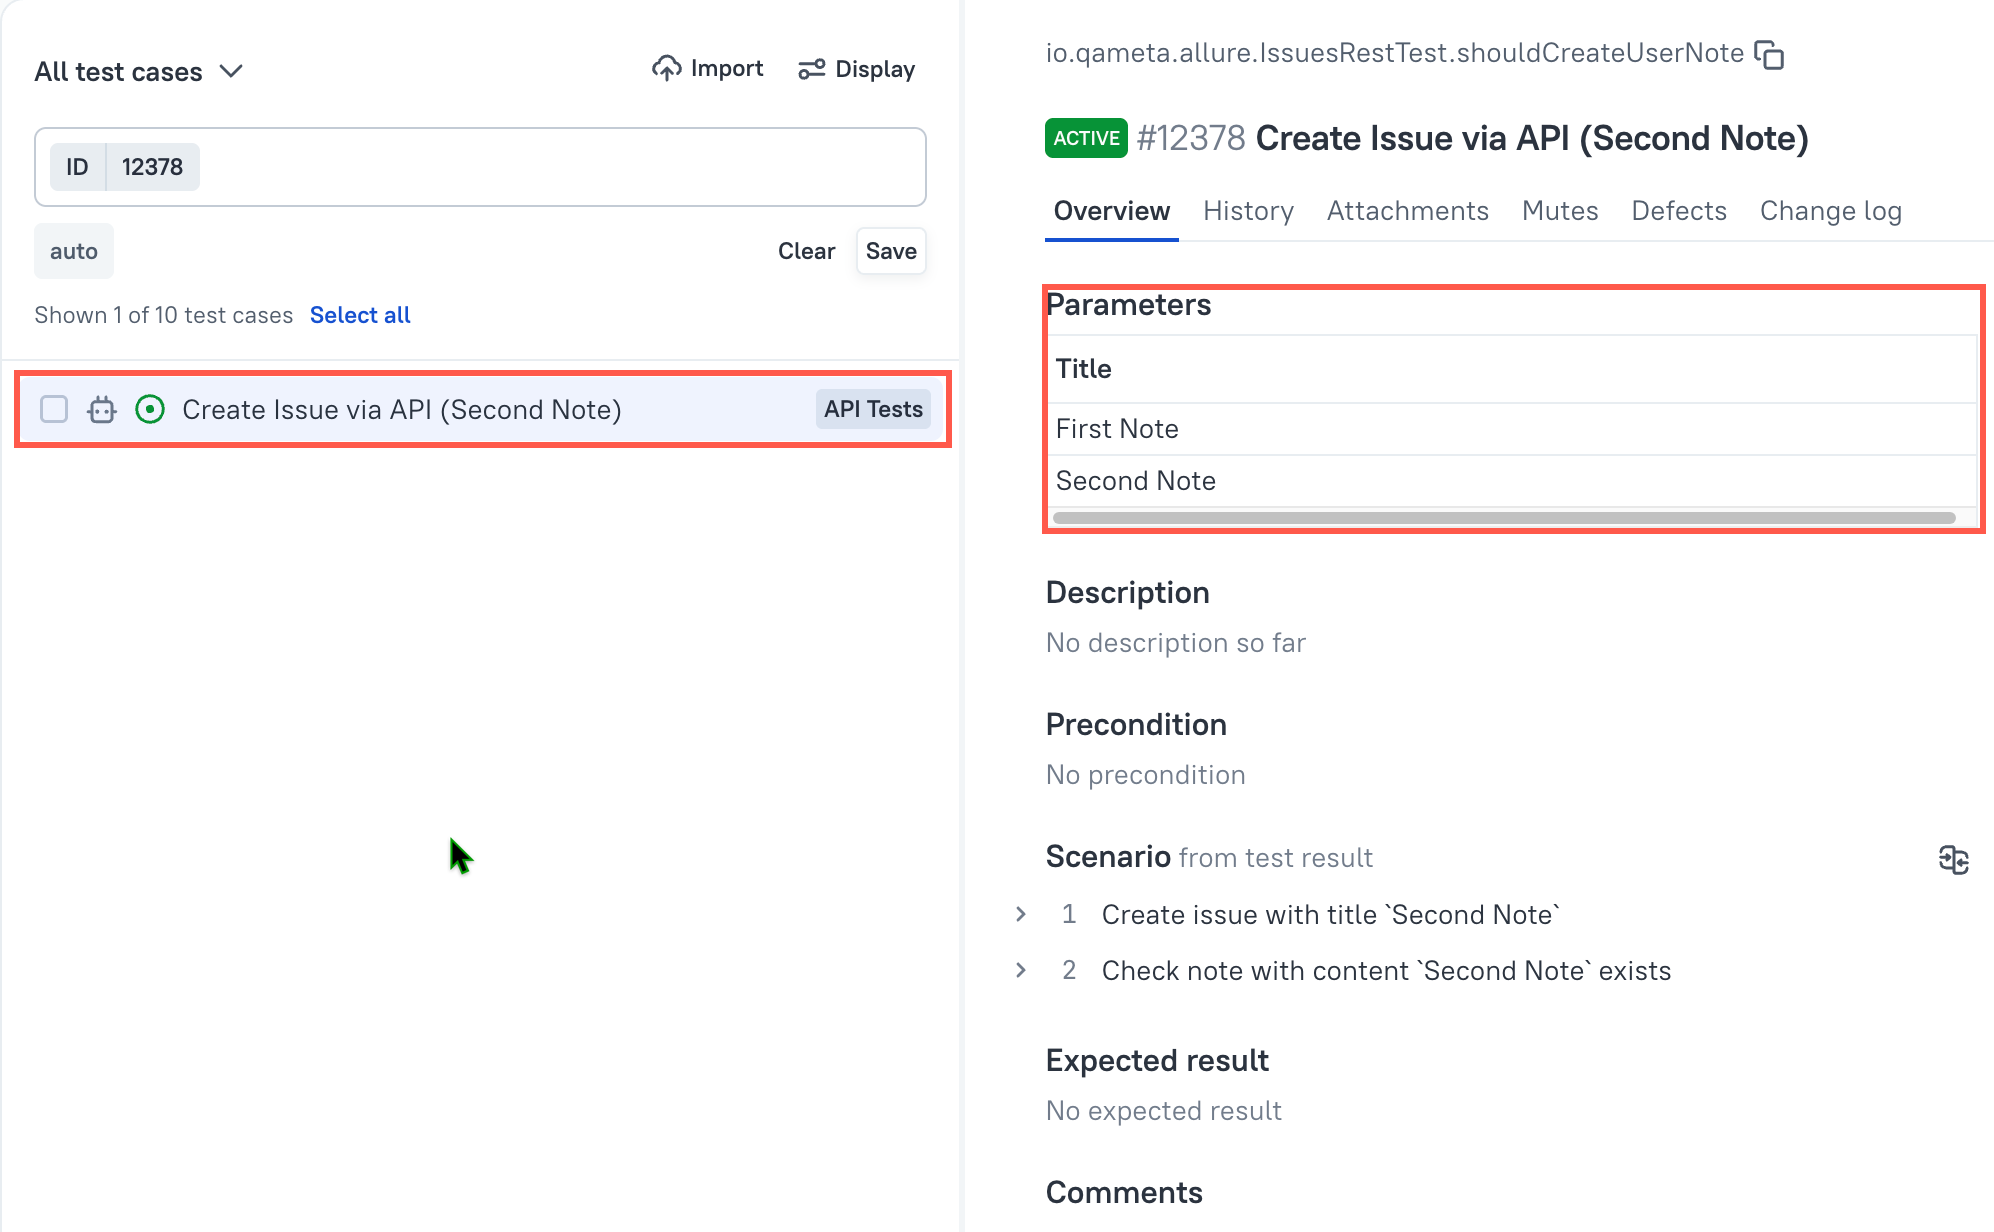
If your framework bakes one parameter value into the test name, the resulting test case name may show the latest uploaded variant of that name. TestOps cannot rewrite that string after the Allure adapter sends it.
Only parameters defined on the test level are collected into test case parameters. Step-level parameters are not added to the case.
Organize large test case lists
Use Display to control sorting and list fields. Use the search box to filter by:
- main attributes such as name, ID, description, and scenario;
- additional attributes such as tags, layers, custom fields, and ownership.
For additional attributes, you can switch between Partial Match, Exact Match, and Does Not Contain. Use No value when you need to find cases where an attribute is missing.
If a filter is useful beyond one session, click Save under the search box, name it, and choose whether only you or the whole project should see it.
Bulk actions and history
Use the bottom action bar to delete, clone, or change attributes for several selected test cases at once.
The maximum number of selected cases for bulk actions is
10,000in Cloud and50,000in Self-Hosted.
To review how one case behaved over time, open the case and switch to the History tab. There you can inspect previous results, launch names, execution dates, durations, and parameters, or compare several results side by side.
Close the window by clicking the close button in its upper-right corner.
To change the filter conditions after closing the window, click the Filter test results icon.
To clear filters and return to the full list, click the Clear filter icon.
Accessing history from Launches section
You can also view the history and results of test case runs in the Launches section. To do this:
- Go to the Launches section and open a launch.
- Go to the Tree tab.
- Select a test result and go to the History tab in the upper-right part of the screen.
Please note that in this case, unlike in the Test cases section, only results that are older and have the same test parameters as the selected result will be shown by default. To view all results, click Show full history above the list.
Test case versions history
You can save up to 10 versions of a test case, restore them, and compare them with each other.
Saving a version
To save the current version of a test case:
- Go to Test Cases section and open a test case.
- Click
⋯in the upper-right corner of the screen and select Version history. - In the window that appears, click Save in the upper-right corner.
- Enter a name and description for the version.
- Click Save.
The current version will be saved and appear on the right side in the test case version list.
To edit the name and description of a saved version or to delete it, click ⋯ next to the version and select the action you need.
Restoring a version
To restore a previously saved version of a test case:
Go to Test Cases section and open a test case.
Click
⋯in the upper-right corner of the screen and select Version history.In the window that appears, in the list of saved versions, open the version you want to restore.
In the lower-right corner, click Restore.
The selected version will become the current one, and the previous state of the test case will be automatically saved to the version history.
Comparing versions
To compare saved versions of a test case:
- Go to Test Cases section and open a test case.
- Click
⋯in the upper-right corner of the screen and select Version history. - In the window that appears, click Compare versions in the lower-left corner.
- In the left and right dropdown lists, select the test case versions to compare.
Exporting test cases
You can export the test case data to a PDF or CSV file.
To export information about a single test case:
Go to Test cases.
Hover over the test case in the list of test cases.
To the right of the test case name, click
⋯→ Export.Choose the file format for export:
- PDF — a human-readable PDF file that includes detailed information about the test case along with its metadata (for example, tags, custom fields, members) and attachments (sreenshots, text, tables). You can send this PDF file to a reader who does not have access to the Allure TestOps instance to share the details of the test case.
- CSV — a file that contains the same information as the PDF but in a tabular CSV format. You can import the CSV file into another project or Allure TestOps instance.
To export information about multiple test cases at once, use the bulk actions menu.
Deleting and restoring test cases
Deleted test cases are moved to the special "folder" (the Trash tree) from which they can be restored.
To open the Trash tree:
- Go to Test cases.
- In the upper-left corner, click All test cases (or the name of the tree if it has been changed).
- Select Trash.
You will see a list of deleted test cases. For each test case in the list, you will have the option to restore or delete it permanently.
Test cases are restored to their previous positions in the tree with all custom field values intact.
To restore or delete a single test case:
- Select the test case.
- In the upper-right part of the screen, click the Restore icon to restore the test case, or
⋯→ Delete permanently to delete it.
Alternatively, you can hover over the test case, click ⋯ next to its name and select the required action.
To restore or delete several test cases:
- Select the test cases using Ctrl or by selecting the checkboxes next to them.
- In the panel at the bottom, click Restore to restore the test cases, or
⋯→ Delete permanently to delete them.
Muting test cases
Muting is an Allure TestOps feature that allows you to resolve a failing test result associated with particular test case by providing a reason why it can be ignored.
To mute a test case:
- Go to Test cases and open a test case.
- In the upper-right part of the screen, under the name of the test case, go to the Mutes tab.
- Click Create mute.
- Enter a name and a reason for the mute.
- Optionally, add an issue link to the mute (see Links, issues, and relations for more info).
- Click Submit.
To mute several test cases at once, use the bulk actions menu.
Generating code for test case automation
Allure TestOps supports the creation of automated test cases using code generation — a feature that allows you to quickly create a template for your testing framework with the required test case attributes (metadata).
Code generation uses an existing Allure TestOps test case and its attributes to create a template. You can select a previously created test case or create a new temporary one with the required metadata.
To generate a code:
- Go to Test cases and open a test case.
- Click
⋯in the upper-right corner of the screen and select Generate code. - Select a programming language.
- Select a testing framework.
- Choose which attributes should be included in the code.
- Click Generate.
- Click Download to download the code or Copy to copy it into clipboard.
Converting automated test cases to manual
Automated test cases can be converted to manual test cases. After this conversion, the automation parts of a test case will be detached from it and all future uploaded test results will no longer be linked to that test case. If an automated test case has test steps (the steps field in the JSON test result file), they can be automatically converted to a manual test scenario.
To convert an automated test case to a manual test case:
Go to Test cases.
Open an automated test case.
Click
⋯in the top right corner of the screen and select Convert into manual. In the resulting window, you will be able to select a workflow for the test case and choose the source for the test scenario.Under Copy scenario from, select what do you want to use as the source for the test scenario.
- Test result — convert the test steps from test results to a test scenario.
- Test case — keep the current stored test scenario.
Under Workflow, select a workflow for the test case.
Under Status, select a workflow status for the test case.
Click Detach automation.
