Wrike
Wrike integration lets Allure TestOps connect test artifacts to work items in Wrike. It covers:
- linking Wrike tasks to test cases, launches, defects, and mutes;
- using Wrike task search from TestOps;
- creating Wrike tasks from defect workflows in TestOps.
Before you begin
- Access to the Wrike workspace that should receive the links.
- Permission to add global integrations in TestOps and to enable them in the target project.
The Wrike account behind the permanent access token defines which tasks and projects TestOps can see. If the picker does not show the expected Wrike items, start by checking the Wrike-side visibility of that account.
1. Add the global Wrike integration
An instance administrator should:
- Open Administration → Integrations in TestOps.
- Click + Add integration.
- Select Wrike.
- Enter a stable integration name and the Wrike endpoint
https://wrike.com. - Save the integration.
2. Create the Wrike permanent access token
In Wrike, click your avatar and select Apps & Integrations.
Go to the API section, enter a name for the token and click Create new.
On the next screen, scroll down to the Permanent access token section.
Click Create token.
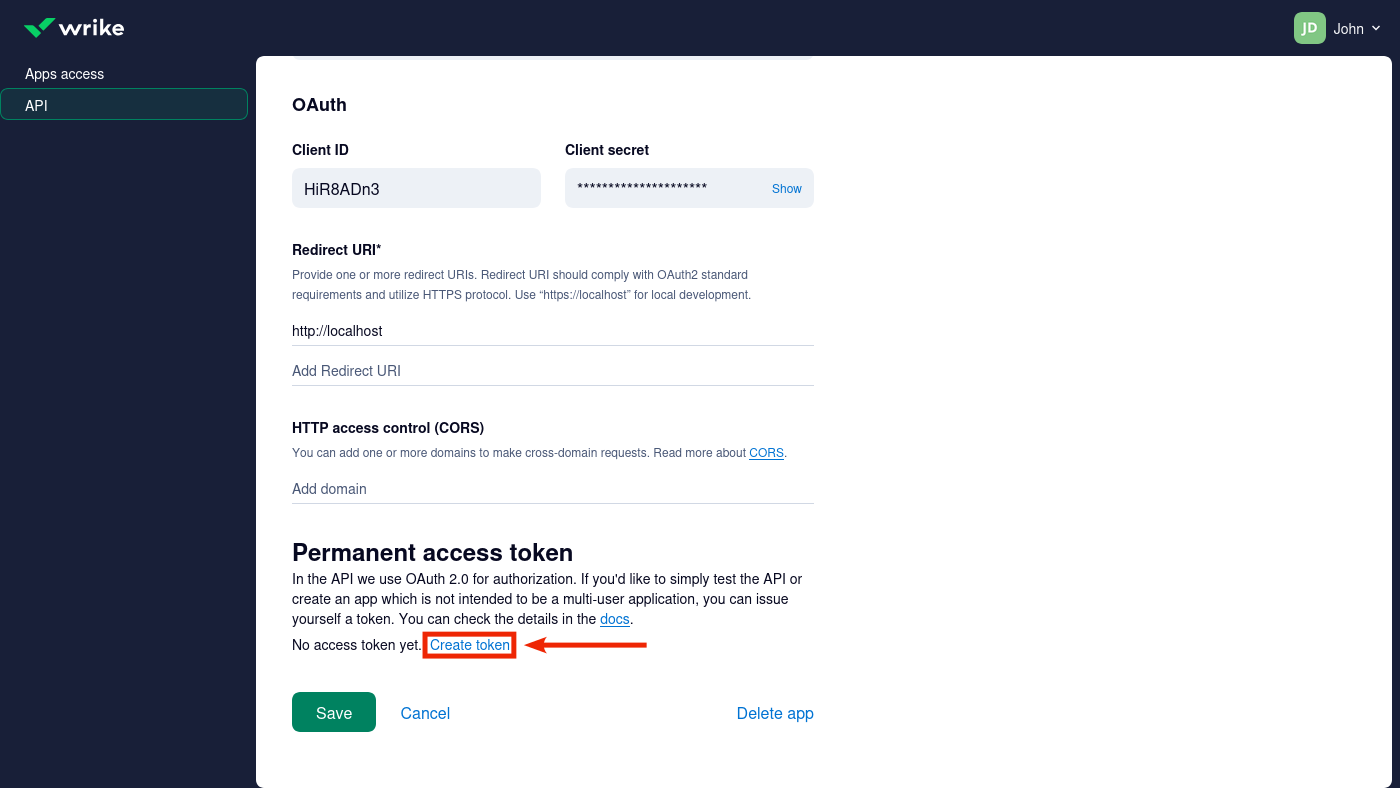
Copy the token. Save it in a secure location.
3. Enable Wrike in the TestOps project
- In TestOps, open the target project.
- Go to Settings → Integrations.
- Under Available integrations, find Wrike and click Add integration.
- Paste the permanent access token into the API token field.
- Click Test connection. If the token is correct, a "Connection established" message appears.
- Click Add integration.
Using the integration
Link to test cases
- Go to Test Cases and open a test case.
- Click the pencil icon next to Issue links.
- Click + Add.
- In the Issue tracker field, select the Wrike integration.
- In the Key field, search for and select the Wrike task.
- Click Submit.
Link to launches
- Go to Launches.
- Click
⋯next to the launch and select Edit. - In the Issues section, click + Add.
- In the Issue tracker field, select the Wrike integration.
- In the Key field, search for and select the Wrike task.
- Click Submit.
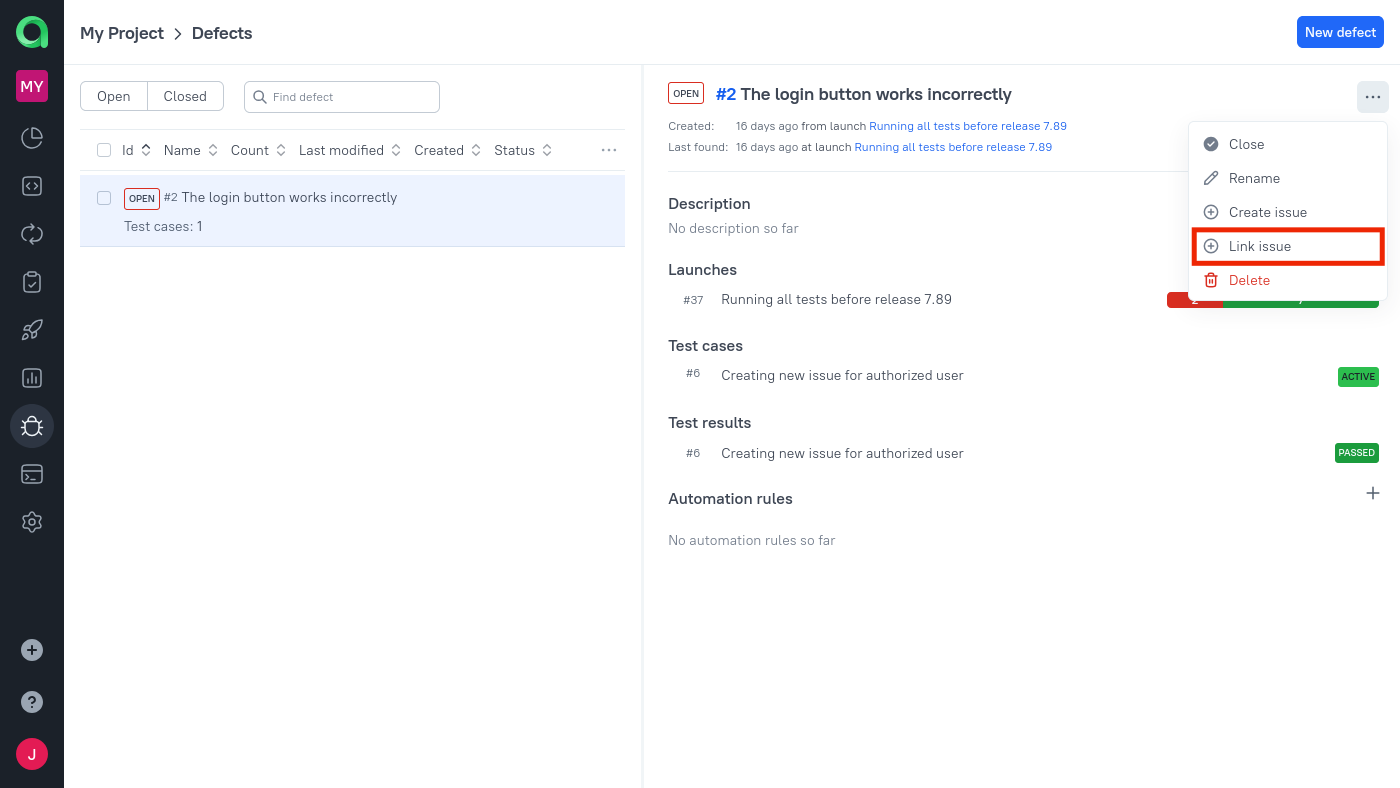
Link to defects
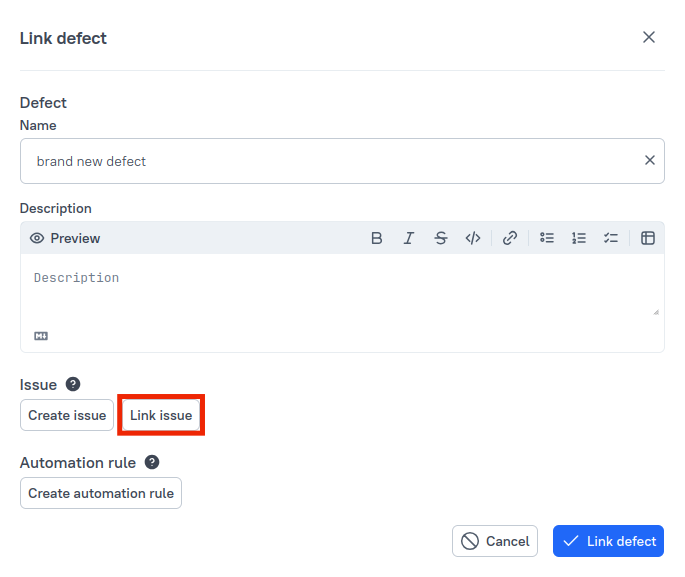
When working with a defect, click Link issue to connect it to an existing Wrike task.
| New defect | Existing defect |
|---|---|
 |
 |
In the dialog, select the Wrike integration, find the task in Key, and click Submit.
Create a new Wrike task from a defect
Instead of linking to an existing task, you can create a new one:
- When creating a defect, click Create issue in the Issue section.
- In the Issue tracker field, select the Wrike integration.
- In the Project field, select the target Wrike project.
- Select the issue type.
- In the Summary field, enter the issue details.
- Click Link defect.
The defect is created and linked to the new Wrike task.
Link to muted test cases
When muting a test case, click + Add in the Issues section, select the Wrike integration in Issue tracker, choose the task in Key, and click Submit.
Verify the integration
- Open a test case in TestOps and add a Wrike issue link.
- Confirm that the picker can find the expected Wrike task.
- Open a defect and confirm that the Wrike create-or-link workflow is available.
Troubleshooting
The Wrike picker cannot find the task you need
Check these points:
- The token belongs to a Wrike user who can see that task.
- The project integration uses the expected Wrike token.
- The task is in the Wrike workspace connected to the token.
TestOps cannot create a Wrike task from the defect view
The token can read Wrike data but does not have rights to create tasks in the target Wrike workspace or project. Check the token's permissions in Wrike.
Related pages
- Issue trackers and work management for the broader issue-linking model.
- Links, issues, and relations for how linked work items appear in TestOps.
- Defects for defect workflows.
