MCP server
Allure TestOps has a built-in MCP server available starting from release 26.1.1. Use it when another tool or AI agent should call TestOps through the MCP contract.
MCP is available in Allure TestOps from release 26.1.1 as a public beta feature. This feature may be subject to additional fees in future releases.
Available tools
The MCP server exposes 13 tools:
Test cases
testops_create_testcase— create a test case with full metadata (steps, tags, custom fields, links, etc.)testops_update_testcase— update an existing test case (partial updates supported)testops_find_testcases— search test cases via AQL with pagination and field expansiontestops_delete_testcase— move a test case to trashtestops_restore_testcase— restore a test case from trash
Shared steps
testops_create_sharedstep— create a reusable shared step with scenariotestops_update_sharedstep— update an existing shared steptestops_find_sharedsteps— search shared steps via AQL with pagination
Test results
testops_find_testresults— search test results via AQL with pagination and expansion
Mutes
testops_create_mute— mute a test case (suppress failures)testops_delete_mute— remove a mute from a test case
Projects
testops_get_project— get project details with optional expansion (collaborators, custom fields, workflows, integrations, test layers, etc.)
Issue integration
testops_get_issue_details— fetch issue data from an external tracker (e.g. Jira) by key
Requirements
To connect to the Allure TestOps MCP server, you need Node.js 18 or later (required by mcp-remote).
Create a personal API token before configuring the MCP client: User menu and API tokens.
Connect VS Code
VS Code stores MCP server configuration in mcp.json:
- macOS:
"/Users/${USER}/Library/Application Support/Code/User/mcp.json" - Windows:
%APPDATA%\Code\User\mcp.json - Linux:
~/.config/Code/User/mcp.json
Add the following entry under servers:
{
    "servers": {
        "allure-testops-mcp": {
            "type": "stdio",
            "command": "npx",
            "args": [
                "mcp-remote",
                "https://url.of.testops/api/mcp",
                "--header",
                "Authorization: api-token ${AUTH_TOKEN}"
            ],
            "env": {
                "AUTH_TOKEN": "TOKEN-TOKEN-TOKEN-HERE"
            }
        }
    }
}
Alternatively, store the endpoint as a variable:
{
    "servers": {
        "allure-testops-mcp": {
            "command": "sh",
            "args": [
                "-c",
                "npx mcp-remote ${MCP_ENDPOINT} --header \"Authorization: api-token ${AUTH_TOKEN}\""
            ],
            "env": {
                "AUTH_TOKEN": "TOKEN-TOKEN-TOKEN-HERE",
                "MCP_ENDPOINT": "https://url.of.testops/api/mcp"
            }
        }
    }
}
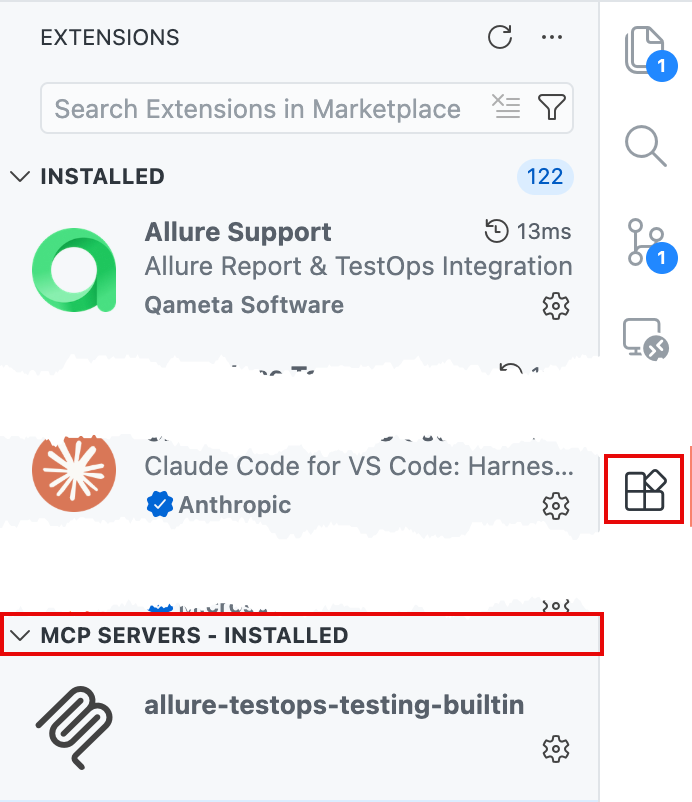
Save the file and restart VS Code. After restart, the MCP server appears in the same sidebar section as Extensions. Right-click it and select Start Server.
VS Code shows server output in the Output panel.
Connect Cursor
Cursor stores MCP server configuration in mcp.json at ~/.cursor/mcp.json.
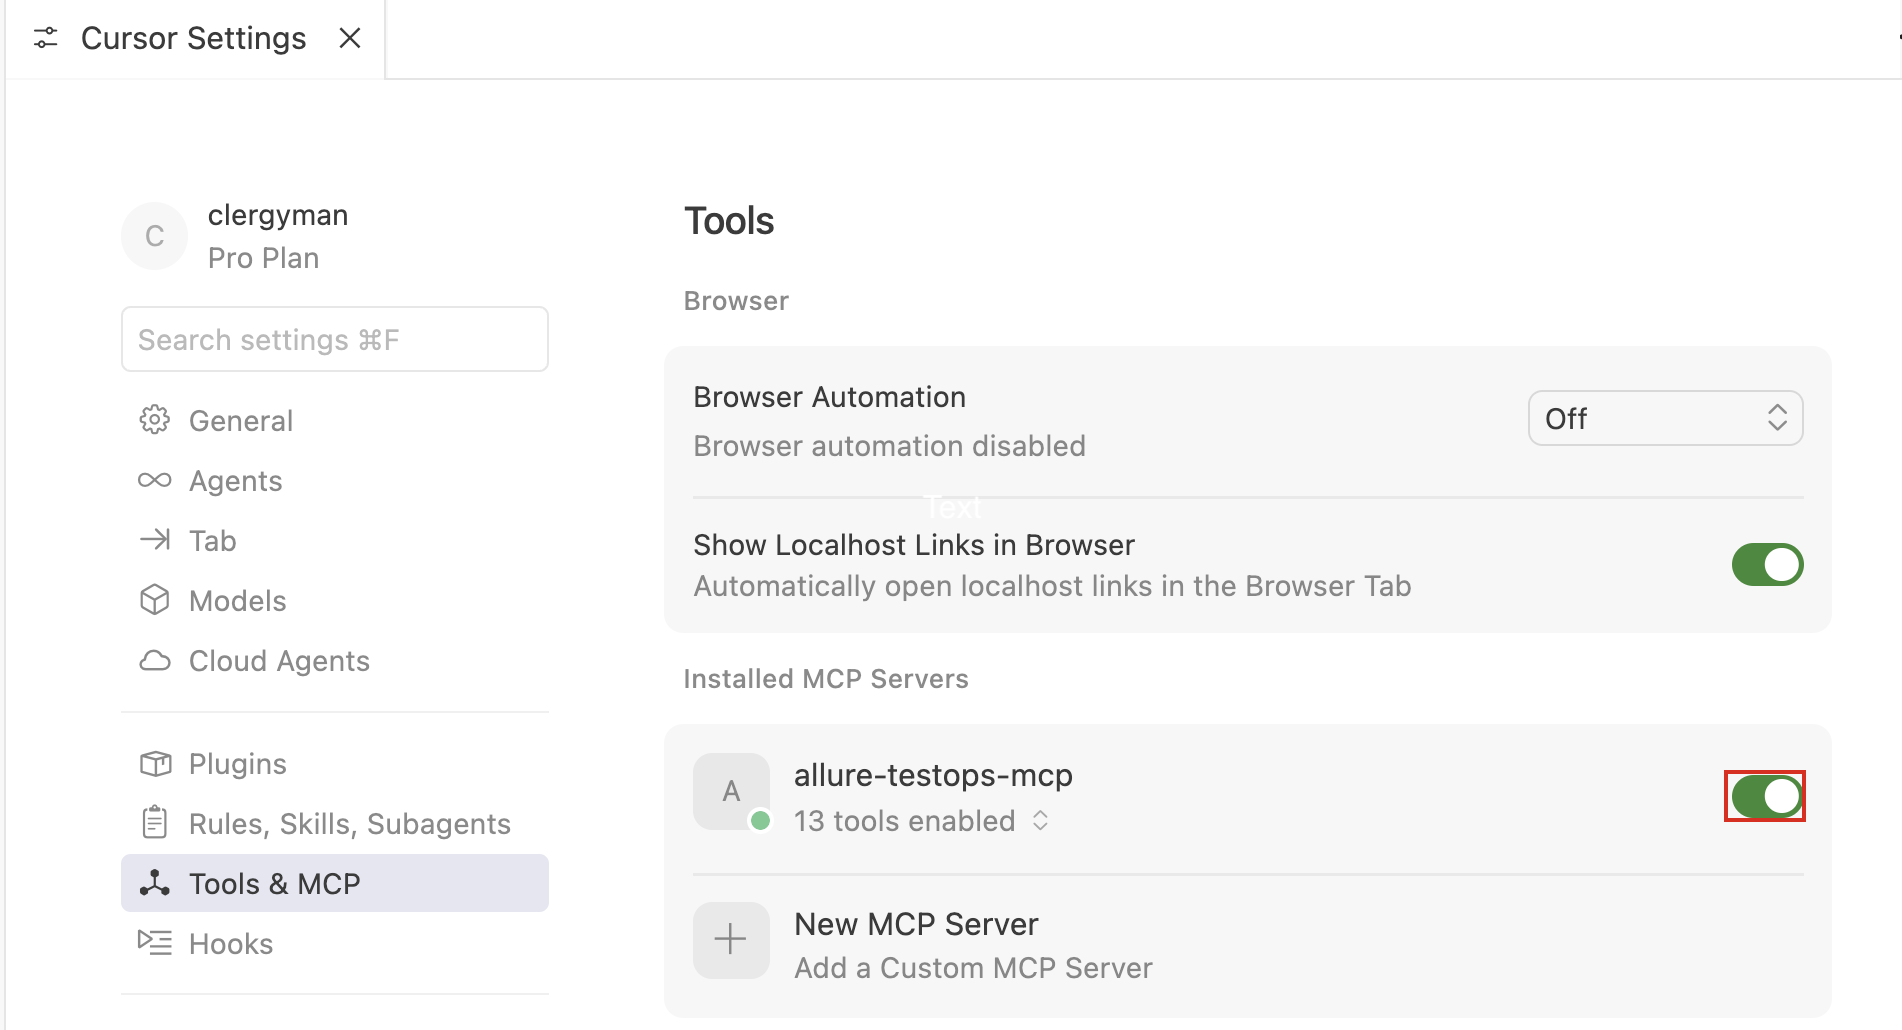
- Go to Cursor → Settings → Cursor Settings.
- In the left menu, select Tools & MCP and click Add Custom MCP.
- Cursor opens the configuration file.
- Add the following entry under
mcpServers:
{
  "mcpServers": {
    "allure-testops-mcp": {
        "type": "stdio",
        "command": "npx",
        "args": [
            "mcp-remote",
            "https://url.of.testops/api/mcp",
            "--header",
            "Authorization: api-token ${AUTH_TOKEN}"
        ],
        "env": {
            "AUTH_TOKEN": "TOKEN-TOKEN-TOKEN-HERE"
        }
    }
  }
}
Alternatively, store the endpoint and token as variables:
{
  "mcpServers": {
    "allure-testops-mcp": {
        "command": "sh",
        "args": [
            "-c",
            "npx mcp-remote ${MCP_ENDPOINT} --header \"Authorization: api-token ${AUTH_TOKEN}\""
        ],
        "env": {
            "MCP_ENDPOINT": "https://url.of.testops/api/mcp",
            "AUTH_TOKEN": "TOKEN-TOKEN-TOKEN-HERE"
        }
    }
  }
}
- Save mcp.json.
- Go back to Cursor settings and enable the tool.
Connect Claude Desktop
Claude Desktop stores its configuration in claude_desktop_config.json.
- Open Claude Desktop settings.
- Go to Desktop app → Developer.
- Click Edit Config. Claude Desktop opens the folder containing the config file.
- Add the Allure TestOps MCP server entry under
mcpServers:
{
  "mcpServers": {
    "allure-testops-mcp": {
      "command": "npx",
      "args": [
        "mcp-remote",
        "https://url.of.testops/api/mcp",
        "--header",
        "Authorization: api-token ${AUTH_TOKEN}"
      ],
      "env": {
        "AUTH_TOKEN": "TOKEN-TOKEN-TOKEN-HERE"
      }
    }
  }
}
- Save the file and restart Claude Desktop.
Claude Desktop starts the MCP server automatically on next launch.
Connect IntelliJ IDEA
Open Settings.
Go to Tools → AI Assistant.
Find the MCP configuration section.
Click + to add a new MCP configuration.
Set Type to command.
Fill in the fields:
- Name — any name, for example
Allure TestOps. - Command —
npx - Arguments —
mcp-remote https://your-instance-url/api/mcp --header "Authorization: api-token your-testops-api-token"
- Name — any name, for example
Click OK, then Apply.
