Integration with Wrike
The integration is available starting from Allure TestOps version 4.22.1.
Integration capabilities
The integration with Wrike allows you doing the following:
- add links to Wrike issues to test cases in Allure TestOps;
- add links to Wrike issues to launches in Allure TestOps;
- add links to Wrike issues to defects;
- add links to Wrike issues to mutes;
- create new issues in Wrike when creating a defect in Allure TestOps.
Requirements
- You need to have your Wrike workspace created.
- You need to have permissions to configure the workspace.
- Allure TestOps release needs to be at least 4.22.1.
Integration
Brief overview
As any other integration Wrike integration first needs to be enabled globally in Allure TestOps instance, and then enabled integration needs to be added to the project where you are going to use this integration. Whole process is described in the integrations overview.
Enable Wrike globally
You need to be Allure TestOps administrator.
- Go to Administration → Integrations.
- Click the + Add integration button.
- Find Wrike logo in the list and click it.
- Give the integration clear distinguishable name.
- Add the endpoint
https://wrike.com. - Save changes.
Now, the integration is enabled and can be added to a project.
Create Wrike permanent access token
In Wrike, click your avatar and select Apps & Integrations
Go to API section add new token's name and click Create new
On the next screen scroll down to Permanent access token section
Click Create token
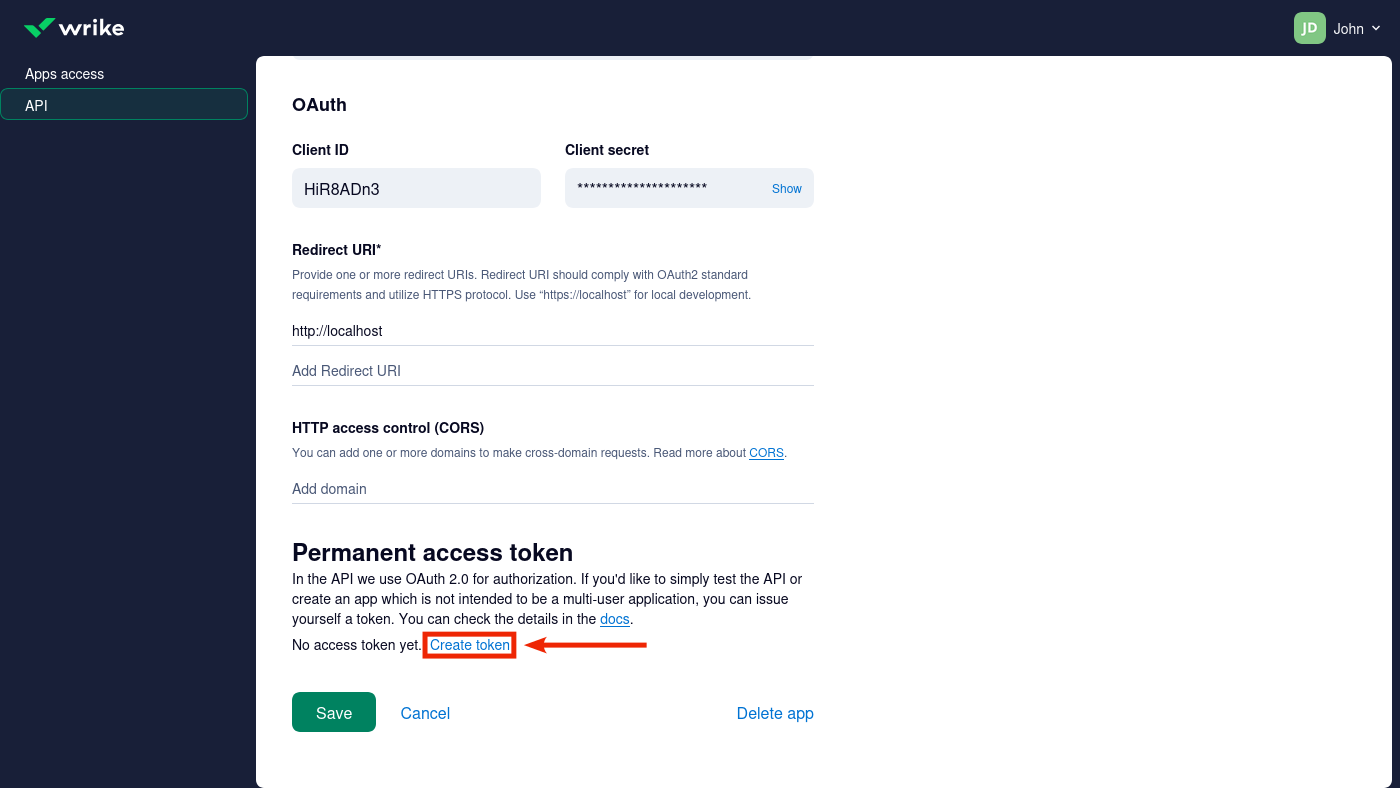
Copy the token and save it for the next integration step.
Add Wrike integration to your project
You need to be a project owner or an administrator.
- In Allure TestOps, open your project.
- Go to Settings → Integrations.
- Locate Wrike integration under Available integrations.
- Click Add integration.
- Add Wrike's permanent token string to API token text field.
- Click Test connection. If the token is correct, a "Connection established" message will appear within a few seconds.
- Click Add integration to save the settings.
Using Wrike integration
Add links to Wrike issues to Test cases
- Go to Test Cases and open a test case.
- Click the pencil icon next to Issue links.
- In the window that opens, click + Add.
- In the Issue tracker field, select your Wrike integration.
- In the Key field, select the issue.
- Click Submit.
- Check that the link to the Wrike issue has appeared under the Issue links in the test case.
Add links to Wrike issues to launches
- Go to Launches.
- Click
⋯next to the launch you want to link to the issue and select Edit. - In the window that opens, click + Add in the Issues section.
- In the Issue tracker field, select your Wrike integration.
- In the Key field, select the issue to which you want to link the launch.
- Click Submit.
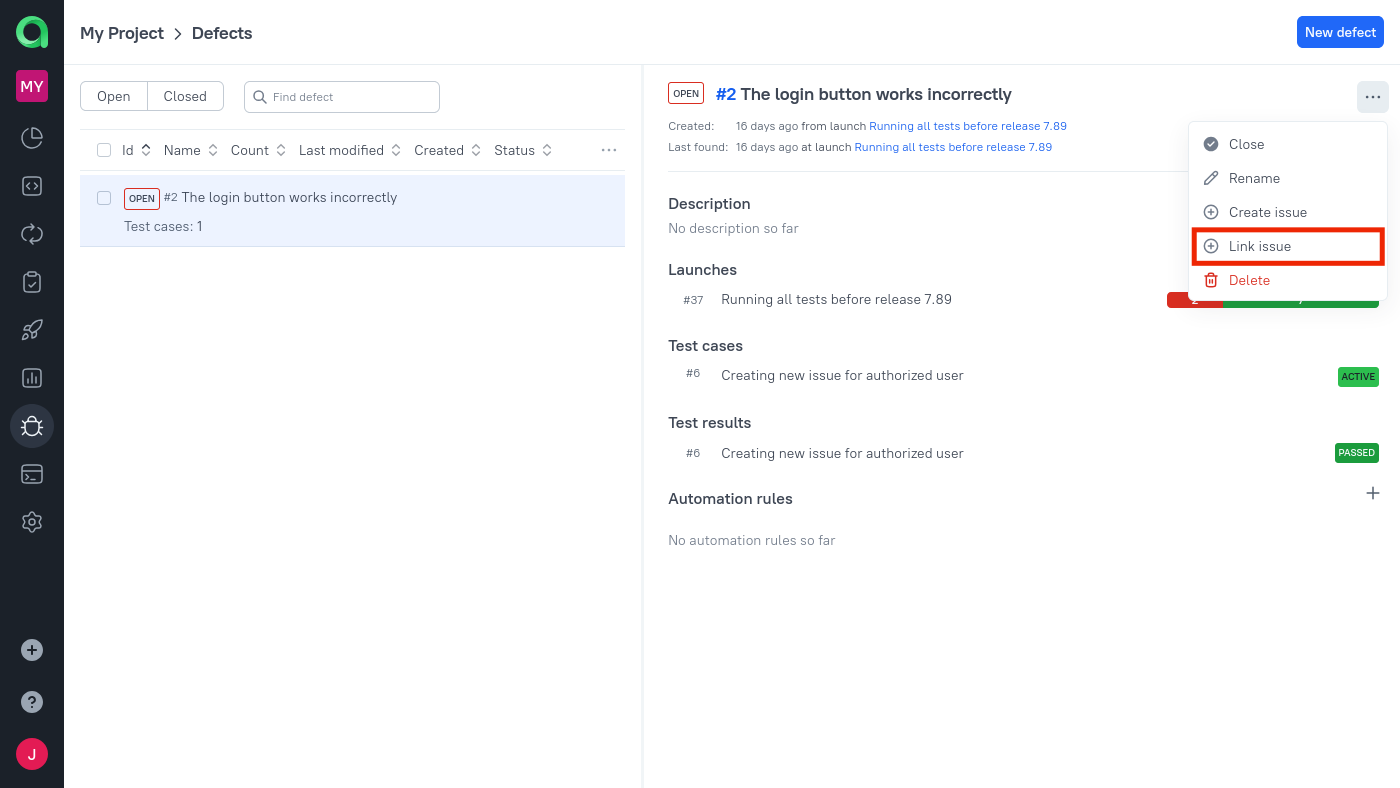
Add links to Wrike issues to defects
Create a new defect from a test result or select an existing defect.
Click Link issue.
New defect Existing defect 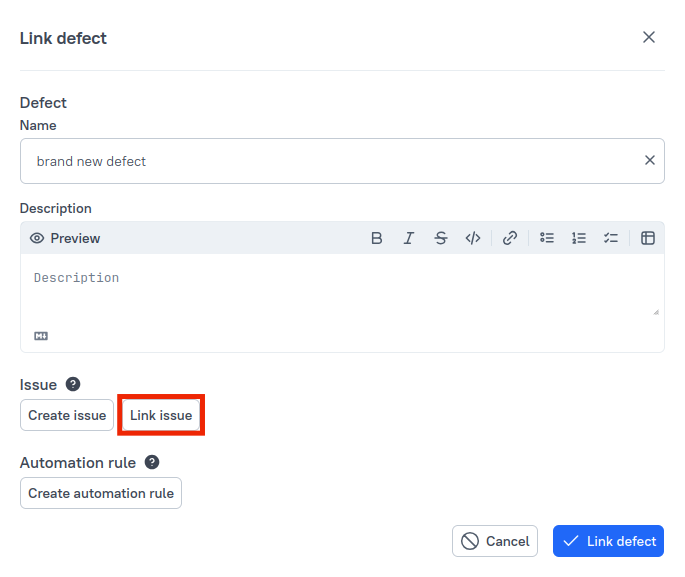
In the Issue tracker field, select your Wrike integration.
In the Key field, select the issue to which you want to link the defect.
Click Submit.
Add links to Wrike issues to muted test cases
- When muting a test case, click + Add in the Issues section.
- In the Issue tracker field, select your Wrike integration.
- In the Key field, select the issue you want to link to the muted test case.
- Click Submit.
Create new issues in Wrike when creating defect in Allure TestOps
- When creating a defect, click Create issue in the Issue section.
- In the Issue tracker field, select your Wrike integration.
- In the Project field, select the desired project in Wrike.
- Select the issue type in Wrike.
- In the Summary field, enter the issue details.
- Click Link defect.
The defect will be created and linked to the new Wrike issue.
