Defects
Defects is an Allure TestOps feature that allows you to mark test failures as known (Resolved), which can help you filter them and focus on test failures that you have not encountered yet.
The basic flow of working with defects is this:
- You receive one or more test failures.
- You perform the triaging, i.e. you analyze the failures to understand the root cause of the problem.
- You create a defect describing the problem. That defect can include one or more automation rules to mark all current and future test failures that match them as resolved.
- After the problem is fixed, you close the defect.
Defects can also be linked to issues in an issue tracker such as Jira or YouTrack if the appropriate integration is enabled in your project.
Creating a defect
Defects can be created using the Defects section (using the + Defect button), but the more convenient and common approach is to create a defect right from a failed test result.
Go to the Launches section.
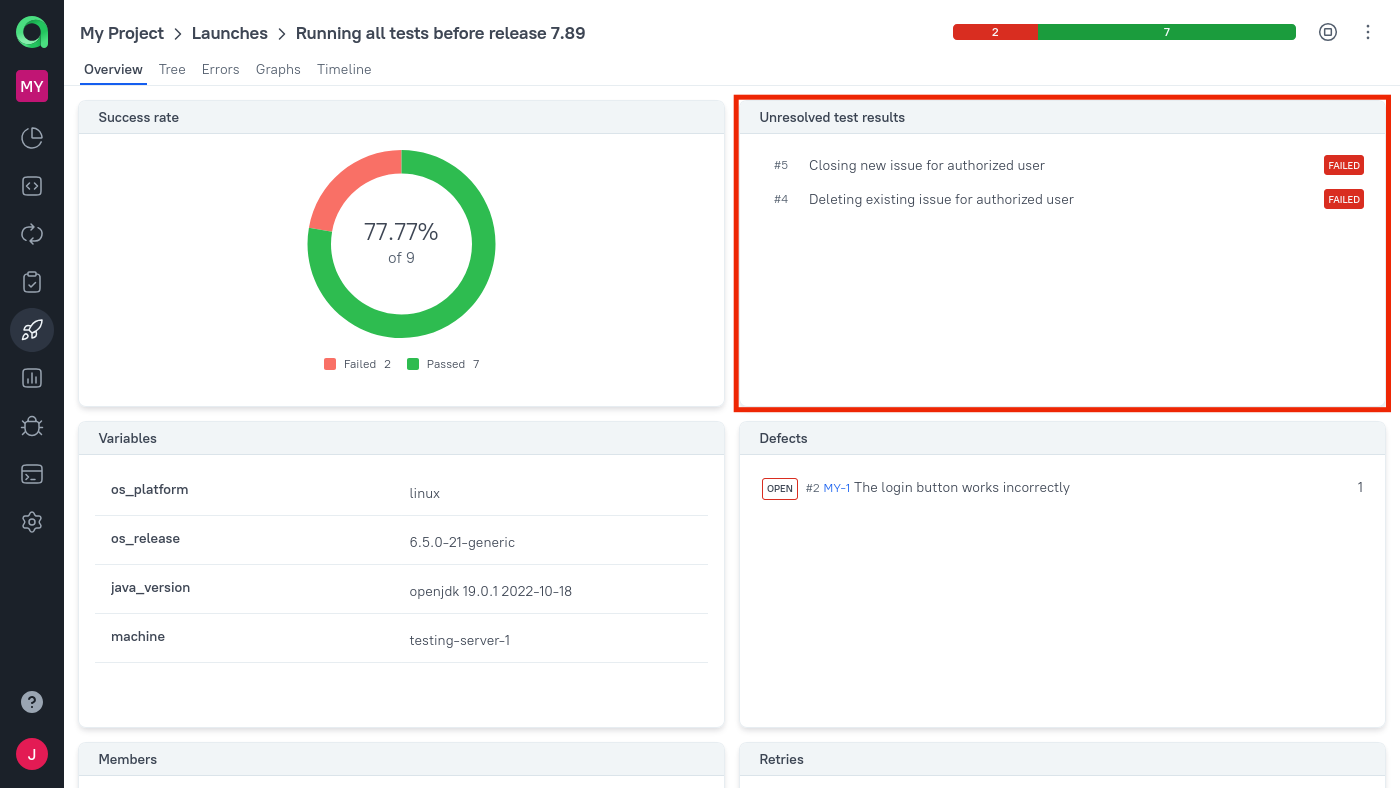
Click a launch that has unresolved test failures.
- For end users' convenience all the failed test results without resolution are grouped in Unresolved test results area of a launch overview tab.
- In the test results tree, failed test results that haven't been triaged and processed (Resolved) can be filtered out by Without resolution filter.
Select one of the results under Unresolved test results.
Click the Link defect button in the bottom right corner.
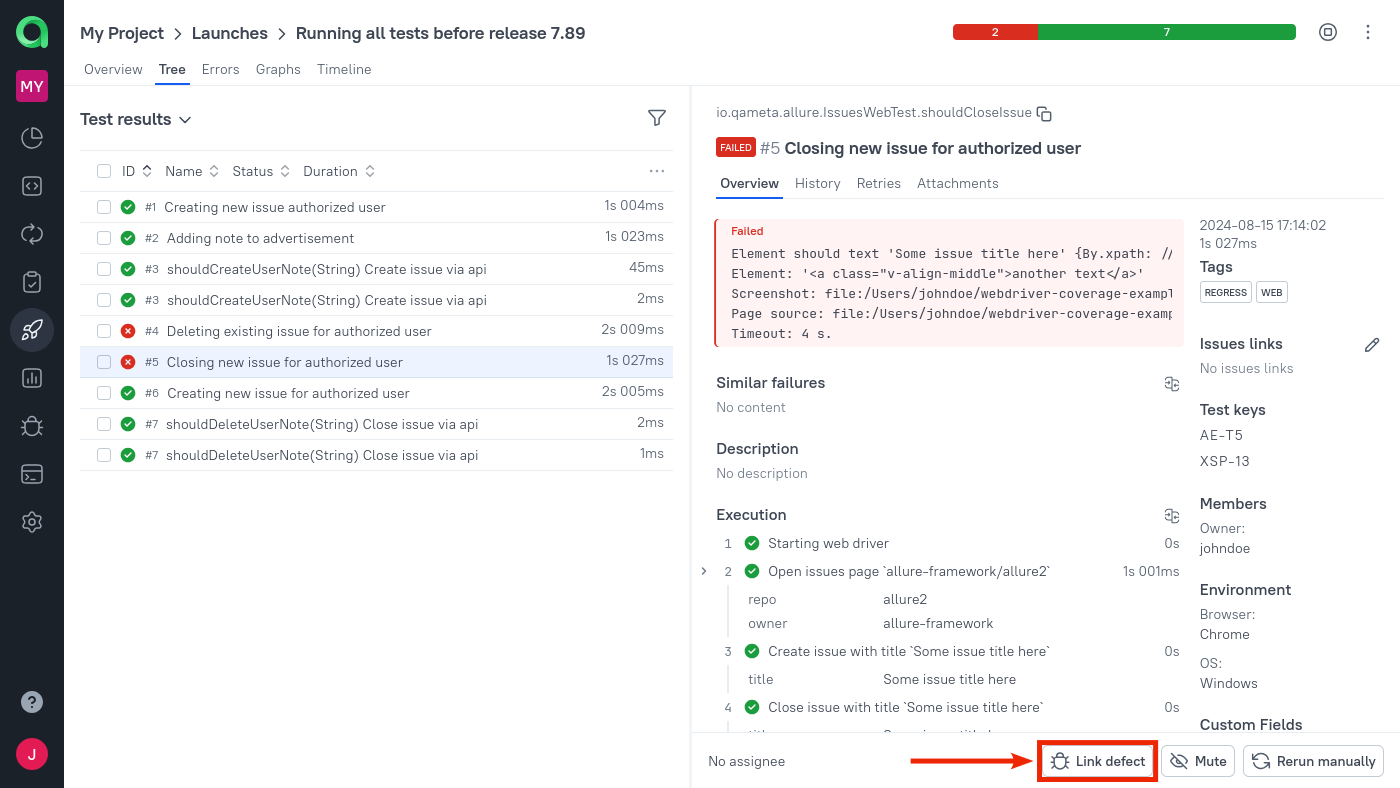
In the resulting window, enter a name for the new defect and click Create. You can also select one of the existing defects instead if you have created them before.
After that, you can add an automation rule to link all similar test failures to this defect, marking them as resolved as well (see below). You can also link the defect to a new or existing issue (see Linking defects to issues).
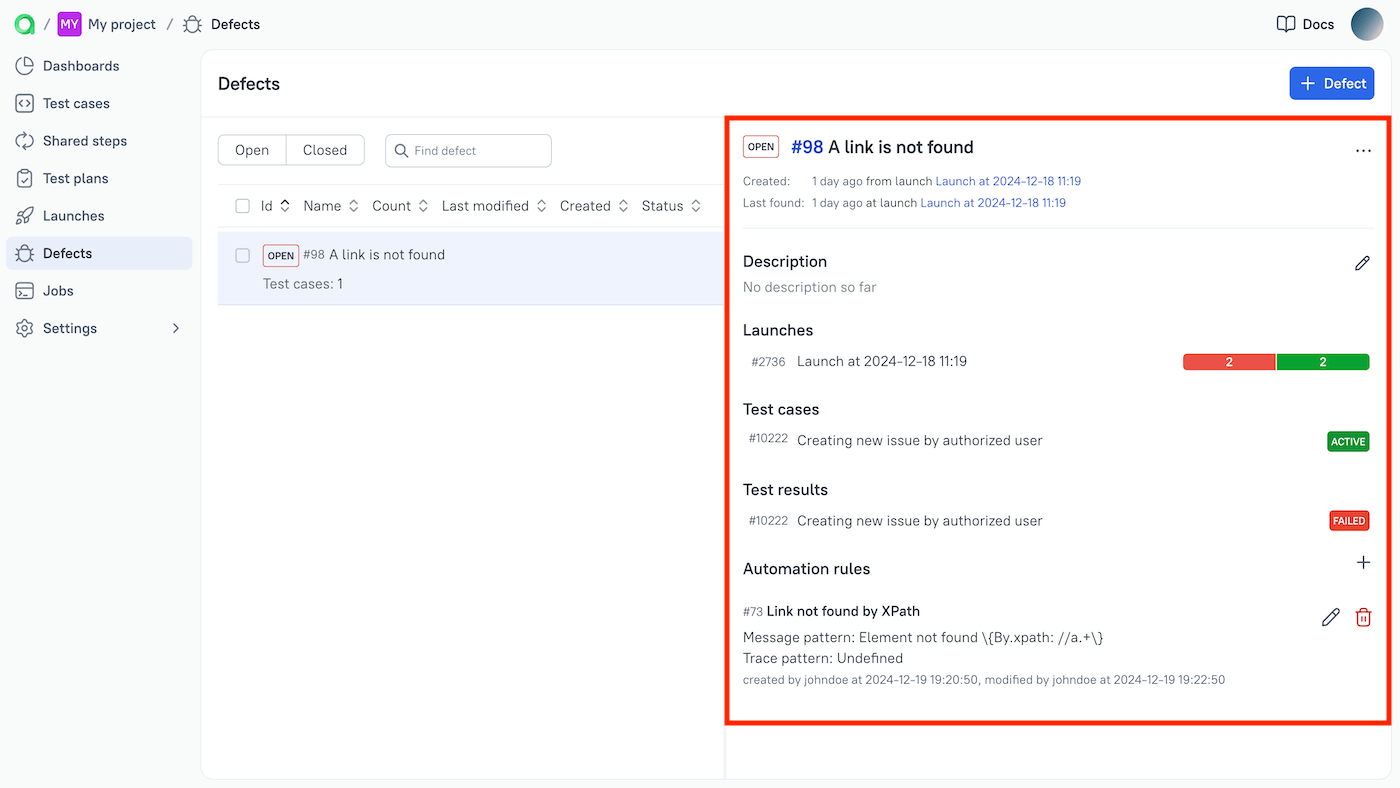
After creating the defect with the automation rule, you can check the list of test failures linked to it by going to the Defects section and selecting the created defect.
The full list of affected test cases appears in the defect only after all related launches are closed.
Automation rules
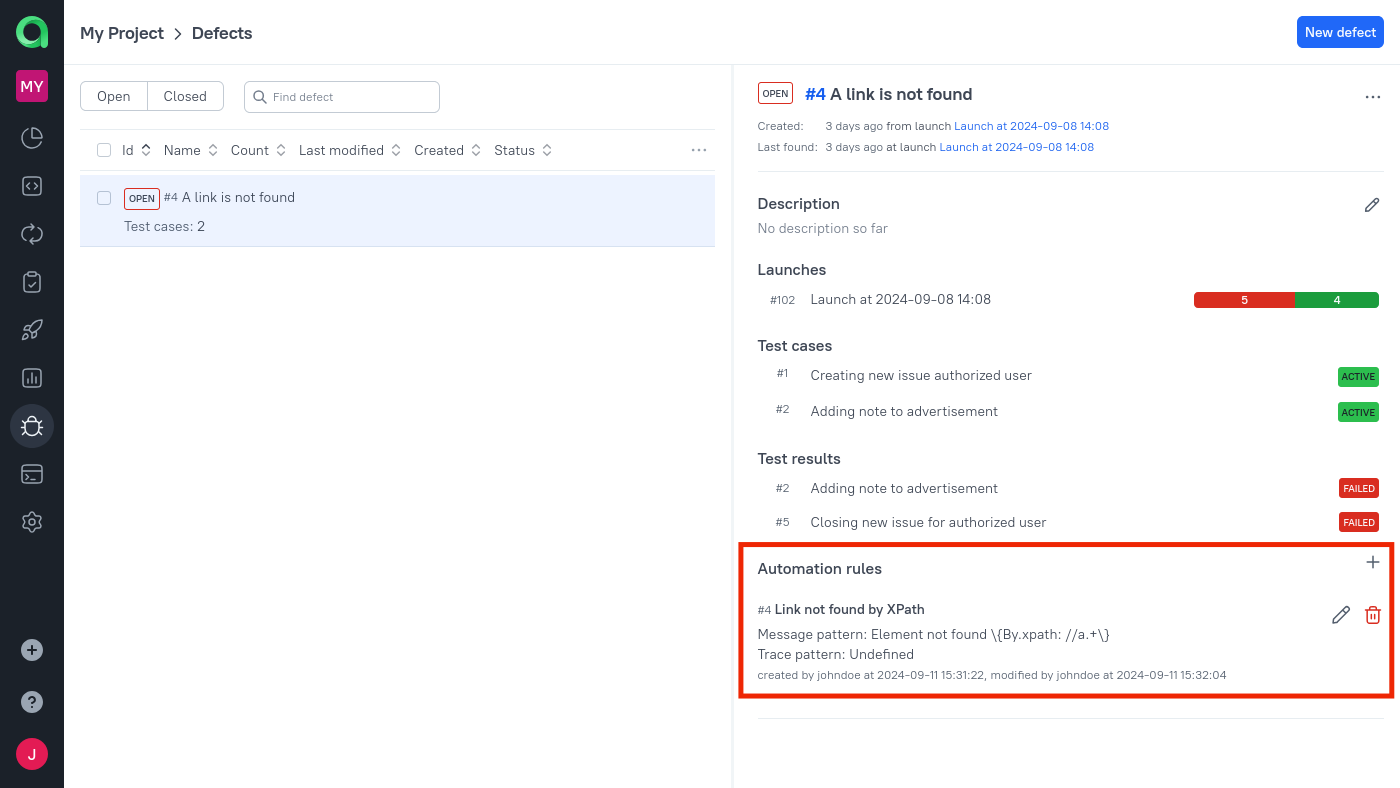
For each defect, you can define one or more automation rules, allowing Allure TestOps to automatically associate test results with the defect based on error messages and stack traces. The feature uses regular expressions to match the text.
For example, if your Selenium cluster is down and you are getting a lot of error messages containing the string “Element not found” followed by an XPath, you can automatically match them using a rule with the following Error message pattern:
Element not found \{By.xpath: //a.+\}.
When you create a new defect using the Link defect button in the test result, you can set an automation rule in the same dialog. To do so, just fill in the Rule name, Error message pattern, and Stack trace pattern fields at the bottom of the dialog.
For an existing defect, you can add, delete or modify the automation rules using the icons to the right of the rules list.
Allure TestOps automatically applies all existing rules to all test failures in a launch:
- If a new launch is created, test failures will be linked to defects based on matching automation rules.
- If a closed launch is reopened, Allure TestOps will recheck all test failures and associate them with existing automation rules.
- If during an open launch a defect with an automation rule is created within another launch, clicking Apply Defect matchers in the open launch’s menu will initiate a check to match test failures against this new automation rule.
Closing a defect
Defects can have the statuses Open and Closed.
When you create a defect, its status is set to Open. This means that the automation rules of that defect are active and all test failures that match the rules will be automatically marked as resolved.
If the problem has been fixed and you no longer expect to receive test failures related to the defect, you can close the defect. If a defect is closed, its automation rules are disabled and will not be used to resolve test failures.
To close a defect:
- Go to the Defects section.
- Select the defect you want to close.
- Click
⋯on the right and select Close.
After you have closed the defect, it can be reopened by clicking ⋯ and selecting Reopen.
Linking defects to issues
In order to be able to link defects to issues, you first need to set up an integration with the required issue tracker. You can find instructions for supported issue trackers in Integrations.
Once you've enabled an issue tracker integration for your project, you can link a defect to an existing issue or create a new issue right from Allure TestOps. This can be done both when creating a defect and later on.
Some integrations, such as Jira, allow you to automatically close the defect when you close the linked issue in the issue tracker. You can read more about that here.
Defect's life cycle sync with linked issue
Allure TestOps implements web-hook feature that allows synchronization defect's status with the status of an issue linked to this defect on issue tracker side, i.e. if an issue gets closed, then linked defect gets automatically closed as well.
This feature is available for Jira Data Center (Jira Server) and Jira Software Cloud integrations.
