Integration with Jira Data Center (Jira Server)
Jira Data Center (previously known as Jira Server) is the self-hosted edition of the popular Jira issue tracker. This instruction describes how to configure the integration between Jira Data Center and Allure TestOps instances.
Integration with Jira Data Center allows you to:
- link Allure TestOps entities (test cases, launches, test results, defects, mutes) with Jira Data Center issues;
- create Jira Data Center issues directly from the defect view in Allure TestOps (see Linking defects to issues for more details);
- view and manage linked test cases from Allure TestOps within Jira Data Center issues;
- view linked launches and test results from Allure TestOps in Jira Data Center issues.
Lists of launches and test results from Allure TestOps are added to Jira issues using an iFrame component. For this to work, Allure TestOps does not have to be accessible from the Jira server, but it must be accessible from the user's device. This also means that the integration may be affected by the user's web browser settings, especially if the Jira Data Center instance uses HTTPS. If your users will report any problems anyway, please consult the Troubleshooting section or contact our support team.
For adding an issue link to a test case manually, Jira must be accessible from the Allure TestOps server.
To use automatic linking between test cases and issues, a test author needs to define a relation using an Allure Report adapter for their test framework. An example of such a definition:
import { test } from "@playwright/test";
import { allure } from "allure-playwright";

test("Some test", async ({ page }) => {
  allure.label("jira", "BUG-123");
  // ...
});
This code defines a relation between the test and the “BUG-123” issue in the “jira” issue tracker. To make this an actual link in the web interface, Allure TestOps will use an issue mapping for “jira”, as configured in step 1.4.
Note that while the example above works, in a real project we recommend to define your own wrapper function instead of specifying the key in
allure.label()every time. Please consult the Allure Report documentation for your test framework.
Configuring the integration
To configure the integration in Allure TestOps, you need to have access to the sections:
- Administration — requires instance administrator permissions;
- Settings of a specific project — requires the project owner role.
To configure the integration with Jira:
Create a token in Jira.
At the Allure TestOps instance level, add the integration with Jira by providing:
- integration name;
- Jira URL.
At the instance or project level in Allure TestOps, enable the added integration for a project by providing Jira credentials.
Configure issue mapping in Allure TestOps.
Configure data embedding from Allure TestOps into Jira by installing the Allure TestOps plugin.
Enable issue lifecycle synchronization by configuring webhooks between Jira and Allure TestOps.
1. Enable Jira links in Allure TestOps
After completing this step, you’ll be able to add links to Jira issues in Allure TestOps entities.
1.1. Create token in Jira
Skip this if you prefer to use your username and password as the credentials.
In Jira, click your avatar and go to Profile.
In the sidebar on the left, go to Personal access tokens.
Click Create token.
Fill in the fields:
- Token Name — name to help you recognize the token, for example, Token for Allure TestOps.
- Expiry date — expiration date of the token. After this date, the integration will stop working. To restore it, you’ll need to create a new token. To create a token without an expiration date, clear the Automatic expiry checkbox.
Click Create.
The new token will become temporarily visible. Copy and save the token in a secure place. You’ll need it to enable the integration in the Allure TestOps project.
1.2. Add Jira integration in Allure TestOps
Go to your Allure TestOps instance.
Go to Administration → Integrations.
In the upper-right corner, click + Add integration.
From the list of available integrations, select Jira Server (DC).
Fill in the fields:
- Name — name to help you recognize the integration, for example, Jira production.
- Endpoint — URL of your Jira instance, for example, https://jira.example.com/.
If your Jira Data Center instance uses a self-signed SSL certificate, select the Disable certificate validation checkbox.
Click Add integration.
1.3. Enable integration for Allure TestOps project
To enable the integration in the specific Allure TestOps project, use one of the two methods below:
1.4. Configure issue mapping
In Allure TestOps, open your project.
Go to Settings → Issues.
Click + Create.
Fill in the fields:
- Key — short integration identifier that you are going to use when writing the tests, for example, jira.
- Issue tracker — name of the integration that you added in step 1.2.
Click Submit.
2. Configure data embedding from Allure TestOps into Jira
After completing this step, you’ll be able to view the list of linked Allure TestOps entities in Jira issues.
2.1. Enable secure cookies in Allure TestOps
This section assumes that both Allure TestOps and Jira Data Center are configured to use the encrypted HTTPS protocol. In other cases, please contact our support team.
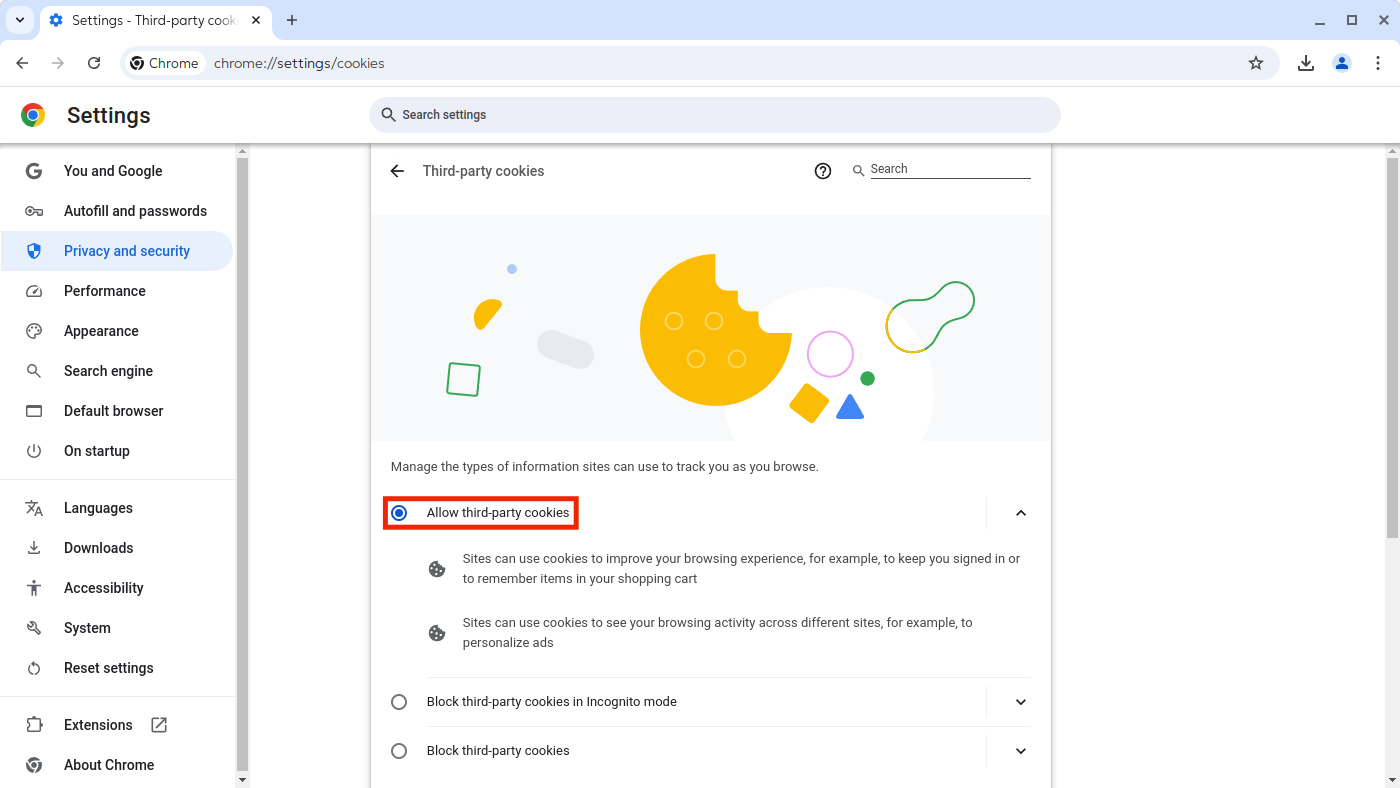
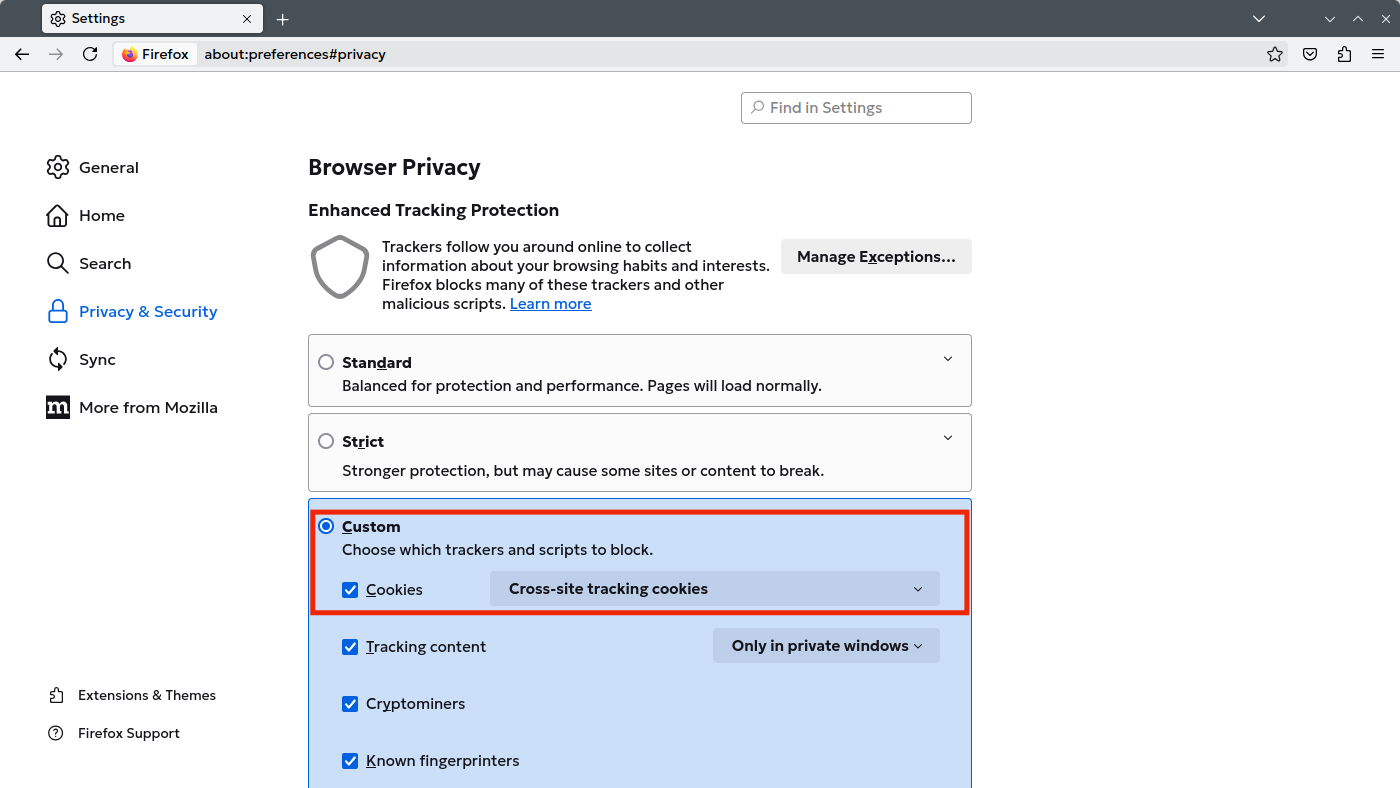
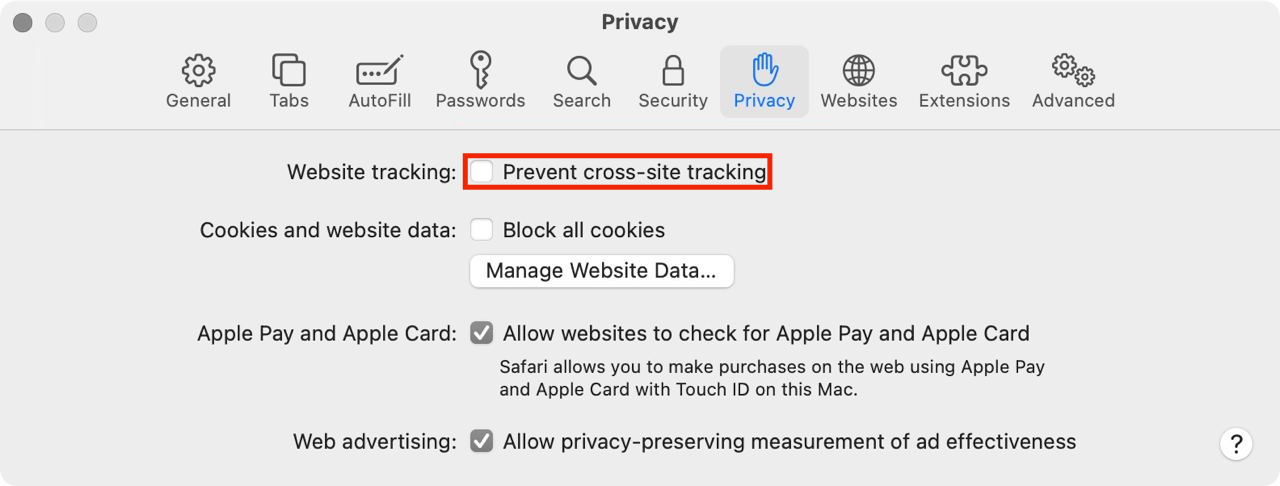
For security reasons, a user's web browser may block sharing cookies between two different websites, such as Allure TestOps and Jira. This may prevent the embedding on the Jira issue details page.
To fix this, make sure that secure cookies are enabled for your Allure TestOps instance.
2.2. Find out integration ID in Allure TestOps
To find the ID of the added integration, use one of the two methods below:
2.3. Enable Allure TestOps plugin for Jira
In Jira, click the Settings icon in the upper-right corner and select Manage apps.
If asked, enter the Jira administrator password.
Using the search box, find the Allure TestOps for JIRA plugin.
Click Install next to the plugin.
In the dialog that appears, click Accept & install.
Wait until the plugin is downloaded and installed.
In the sidebar on the left, go to Manage apps.
Expand the Allure TestOps for JIRA section and click Configure.
Fill in the fields:
- Config — if you configure the plugin for the first time or you need to add an integration with a new Allure TestOps instance, select Create new config. Otherwise, select the URL of the instance for which you want to update the settings.
- Endpoint — URL of your Allure TestOps instance, for example, https://testops.example.com. Make sure there’s no trailing slash in the URL, as it may cause plugin issues.
- Version — Version after 5.17.x.
- Integration ID — Jira Data Center integration ID you copied in step 2.2.
- Selected groups, Groups — Jira groups for which the plugin will be enabled. To enable it for users from all groups, leave the Selected groups checkbox clear.
- Selected projects, Projects — Jira projects for which the plugin will be enabled. To enable it for users from all projects, leave the Selected projects checkbox clear.
Click Save.
3. Enable synchronization of the issue lifecycles
Allure TestOps supports Jira webhooks. Jira uses webhooks to notify external systems when an issue status changes. When Allure TestOps receives such a notification, it finds all defects linked to the issue and updates their status accordingly.
3.1. Create webhook in Allure TestOps
Go to your Allure TestOps instance.
Go to Administration → Integrations.
From the list of configured integrations, find and open your Jira Data Center integration.
Go to the Webhooks tab.
Click + Create webhook, then click Confirm creation.
In the dialog that appears, click the Copy icon to copy the webhook URL into clipboard.
You’ll need this URL in the next step.
3.2. Add webhook from Allure TestOps to Jira
In Jira, click the Settings icon in the upper-right corner and select System.
In the sidebar on the left, under Advanced, click WebHooks.
Click Create a WebHook.
Fill in the fields:
- Name — name to help you recognize the webhook.
- Status — Enabled.
- URL — webhook URL that you saved in step 3.1.
- Issue related events — select Issue → updated.
Click Create at the bottom of the page.
Troubleshooting
In Jira issues, viewing and managing Allure TestOps entities is done through an iFrame component. Below are examples of possible errors that may appear in the iFrame, along with recommendations for resolving them.
iFrame displays the Sign in button
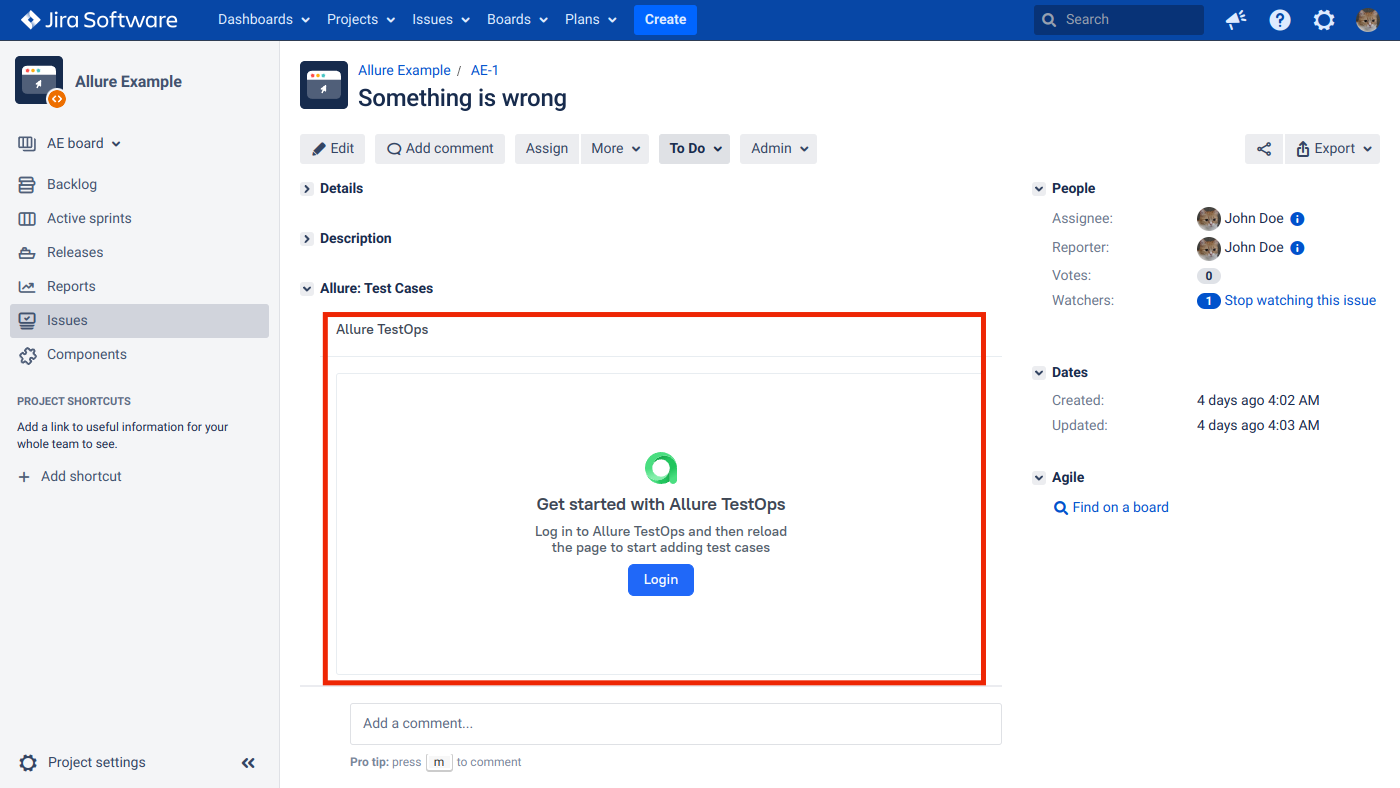
If you are signed in to Allure TestOps but you still see the Sign in button in Jira, this is most likely caused by the security settings in your web browser. Follow the browser-specific instructions below to make sure that the proper communication between Jira and the Allure TestOps iFrame is allowed.
Each user who encounters this error needs to do these steps.
iFrame does not display content
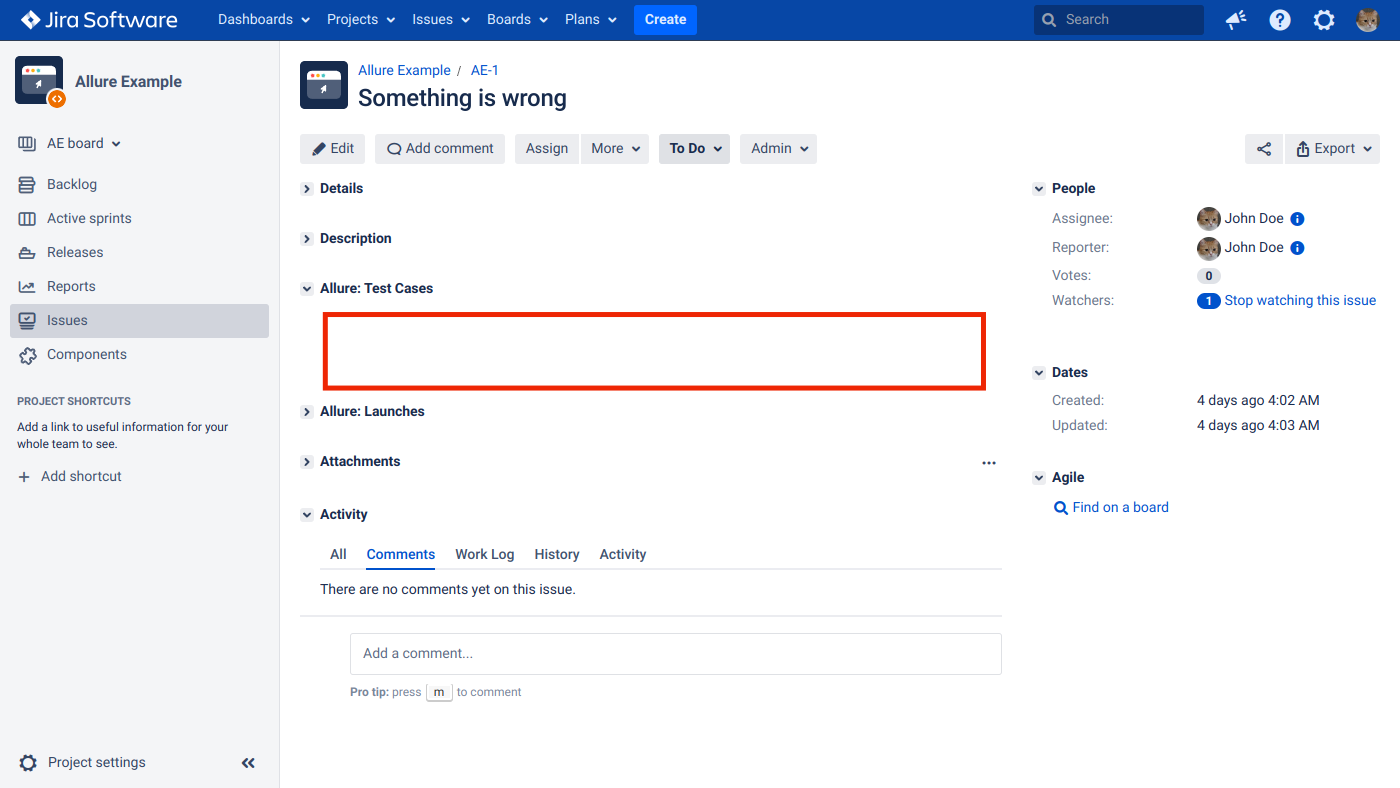
The absence of content in the iFrame (an empty window) usually means that your Jira instance uses HTTPS, while Allure TestOps uses HTTP. This configuration is not supported, we recommend switching to HTTPS for both products. See Enabling HTTPS.
Once you have enabled HTTPS for Allure TestOps, be sure to replace http with https in the plugin settings.
iFrame displays the message “Couldn't connect to Allure TestOps”
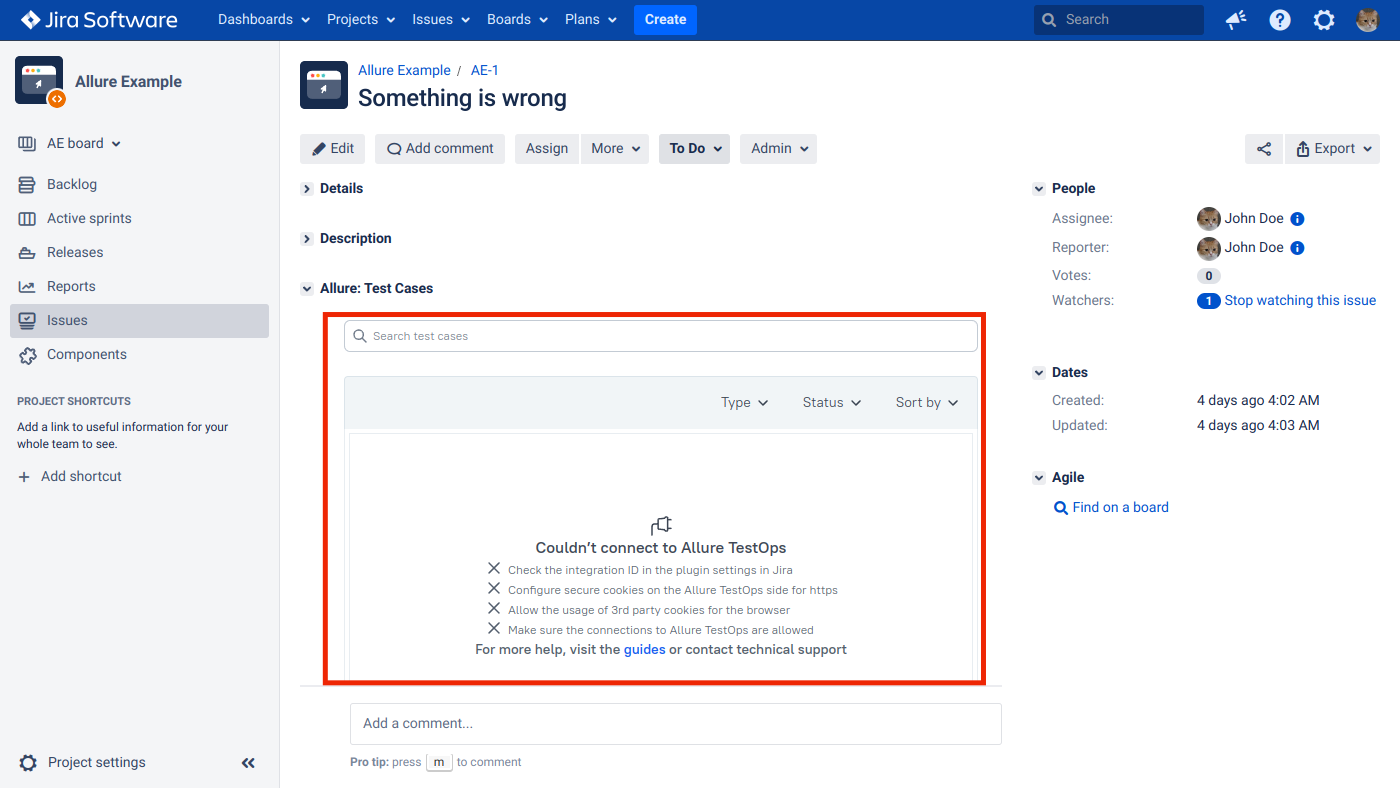
The message “Couldn't connect to Allure TestOps” means that an incorrect integration ID is specified in the plugin settings in Jira.
To fix the error:
- Find the relevant integration ID in Allure TestOps.
- Make sure that this ID is specified in the plugin settings.
