Integration with ClickUp
This integration is available starting with Allure TestOps version 25.3.1.
Integration with ClickUp allows you to:
- link Allure TestOps entities (test cases, launches, test results, defects, mutes) with ClickUp issues;
- create ClickUp issues directly from the defect view in Allure TestOps (see Linking defects to issues for more details).
Unlike other integrations, ClickUp does not support issue search by ID.
When linking Allure TestOps entities to ClickUp issues, you can only search for issues by their names.
Configuring the integration
To configure the integration in Allure TestOps, you need to have access to the sections:
- Administration — requires instance administrator permissions;
- Settings of a specific project — requires the project owner role.
To configure integration with ClickUp:
- Create an API token in ClickUp.
- Find out your list and team IDs in ClickUp.
- At the Allure TestOps instance level, add the integration with ClickUp by providing:
- integration name;
- ClickUp URL;
- ClickUp API URL.
- At the instance or project level in Allure TestOps, enable the added integration for a project by providing the ClickUp List ID, team ID, and created API token.
1. Create API token in ClickUp
- Sign in to your ClickUp instance.
- In the upper-right corner, click on your avatar and select Settings.
- In the left sidebar, click Apps.
- Under API Token, click Generate.
- Enter your ClickUp account password and click Confirm Password.
- Click Copy to copy the token into clipboard.
- Save the token in a secure place. You’ll need it to enable the integration in the Allure TestOps project.
2. Find list and team IDs in ClickUp
- In ClickUp, open the List for which you configure the integration with Allure TestOps.
- In the left sidebar, next to the List name, click
⋯→ Copy link.
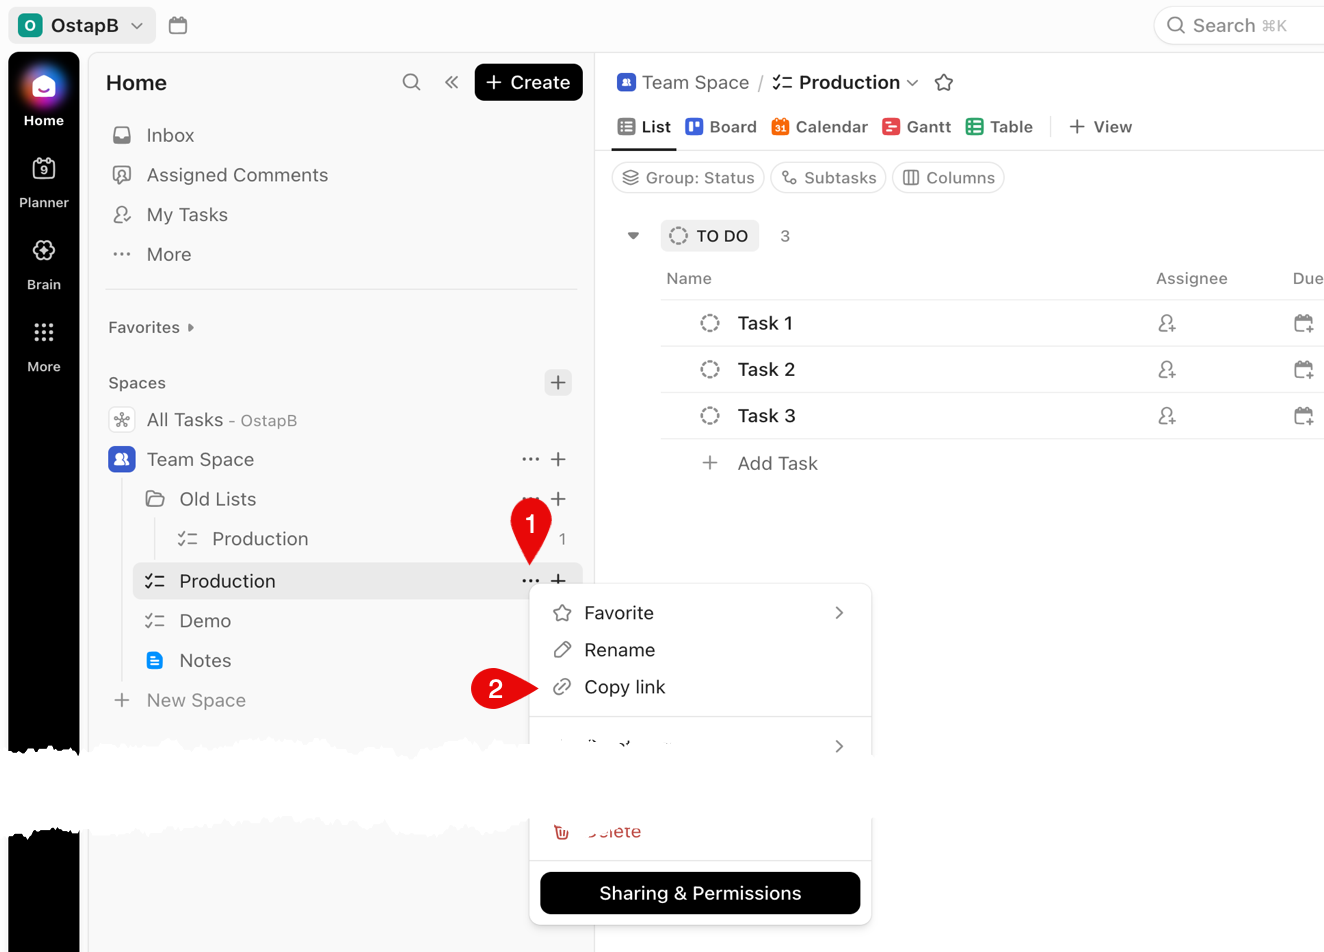
- You’ll get a URL like https://your_ClickUp_domain/team_ID/v/li/list_ID.
- For example: https://app.clickup.com/12345/v/li/67890
- 12345 will be your team_ID
- 67890 will be your list_ID
- Save the values of team_ID and list_ID you’ll need them to enable the integration in the Allure TestOps project.
3. Add ClickUp integration in Allure TestOps
Go to your Allure TestOps instance.
Go to Administration → Integrations.
In the upper-right corner, click + Add integration.
From the list of available integrations, select ClickUp.
Fill in the fields:
- Name — a name to help you recognize the integration, for example, ClickUp Production.
- Endpoint — the base URL of your ClickUp instance:
- for cloud versions of ClickUp, use https://app.clickup.com;
- for ClickUp Enterprise, use the URL of your ClickUp instance.
- Endpoint for API calls — the URL of ClickUp API:
- for all cloud versions of ClickUp, use https://api.clickup.com/api;
- for ClickUp Enterprise, use
⟨URL⟩/api, where⟨URL⟩is the URL of your ClickUp instance.
Click Add integration.
4. Enable integration for Allure TestOps project
To enable integration in the specific Allure TestOps project, use one of the two methods below:
© Qameta Software Inc. All rights reserved.
