Test results upload from AWS CodePipeline
To upload the test results from AWS CodePipeline, you need to use allurectl.
Foreword
The aim of this chapter is to explain how AWS CodePipeline could be integrated with Allure TestOps' workflows.
This chapter won't cover the peculiarities of AWS CodePipeline, and detailed description of AWS CodePipeline configuration as we believe AWS team created high quality documentation covering their product.
Creation of a pipeline
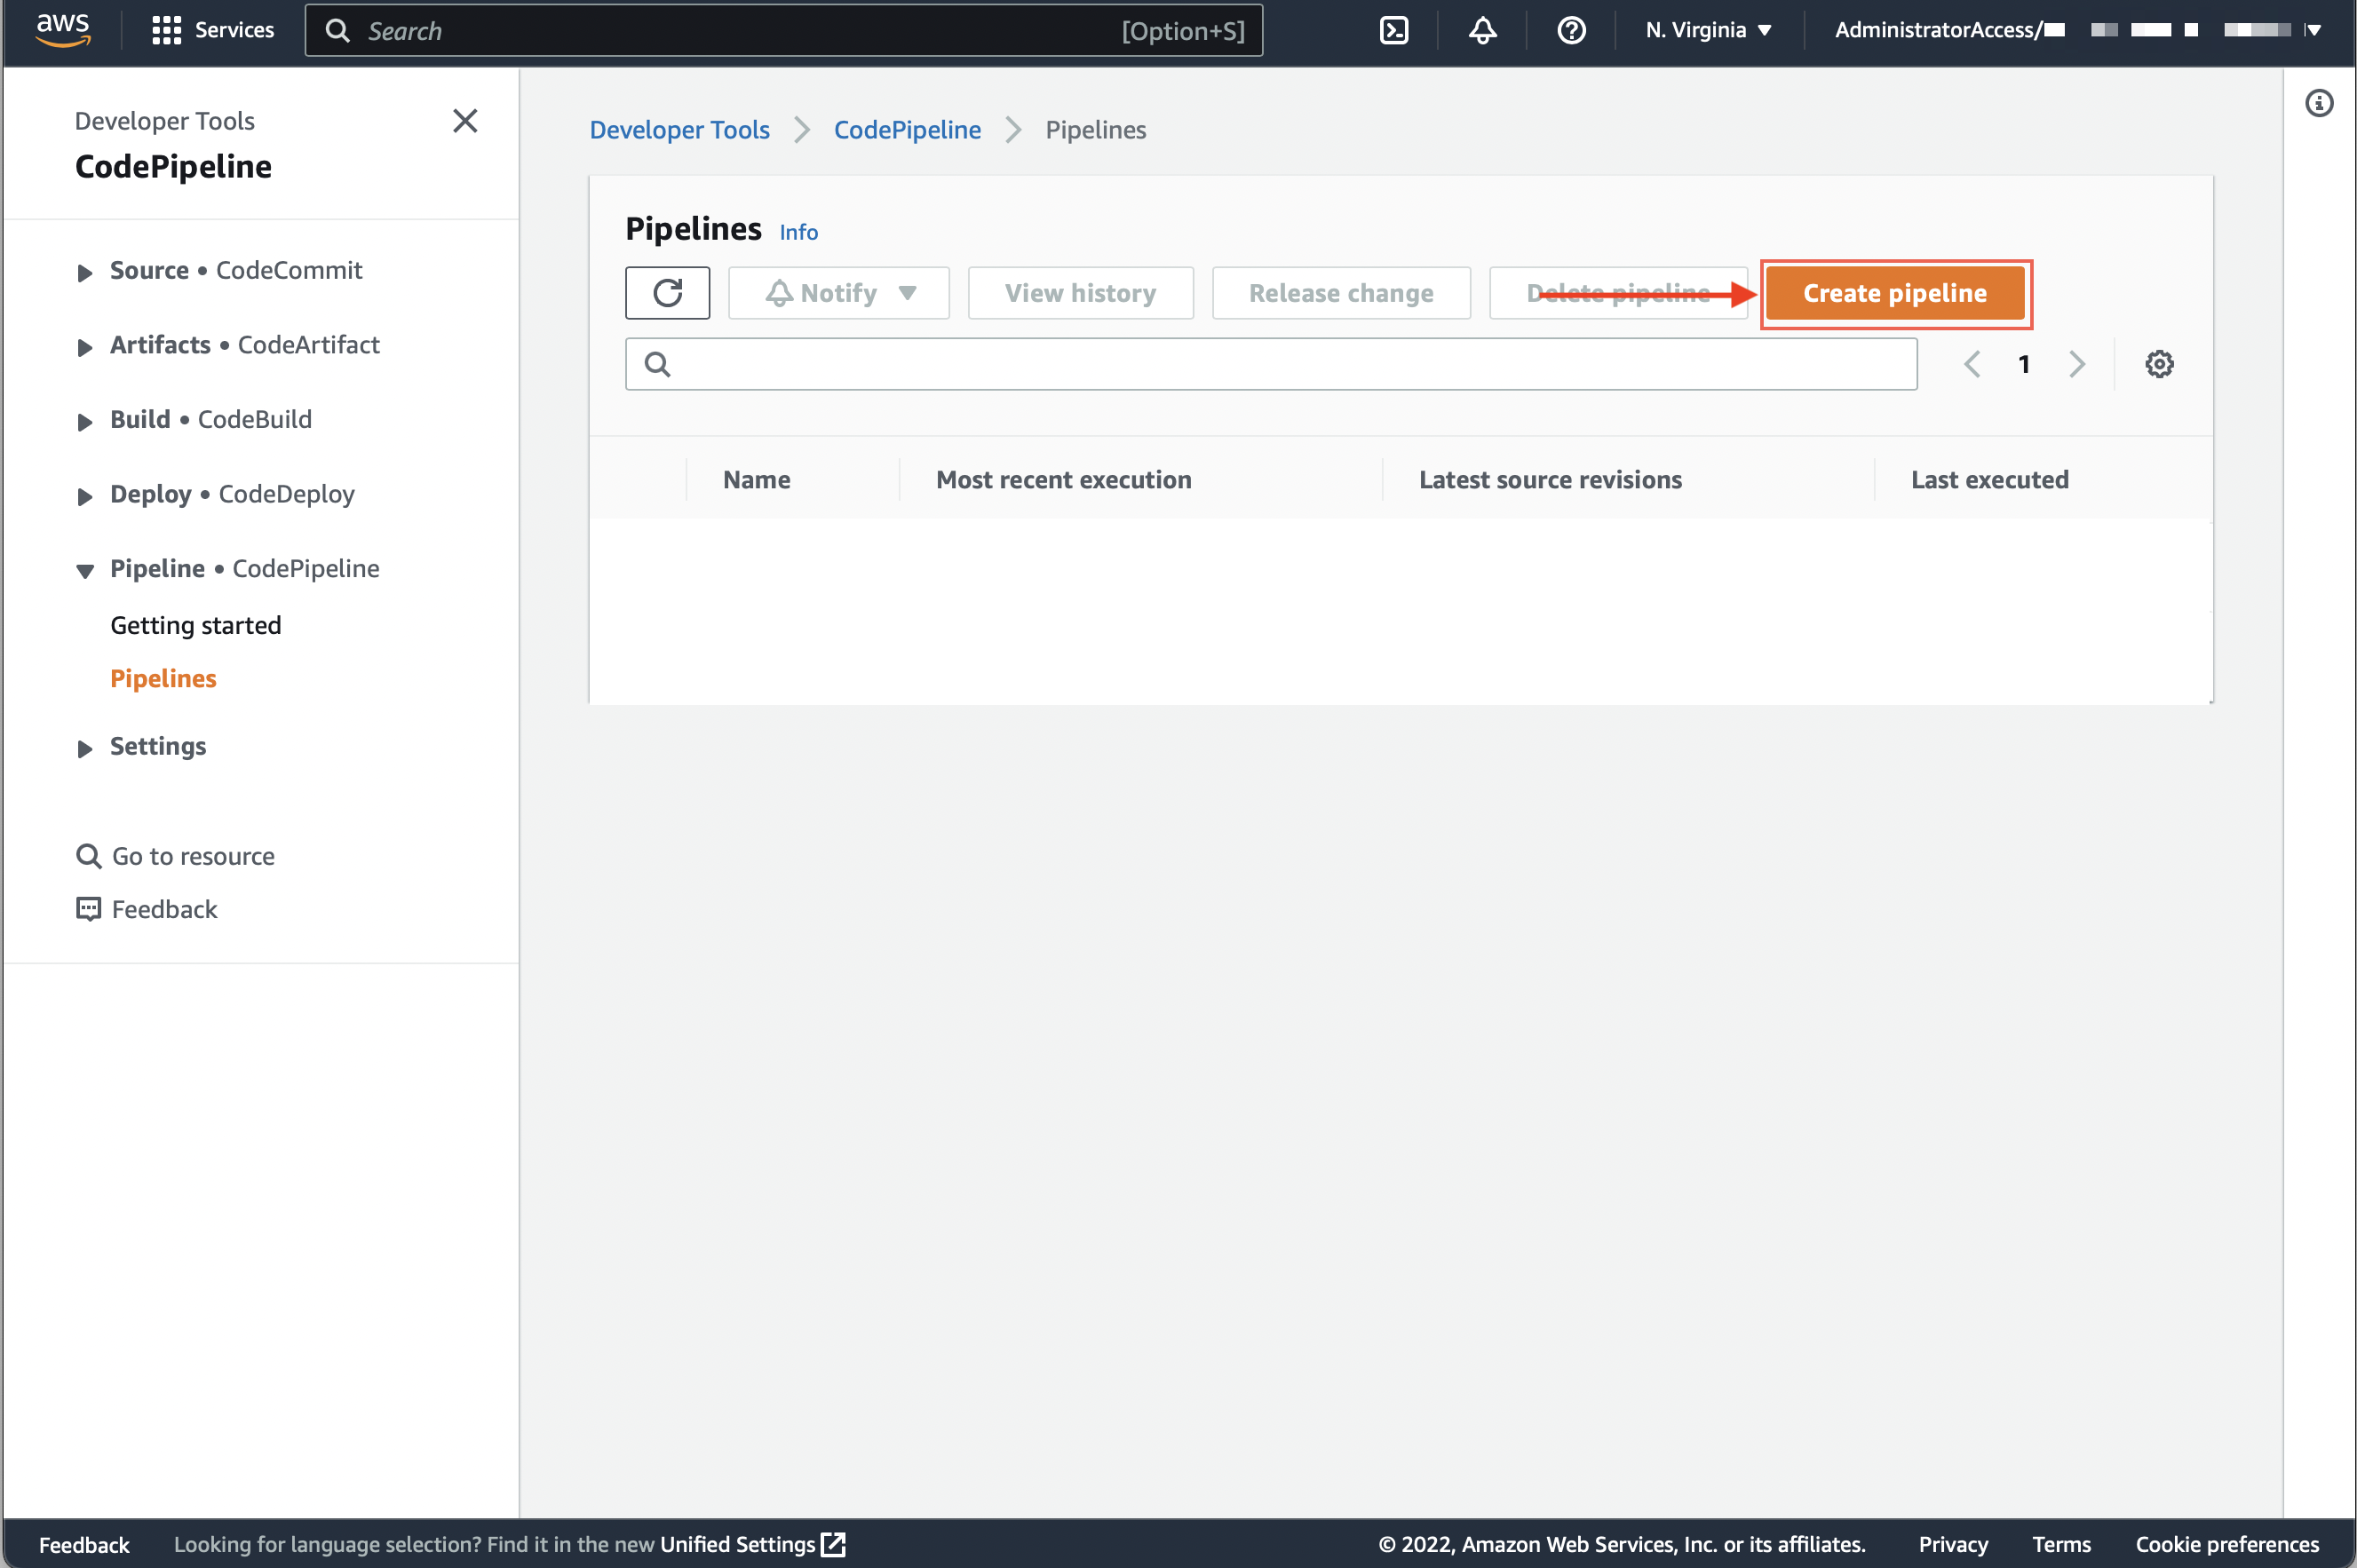
In the Developer tools Code pipeline open Code pipelines and then Pipelines section.
Click Create pipeline.
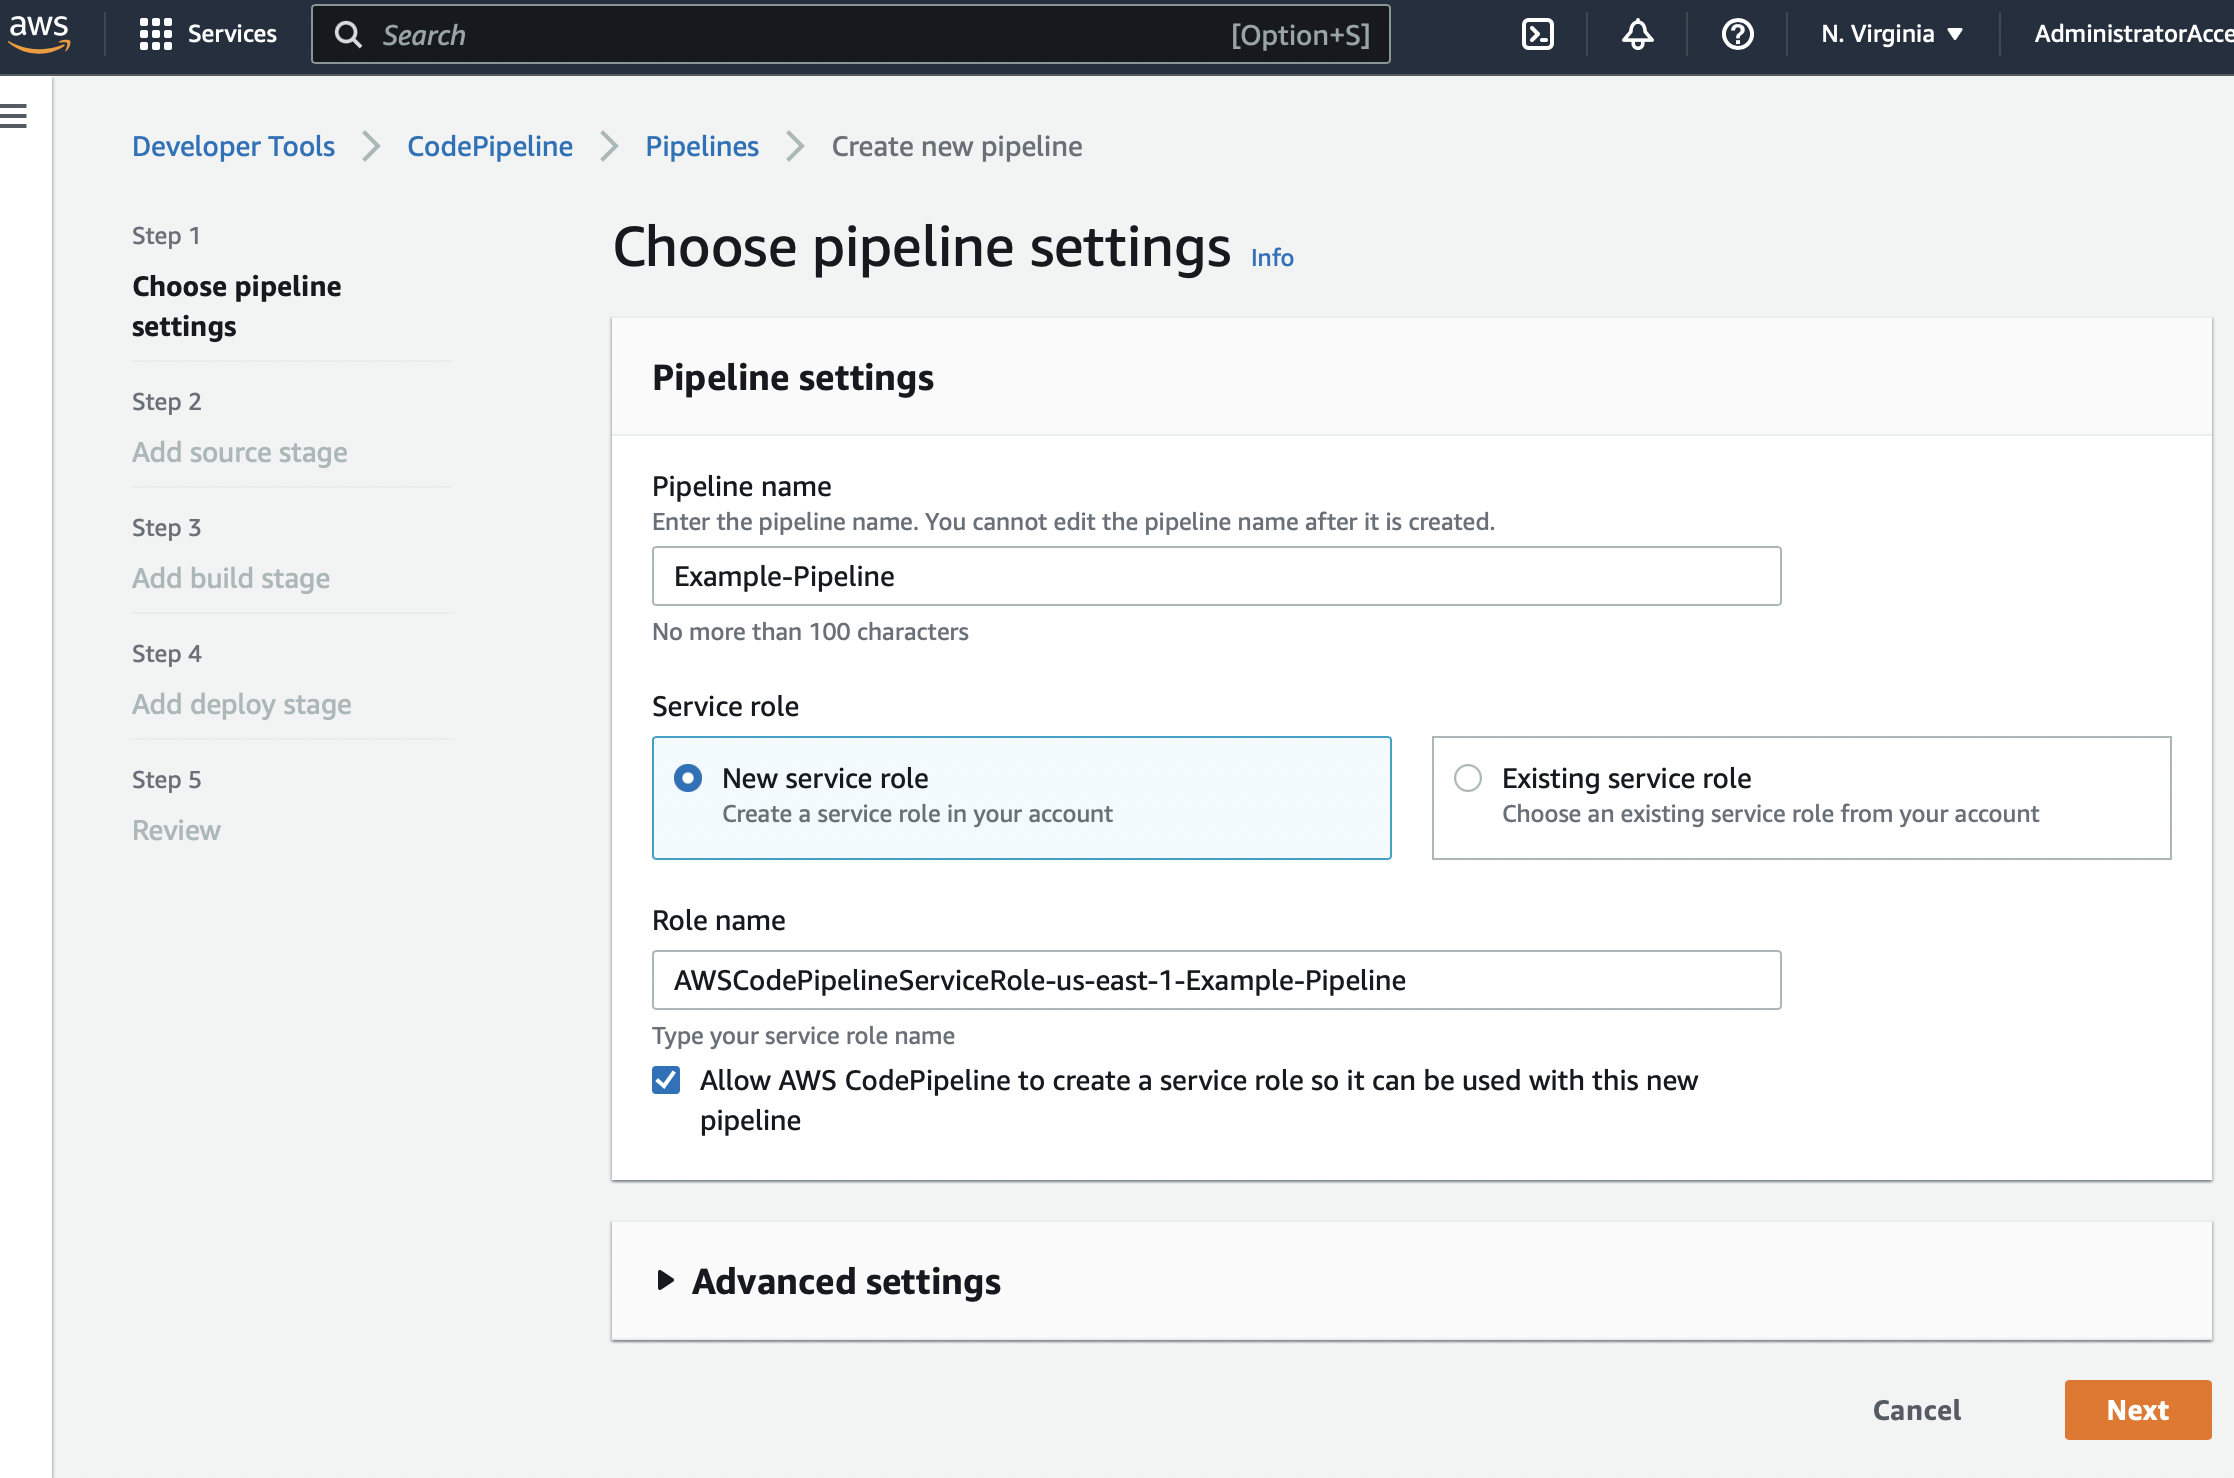
Assign a new or existing service role.
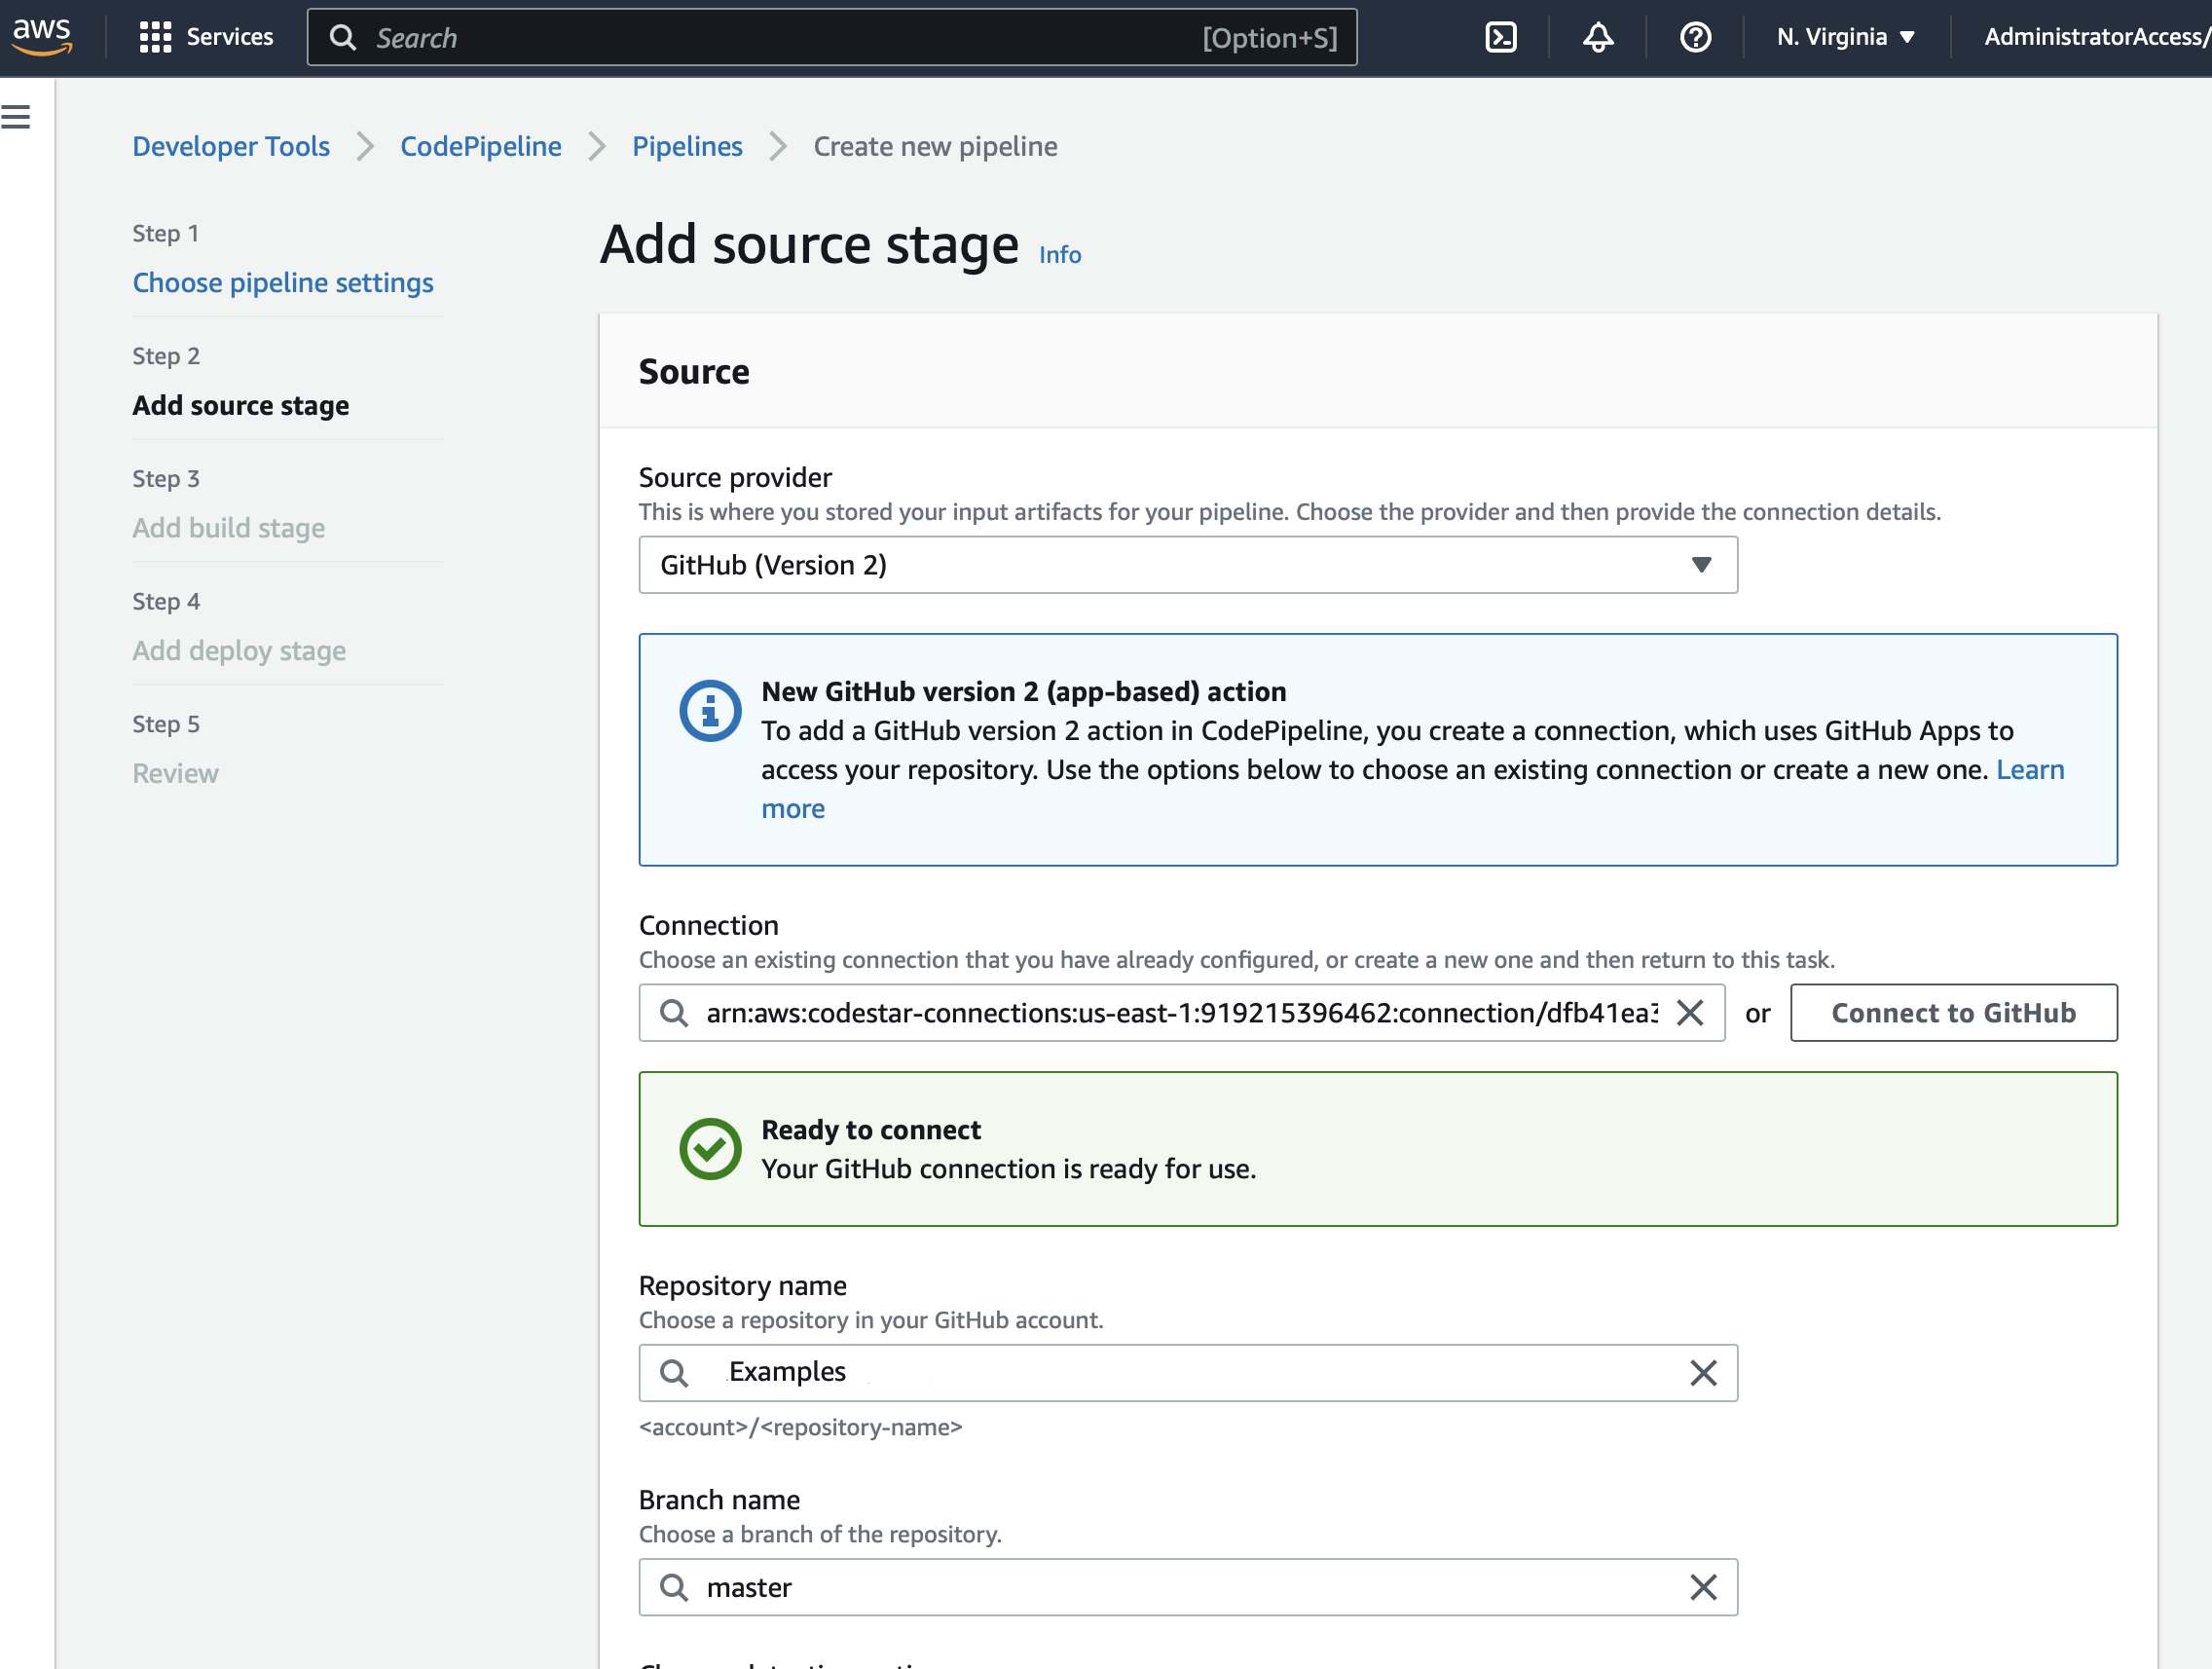
Add a repository with the code to your pipeline.
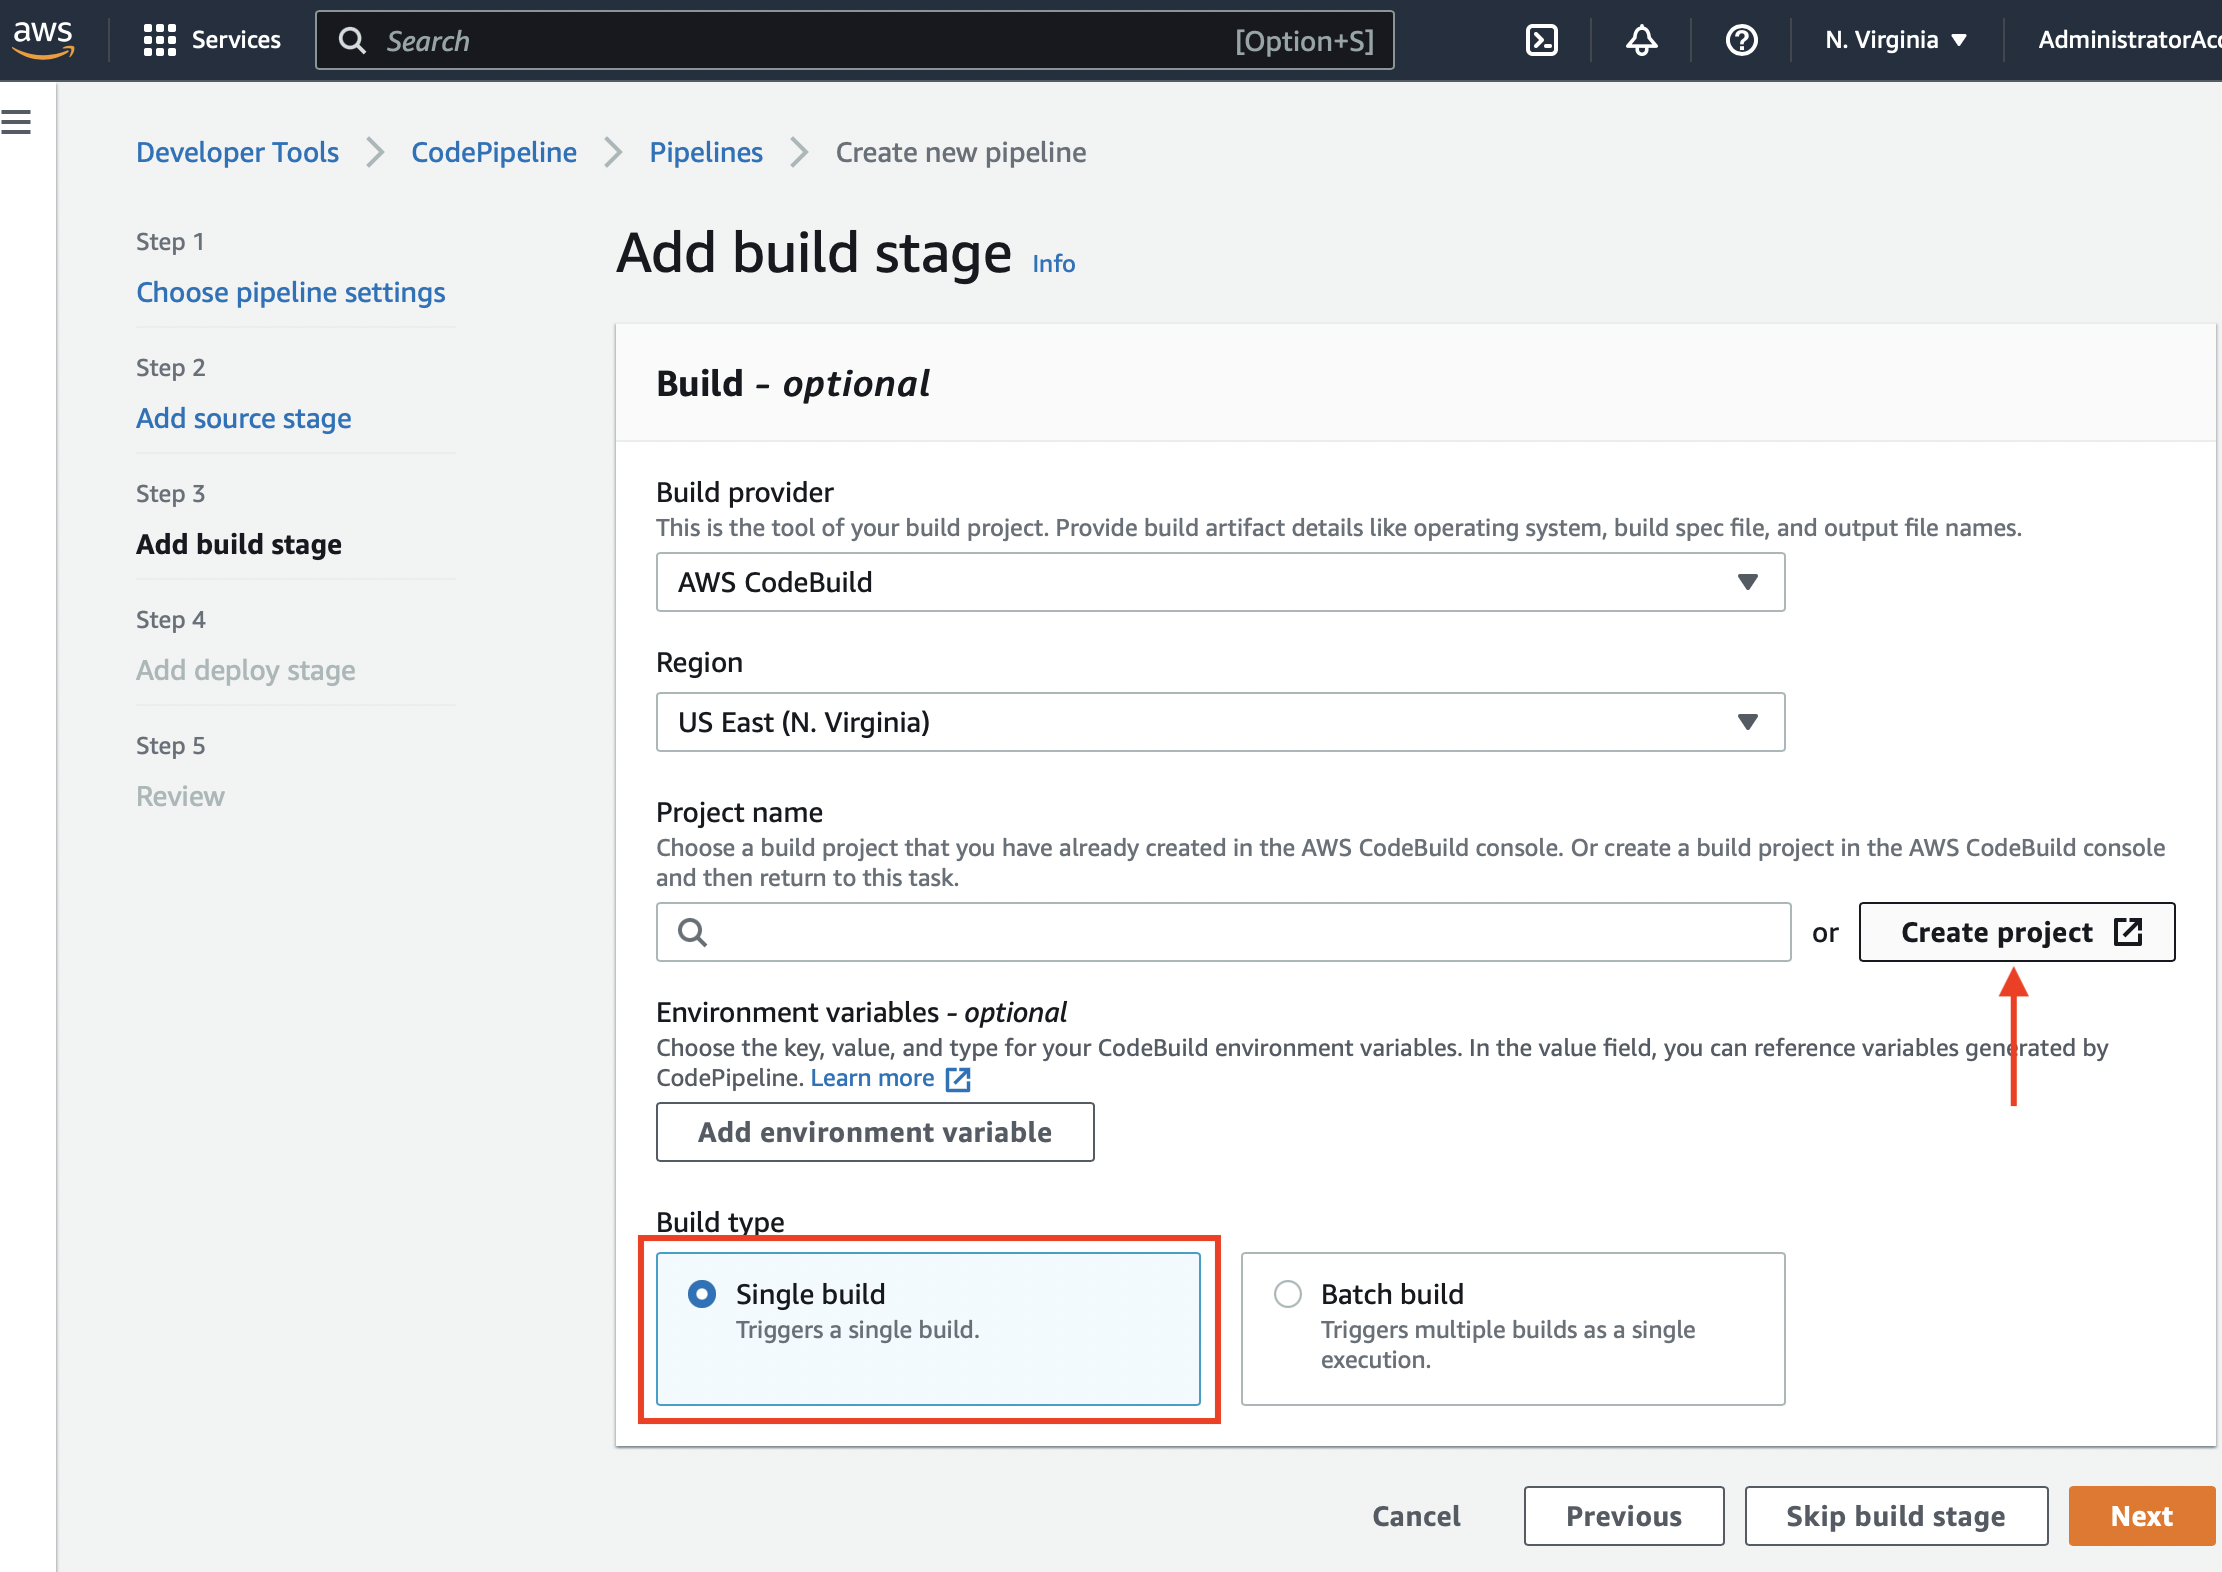
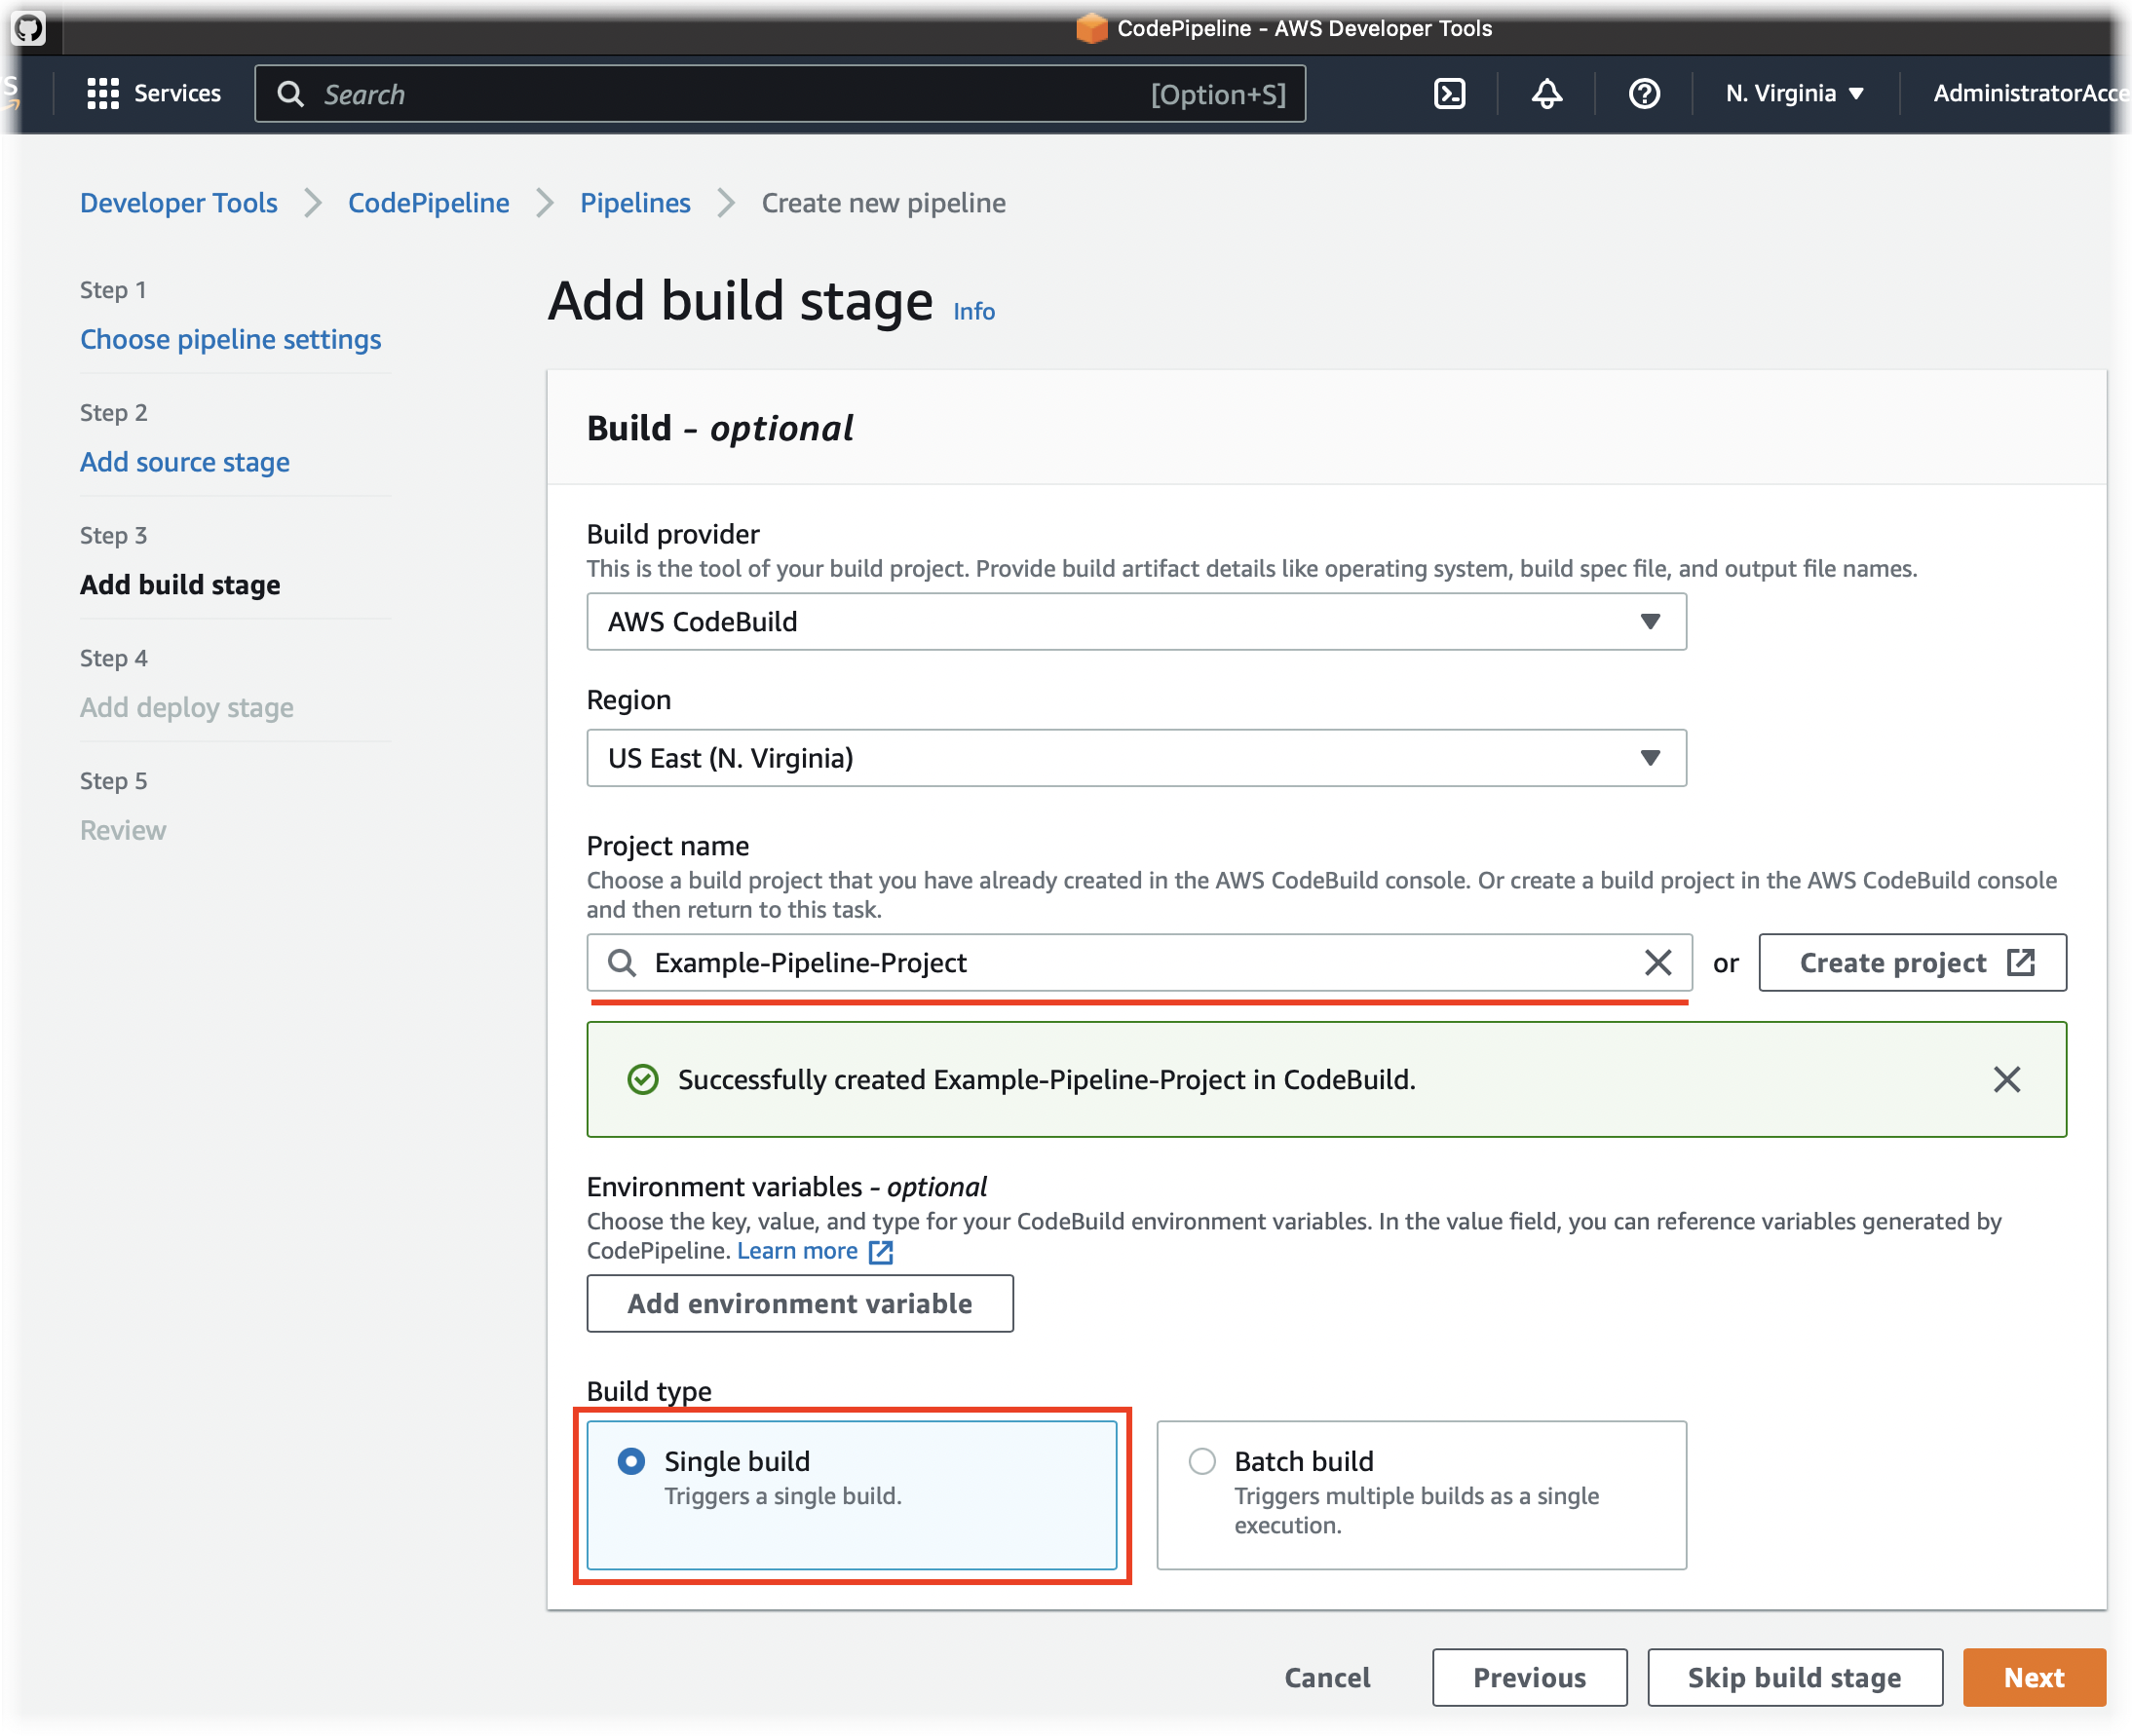
Add a build step.
Сreate a new CodeBuild project or select an existing one (in our example we'll create a new project).
When you create a new project, a new form will appear. In this window you need to set up your new project:
- Add the name for your project (it must be different from the pipeline name).
- Select the container image (OS, version with library set).
- Assign a service role. You can use an existing role for CodeBuild (please do not confuse it with CodePipeline) or create a new one, as shown in the example.
- Add other parameters specific for your build such as timeouts, resources, certificates, etc.
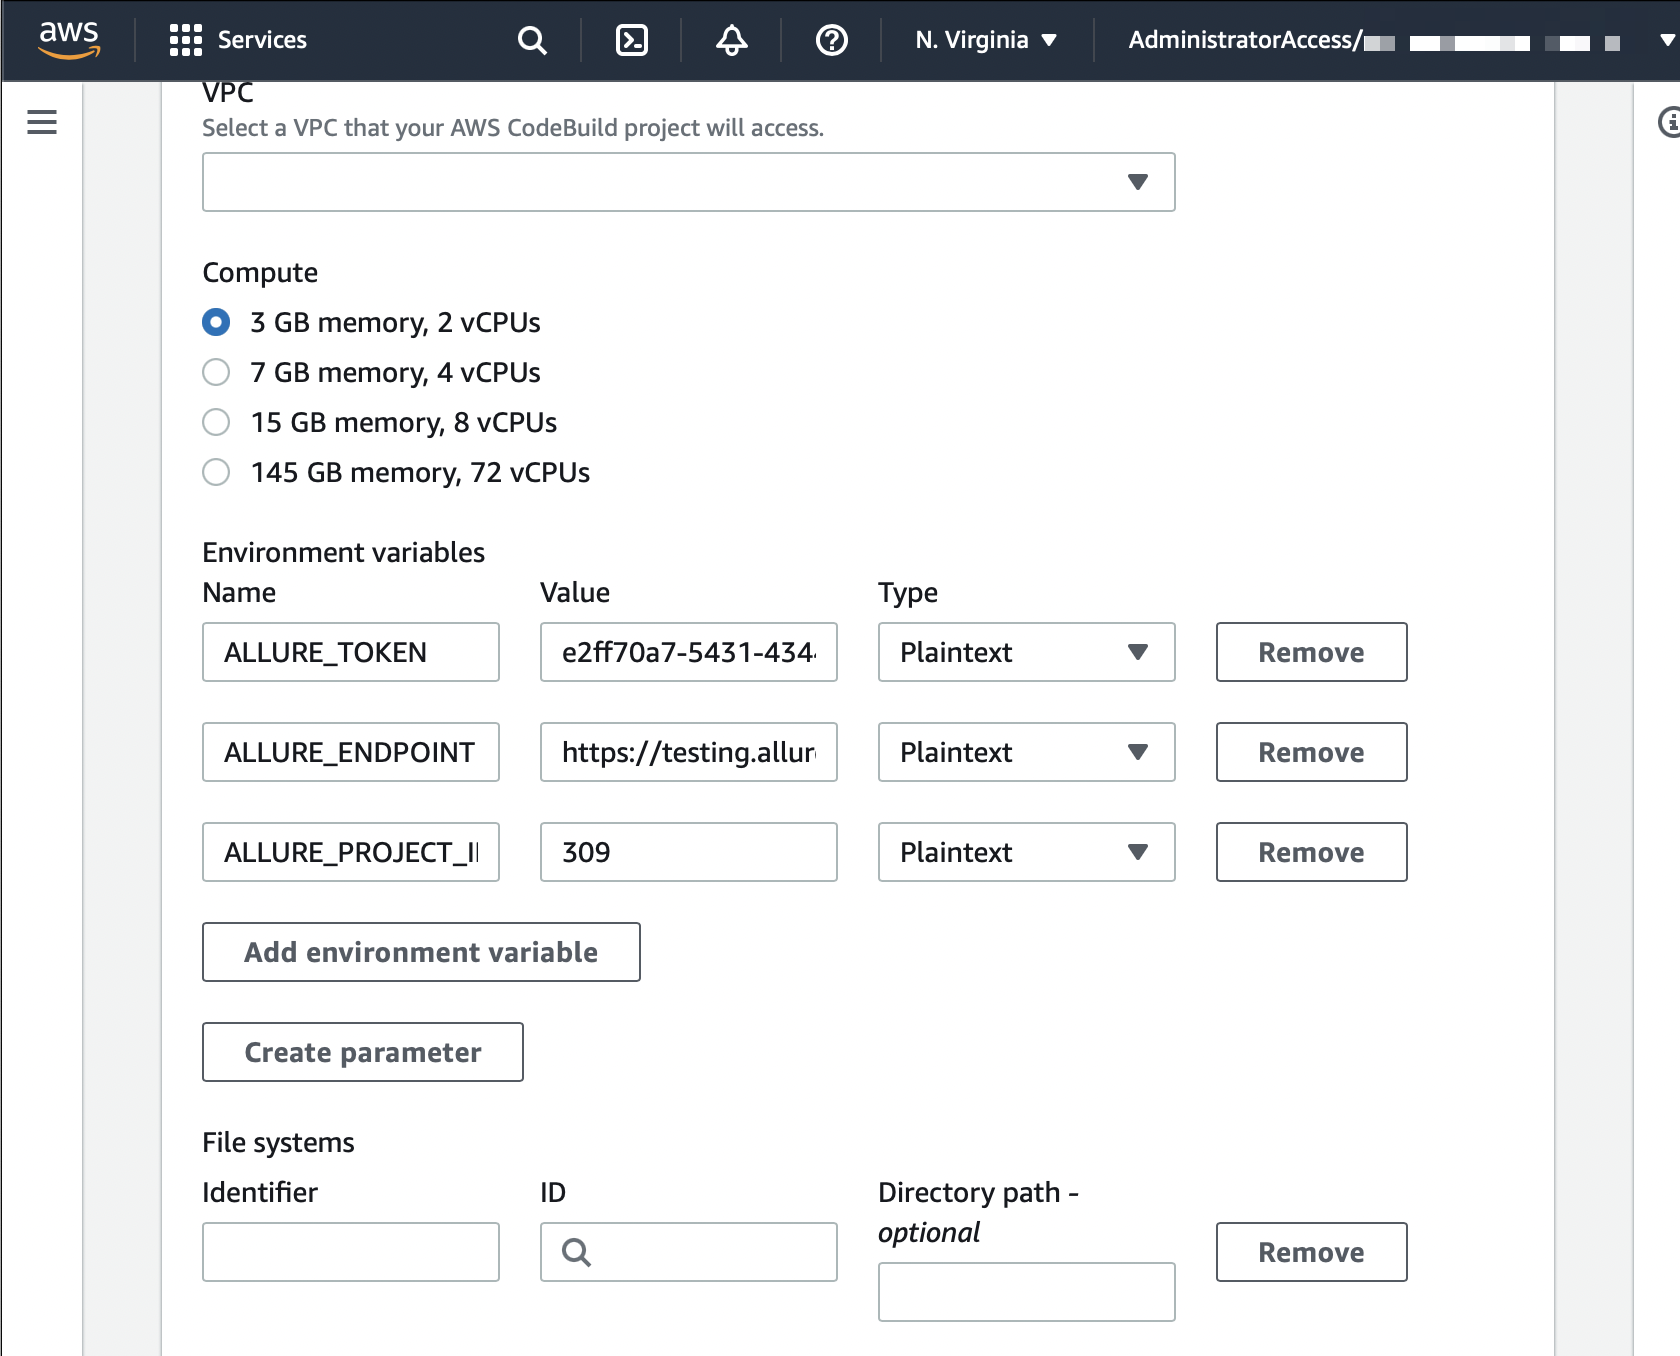
Add environment variables required for the test results upload using allurectl:
- ALLURE_ENDPOINT — the FQDN or IP address of your Allure TestOps instance;
- ALLURE_TOKEN — a personal API token generated in the user menu;
- ALLURE_PROJECT_ID — the ID of the Allure TestOps project where test results will be sent.
About API token
API token
API token will be used by allurectl running in a pipeline to authenticate/authorize your pipeline to upload the test results to Allure TestOps instance.
Log in to Allure TestOps with the account you are going to use to upload test results.
Click your avatar and go to API Tokens.
Click + Token.
Enter a name for the token (e.g., "Token for AWS") and click Create.
Allure TestOps will generate the token and display it in a modal window.
Click the Copy icon to copy the token into clipboard. Save the token in a secure location, as it cannot be retrieved through Allure TestOps.
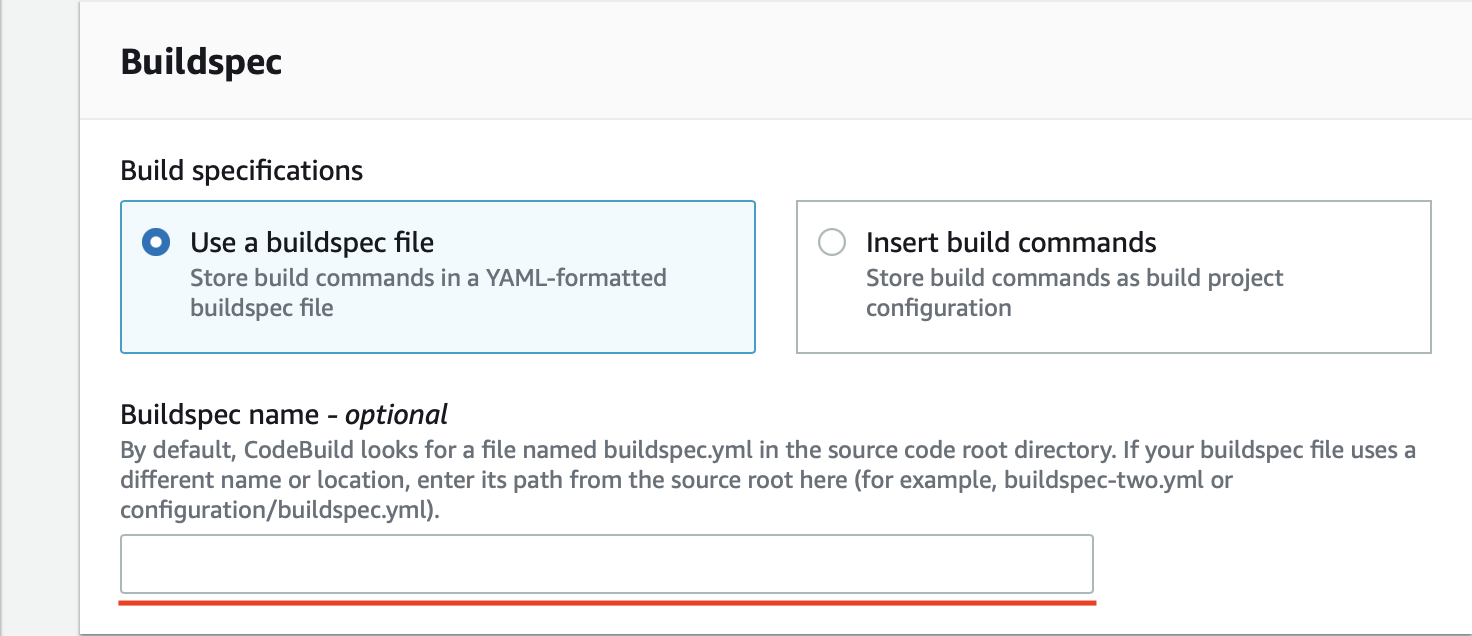
YAML spec
Next, you need to specify the path to the AWS YAML specification:
- The default location is
/buildspec.yml. - You can specify a different location if the YAML file is not stored in the root of your repository.
Then click CodeBuild. The window will close, and you will return to the pipeline creation page.
Choose what type of build you need. Check that everything is in place and click Next.
Depending on your process you can either skip creating of the Deploy stage or set it up if a Deploy is needed. This is out of the scope of the integration with Allure TestOps.
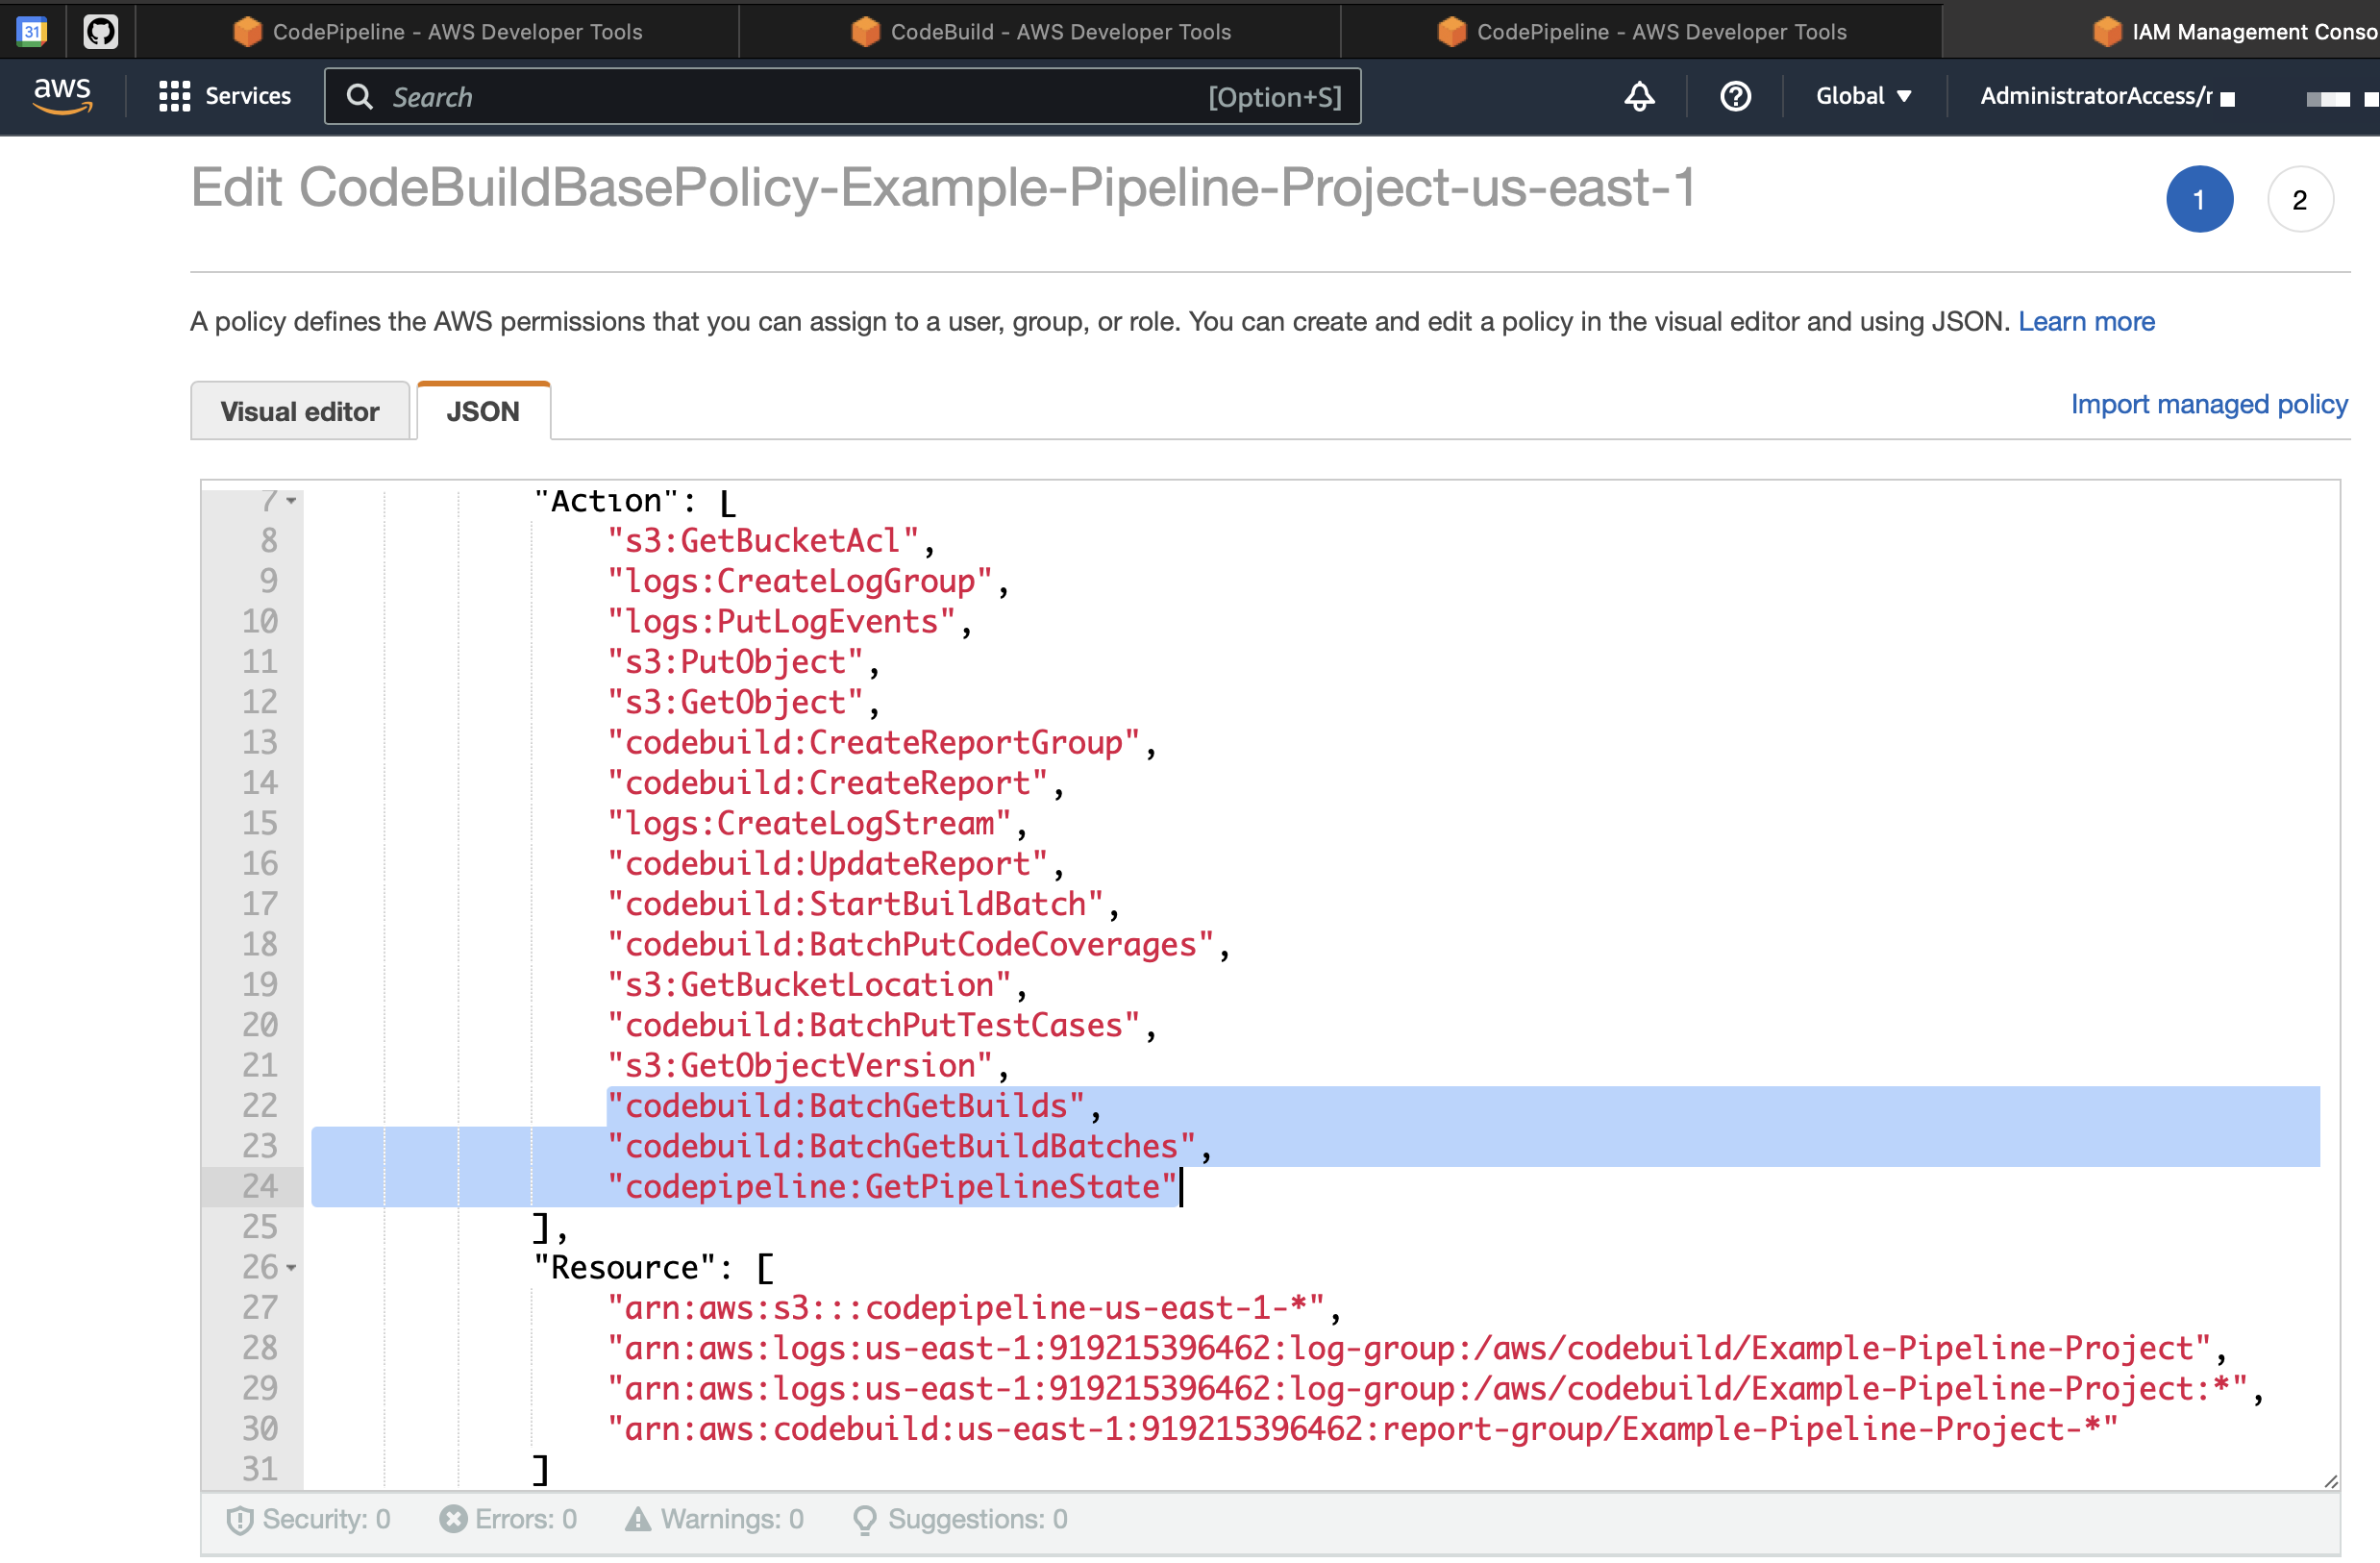
Set up of the service role for CodeBuild
From the main page open IAM section and proceed to Roles tab.
Search for the service role you are using in CodeBuild and select it for the editing.
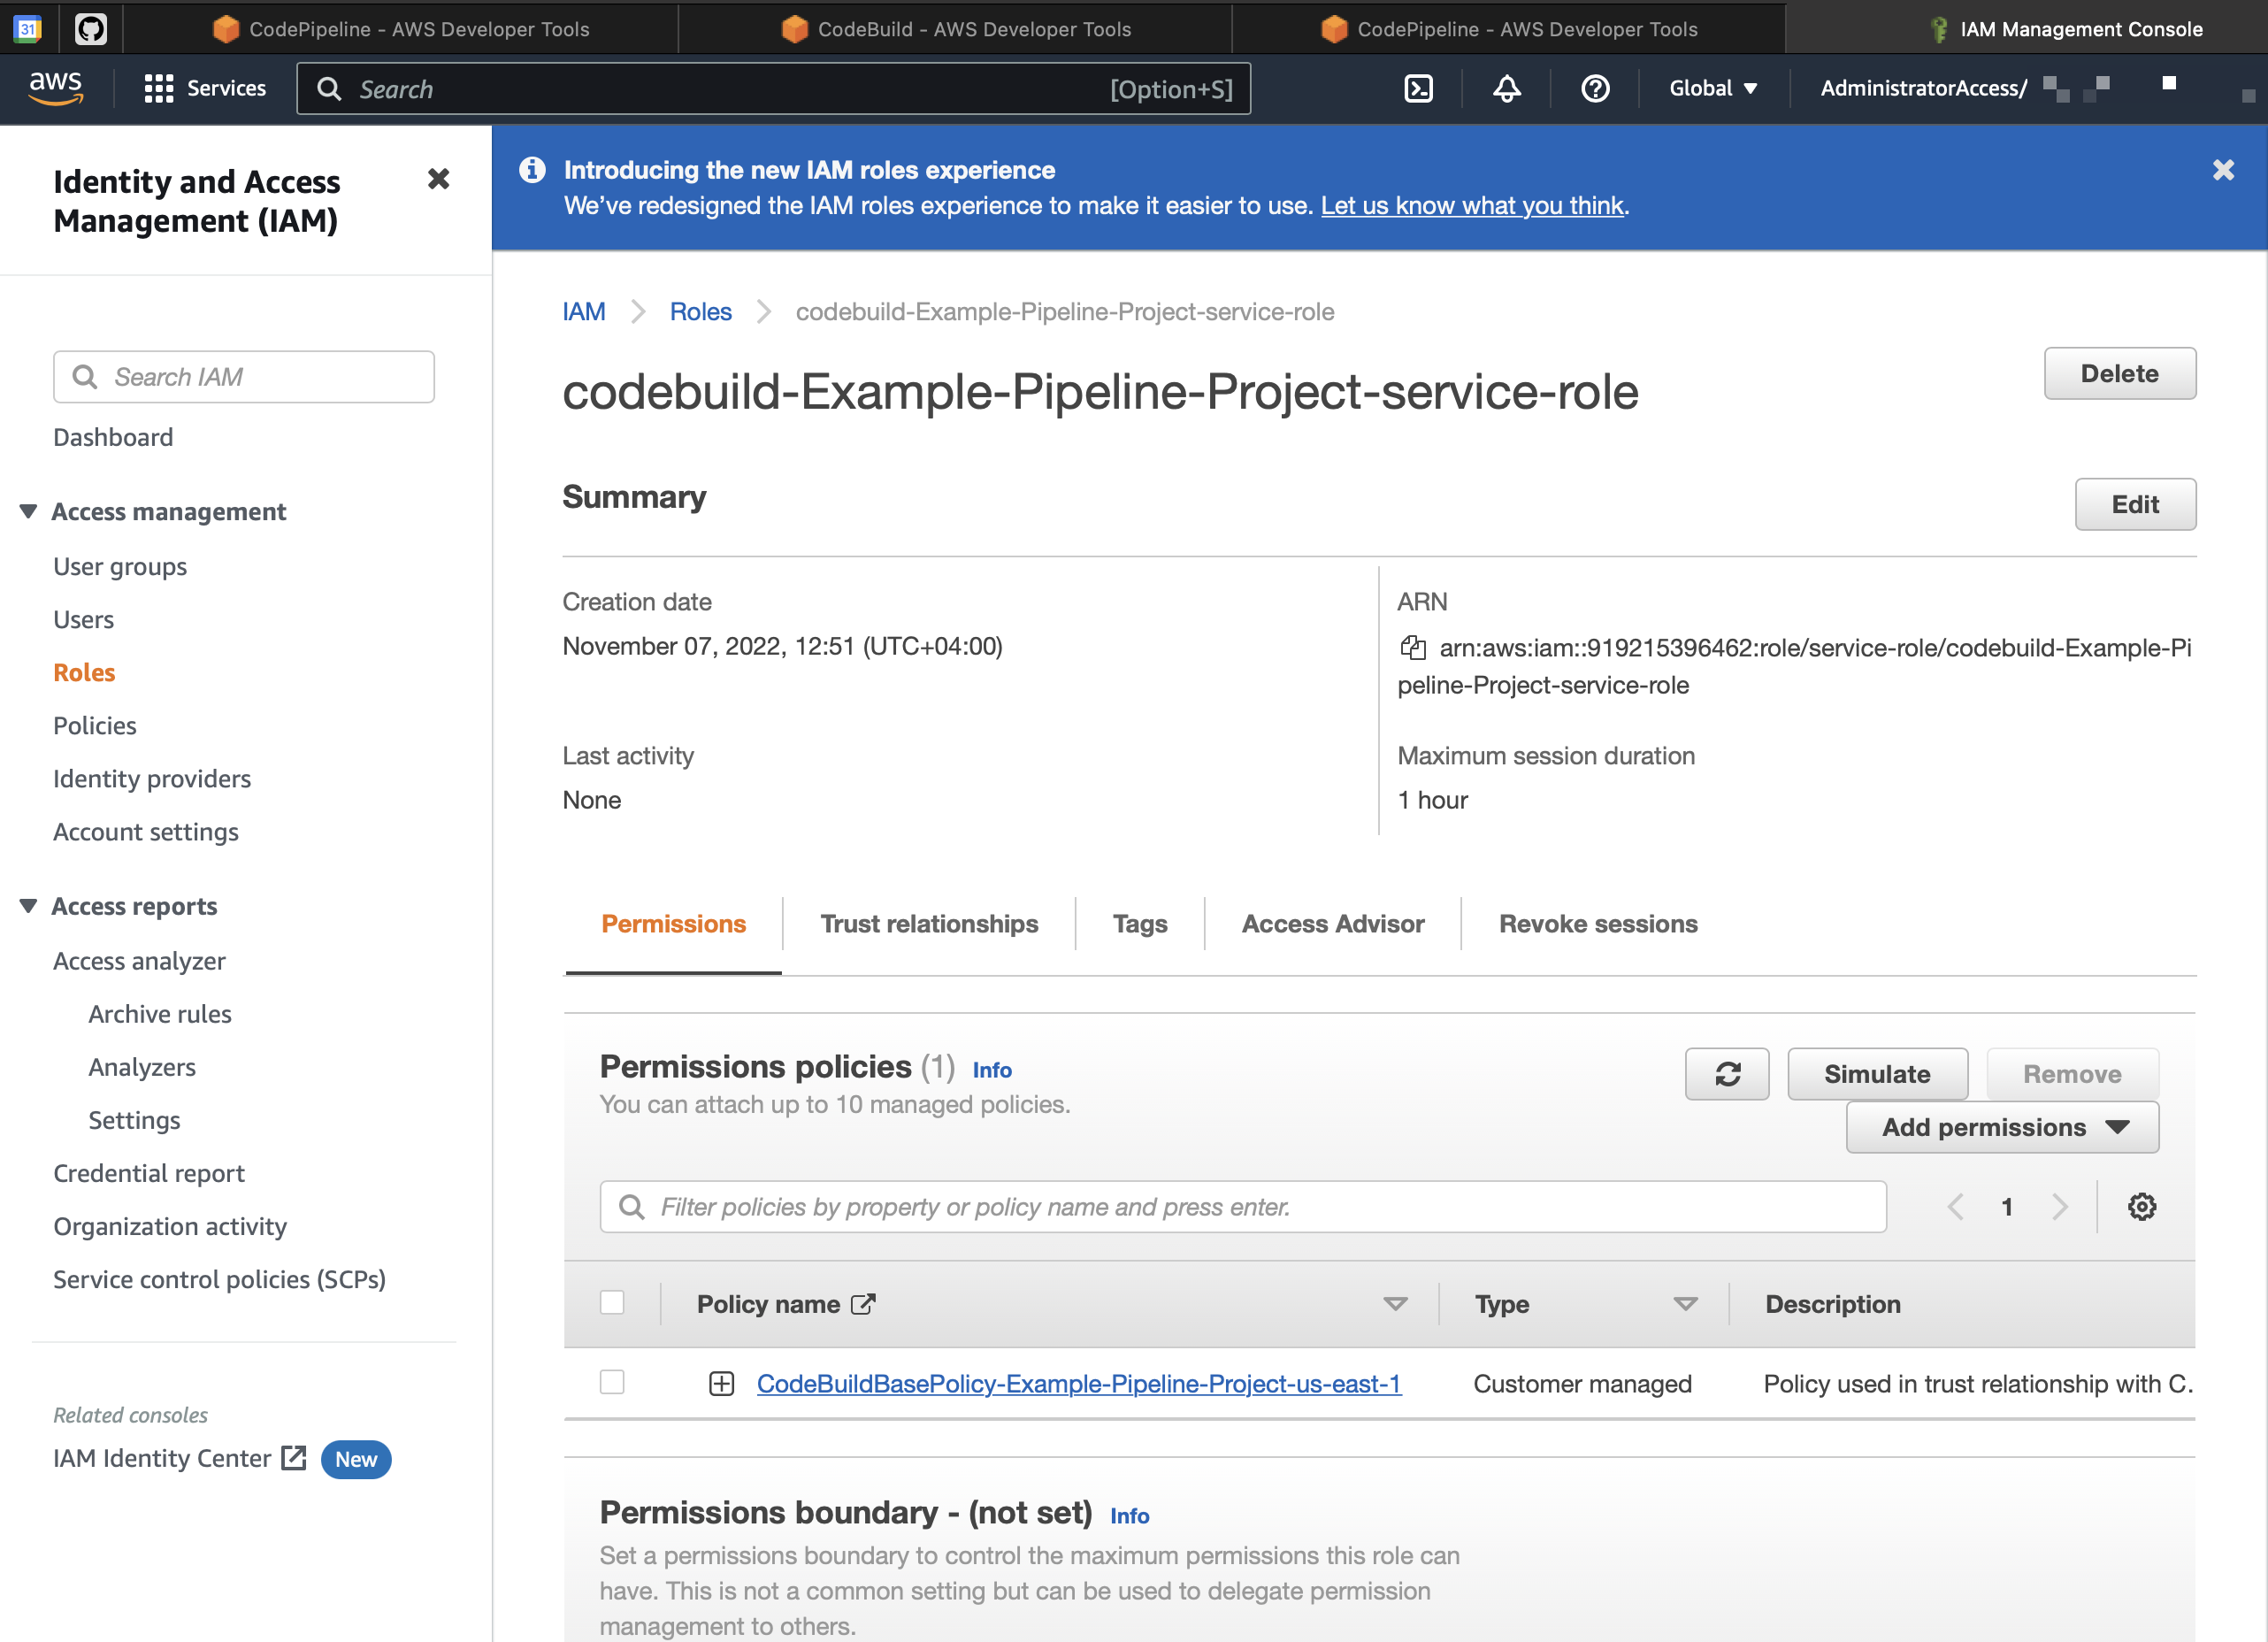
Add three roles:
codebuild:BatchGetBuilds,codebuild:BatchGetBuildBatches,codepipeline:GetPipelineState.
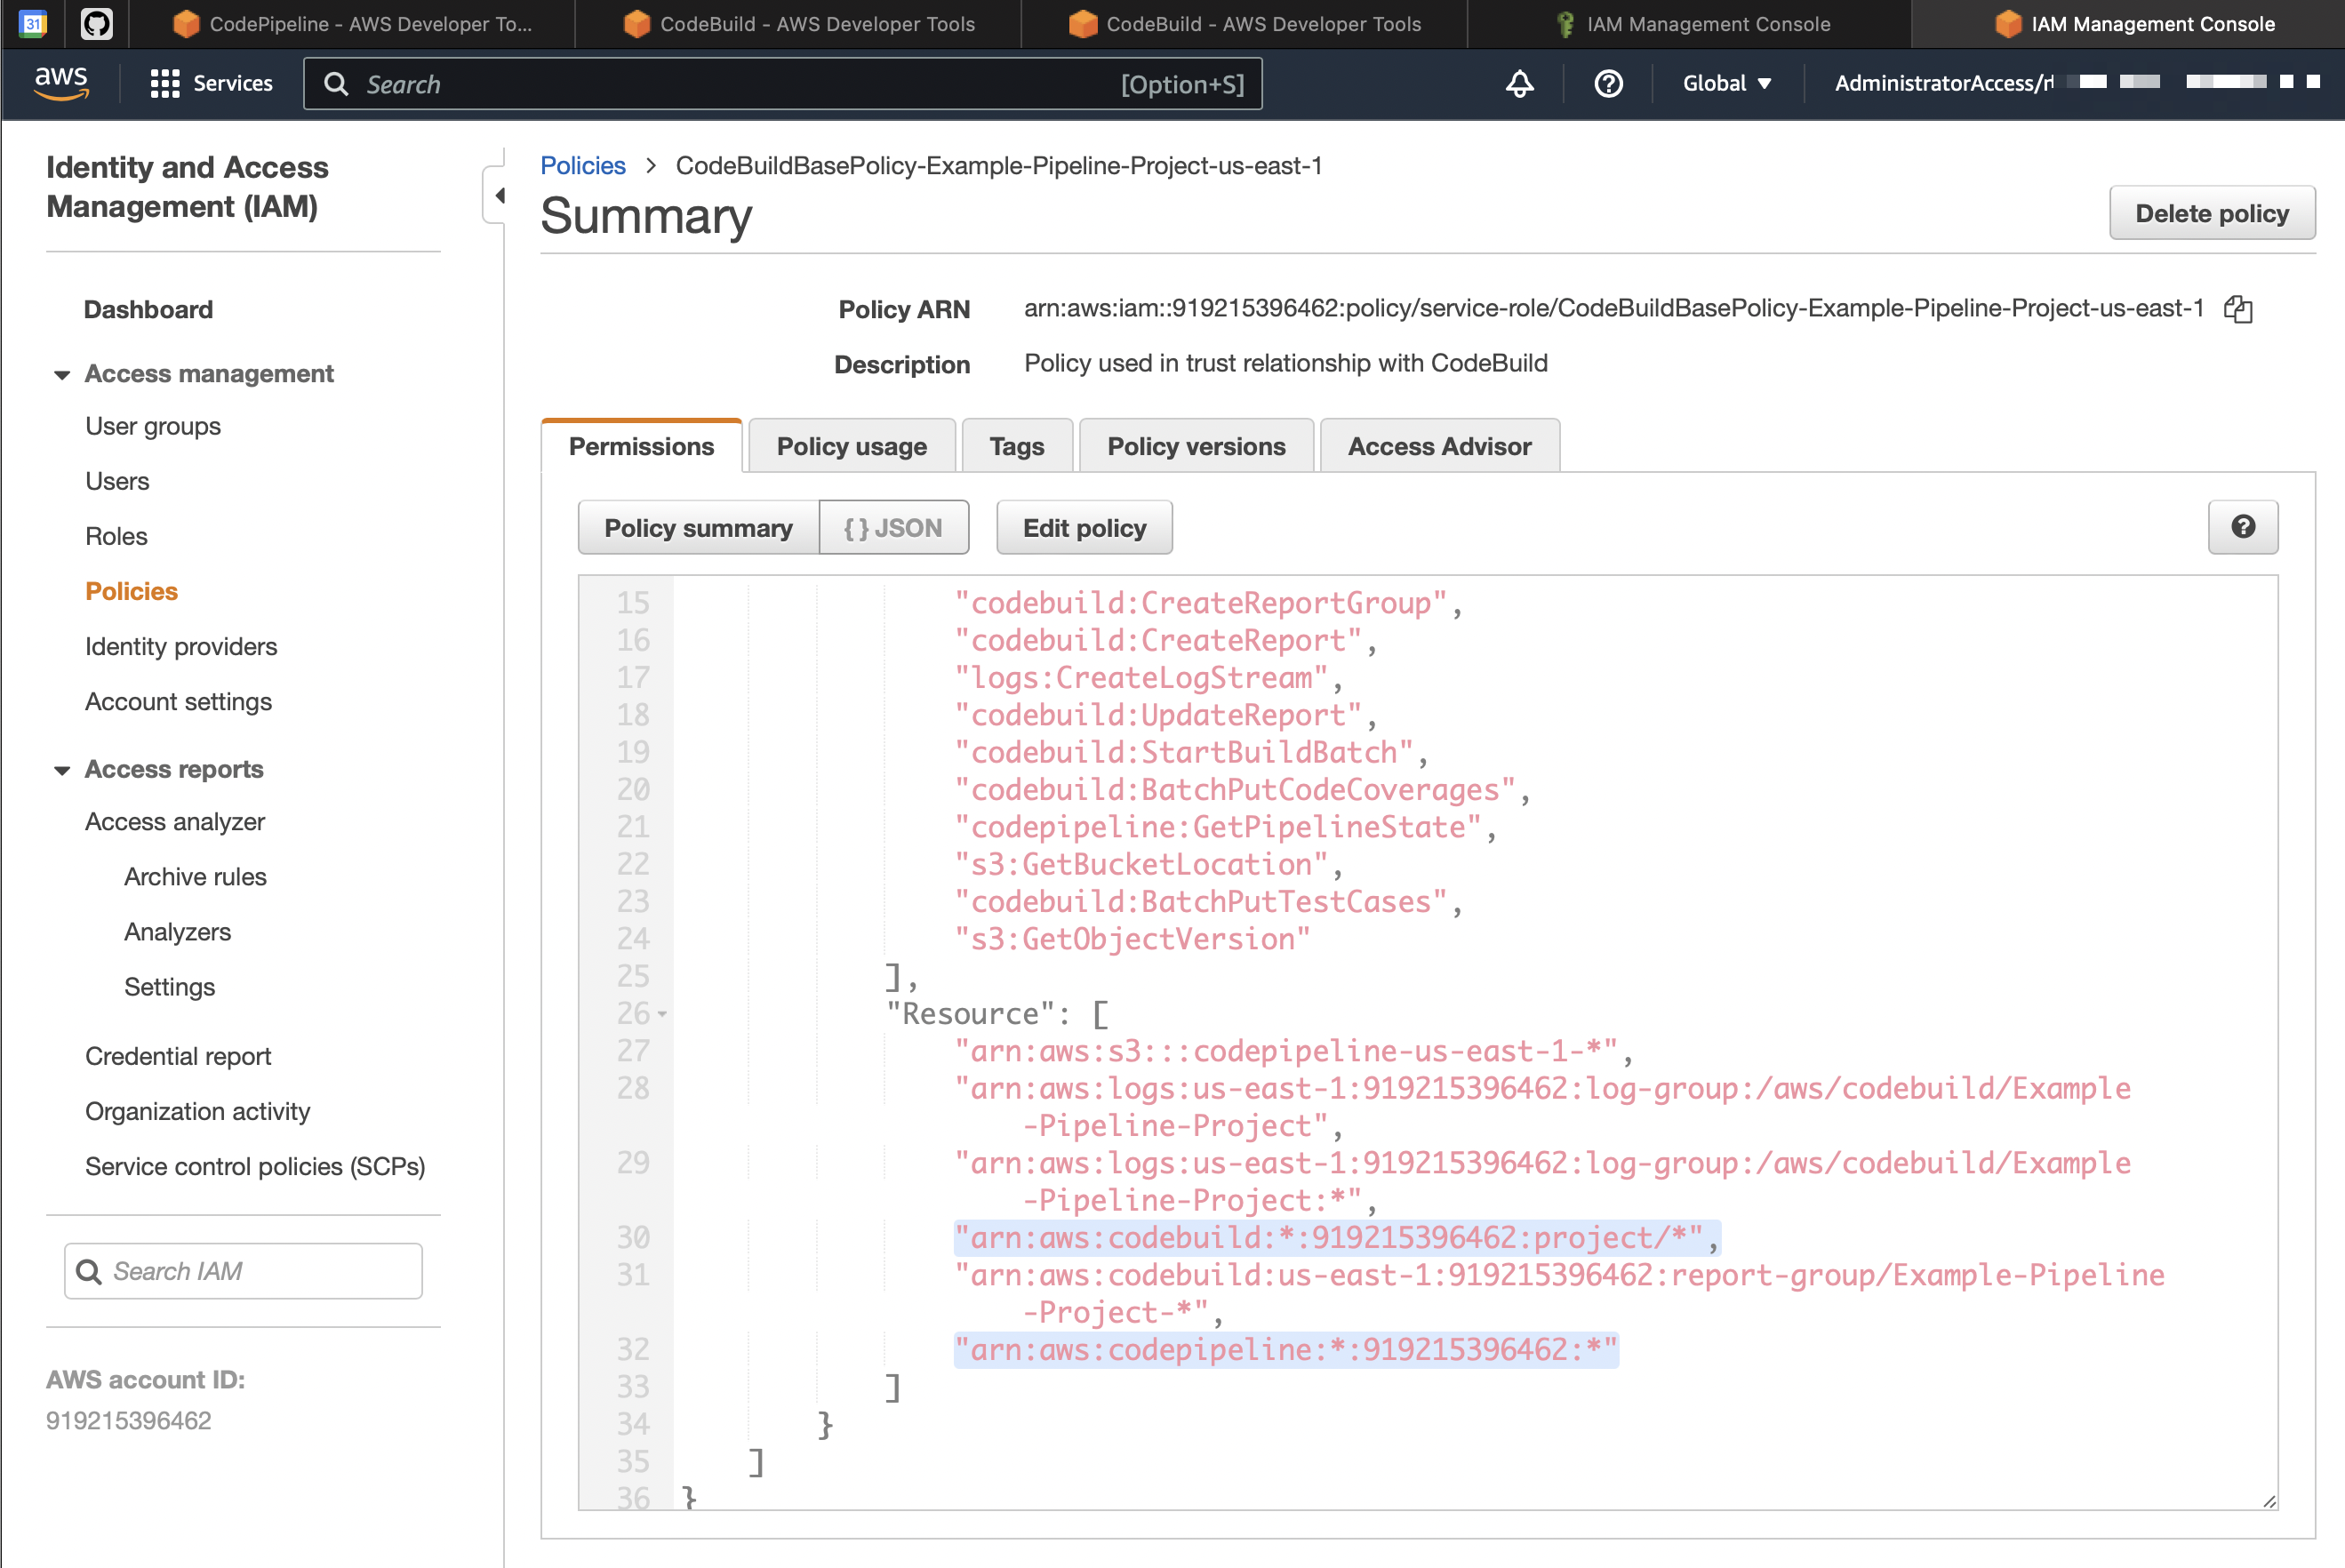
Then specify the resources to which these rules apply:
- all projects for codebuild;
- all projects for codepipeline.
Depending on your security policies the settings could be more granular.
Run your pipeline and send test results to Allure TestOps
allurectl
Use allurectl to upload test results to Allure TestOps.
Add allurectl to the pipeline or download it there at one of the pipeline stage execution.
