Running an automated test case
Automated test cases are test cases that are executed automatically using testing frameworks and other specialized tools. Unlike manual test cases, automated test cases cannot be created directly using the Allure TestOps interface.
Each automated test case is a code written in a programming language, which when executed, generates test results that can be uploaded to Allure TestOps. Upon upload, Allure TestOps creates new test cases in its interface or updates the existing ones with the new results.
Allure TestOps supports several test result formats, but for most cases, we recommend using our internal format, which supports all Allure TestOps features. In order to use it, you can install an officially supported adapter for your testing framework.
Uploading test results
Test results can be uploaded to Allure TestOps both manually and automatically. For automatic upload, you can use the dedicated CLI application (allurectl) or a plugin for a selected CI system.
In addition to the main information, such as the status and duration of the test, each test result contains a unique ID of the test case. To generate this ID, adapter uses a test case identifier if it is provided by the testing framework or other available data, such as the function signature. If the generated ID already exists in the system, instead of creating a new test case, Allure TestOps will update an existing test case with the new data. You can learn more on how test results are matched to test cases in a separate article.
If you are using one of the official adapters, after running the tests, you can find the test results in the directory allure-results or build/allure-results.
For the purposes of this tutorial, you can download an example project, run it, and upload the resulting files.
Manual upload
To upload test results manually:
Open your project.
Go to Launches.
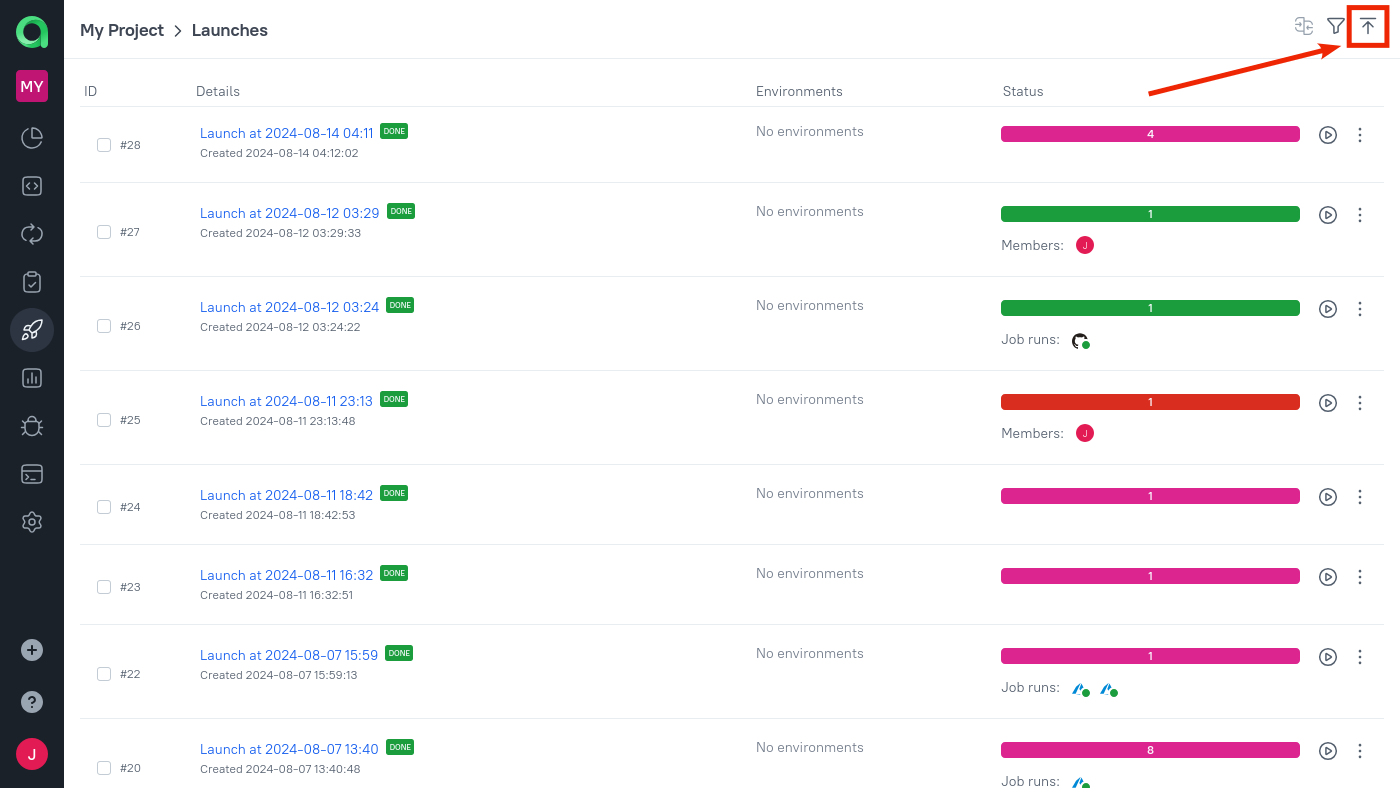
In the upper-right corner of the screen, click Import.
A window will appear in which you can select files for the upload. To do this, click the upload area on the right side and select the files or drag and drop them to the upload area.
Test results can be uploaded either as individual files or as a ZIP archive.
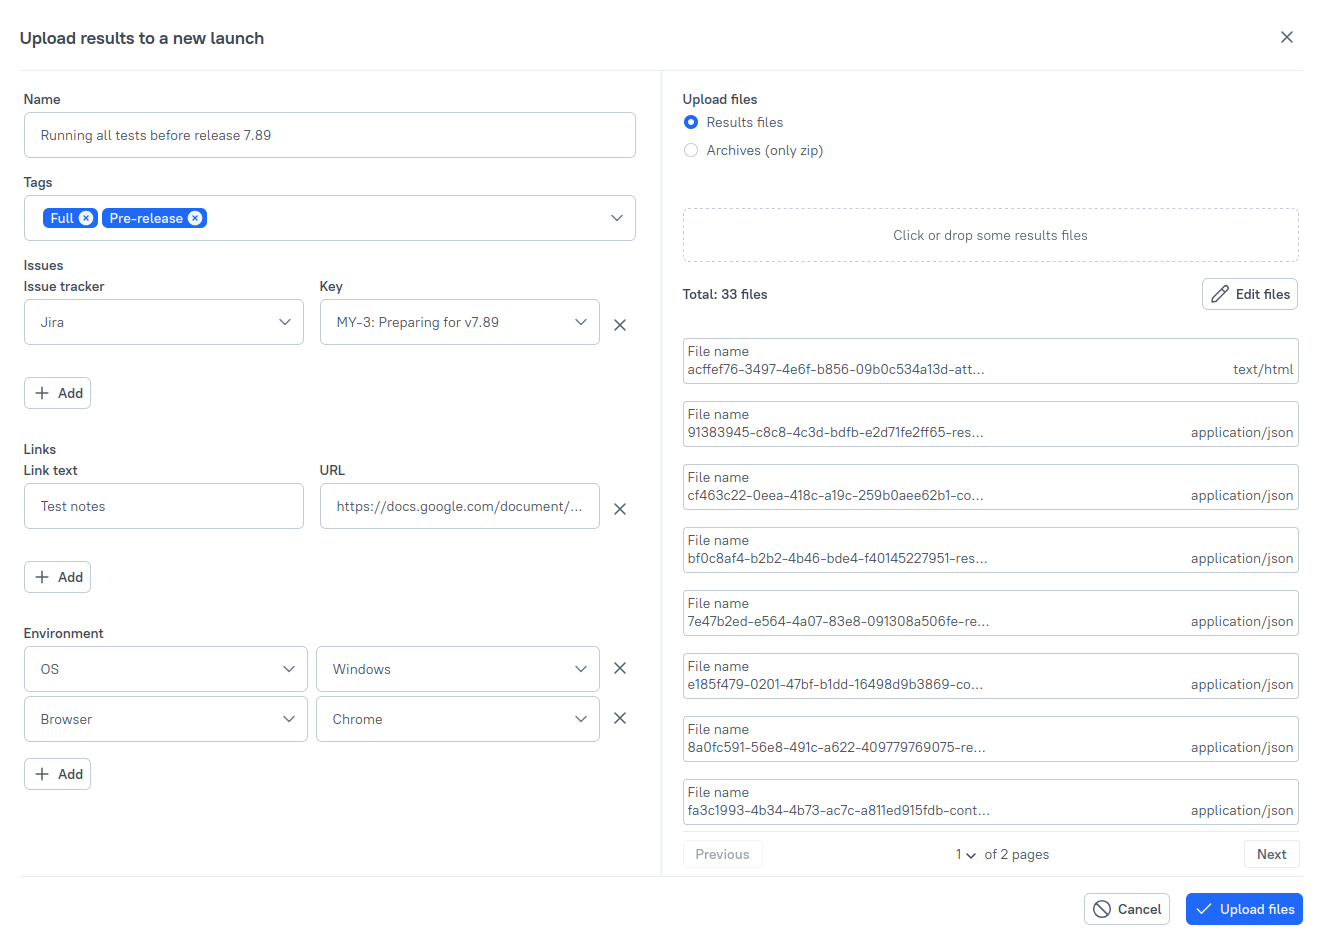
Optionally, you can change the name and other attributes of the launch. See Launches for more information.
Click Upload files.
After a few moments, a new launch should appear in the list with an Open status. This status means that the launch has not yet been processed by Allure TestOps and can be modified (e.g., you can add more test results to it, change the attributes, etc.). Only after you close the launch Allure TestOps will create or update the corresponding automated test cases.
To close the launch, click the Close launch icon to the right of it.
Automatic upload
As automated tests are usually run on CI systems, such as Jenkins or GitHub Actions, it would be reasonable to automate the process of uploading the test results as well. To do this, you can install a plugin for your CI system if it is supported or use a CLI application as a more universal solution.
Using plugins
Plugins are usually more convenient and have more features such as the ability to run CI pipelines from the Allure TestOps interface. You can find the list of supported CI systems and plugin installation instructions in the Integrations with external systems article.
If your CI system is not supported or if you prefer to use a CLI application, you can use allurectl to upload test results.
Using allurectl
To start using allurectl:
- Download the file for your platform.
- Create an API token for allurectl in Allure TestOps.
Then, run the tests and call allurectl to upload the results:
allurectl upload <directory> -e <instance> -t <token> --project-id <project>
where:
<directory>— directory containing test result files;<instance>— URL of your Allure TestOps instance;<token>— API token created in Allure TestOps;<project>— ID of your project in Allure TestOps.
You can also use the watch command instead of upload to upload test results as soon as they appear and use environment variables instead of command-line arguments. For more information on using allurectl, see Command-line tool - allurectl.
After uploading the test results, close the launch.
Running pipelines from Allure TestOps
If you have installed a plugin for your CI system, you can run CI pipelines directly from the Allure TestOps interface:
Open your project.
Go to Test cases.
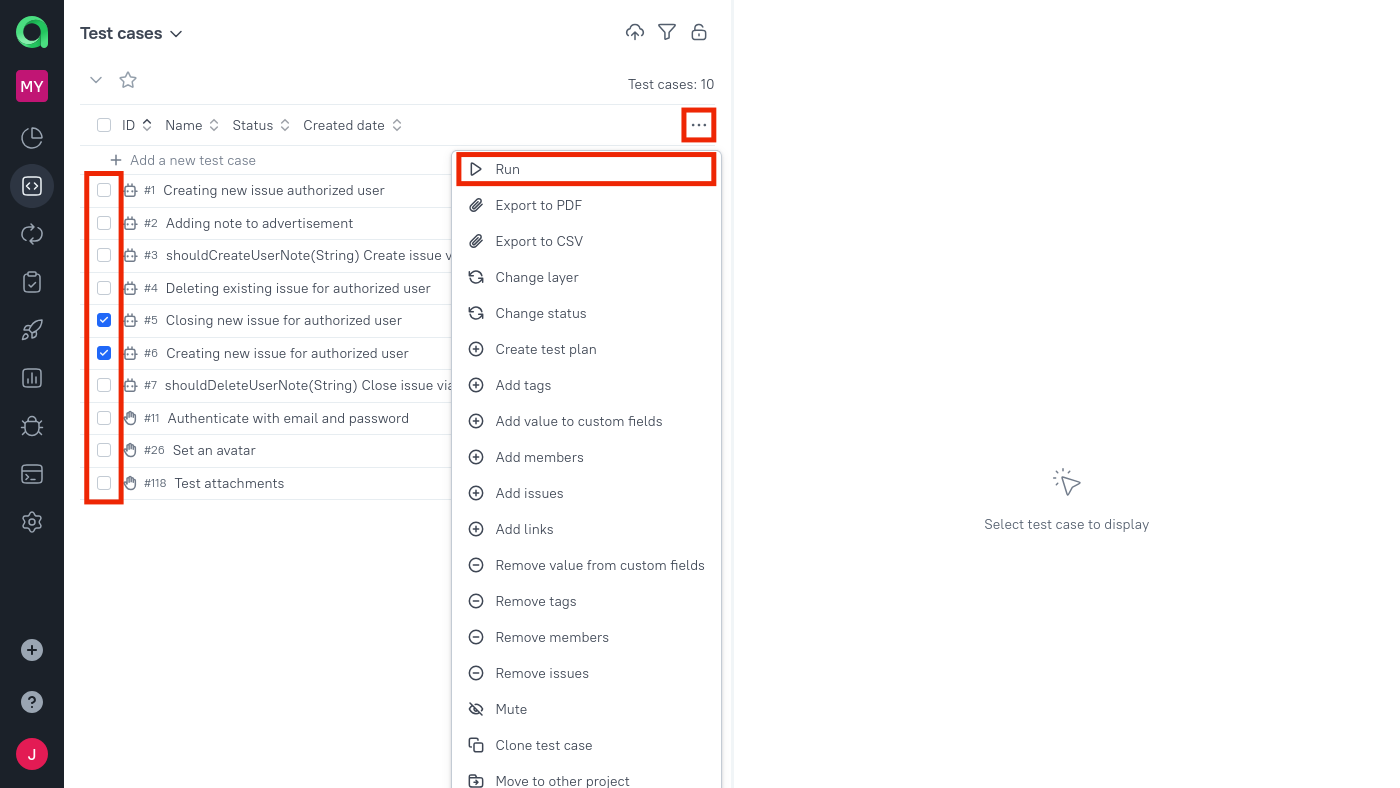
Select one or more test cases using Ctrl or by selecting the checkboxes next to them.
At the bottom of the screen, click Run.
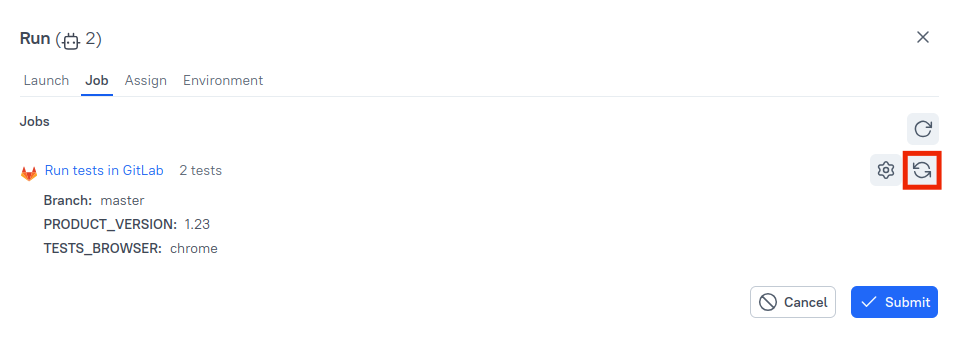
In the resulting window, switch to the Job tab and make sure it shows the correct CI system. If not, click the Replace job button.
Click Submit.
Go to Launches.
Find the newly created launch. Under its name, you should see a blinking icon indicating that the CI job is currently in progress.
After a short time, depending on the integration, the icon becomes clickable, allowing you to quickly navigate to the job in the CI system.
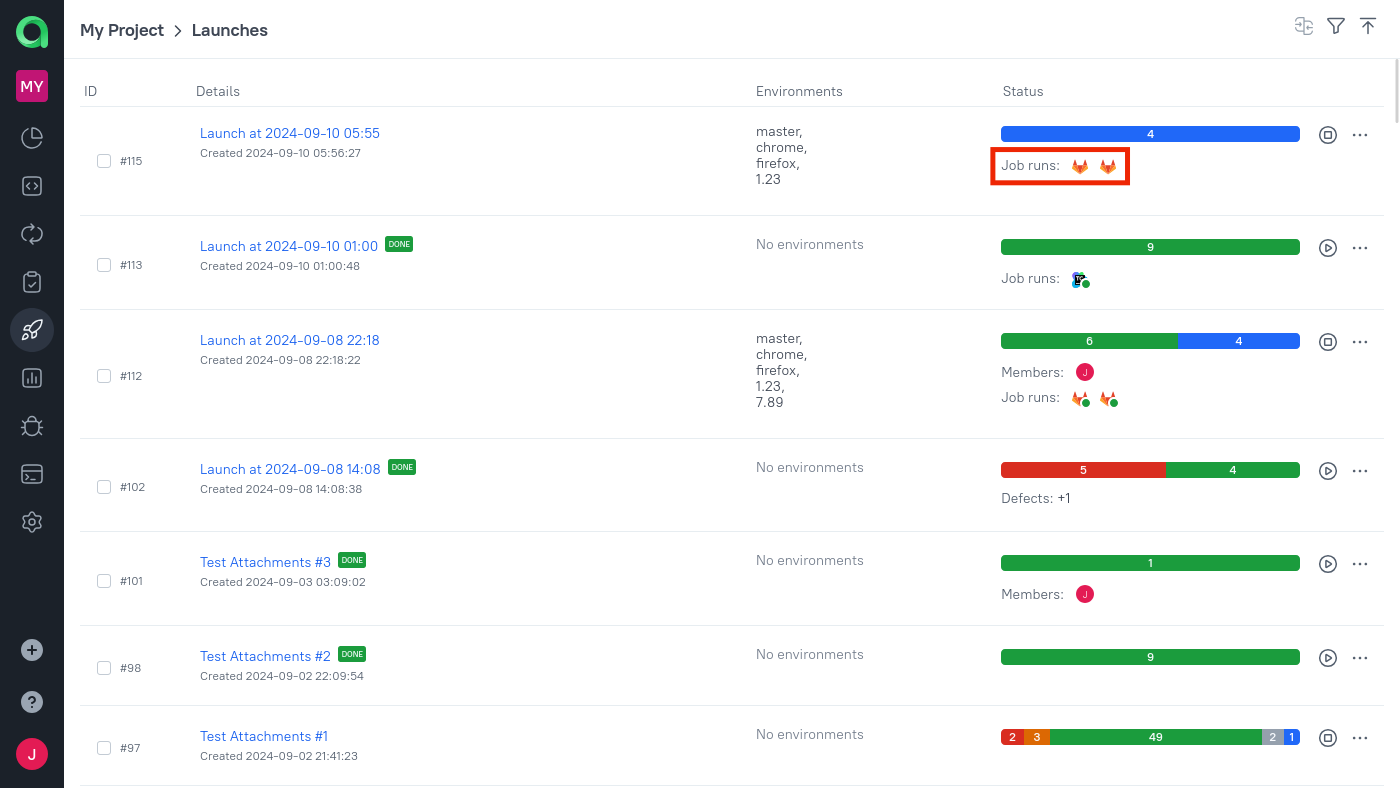
After the CI job finishes, click on the launch to view the test results.
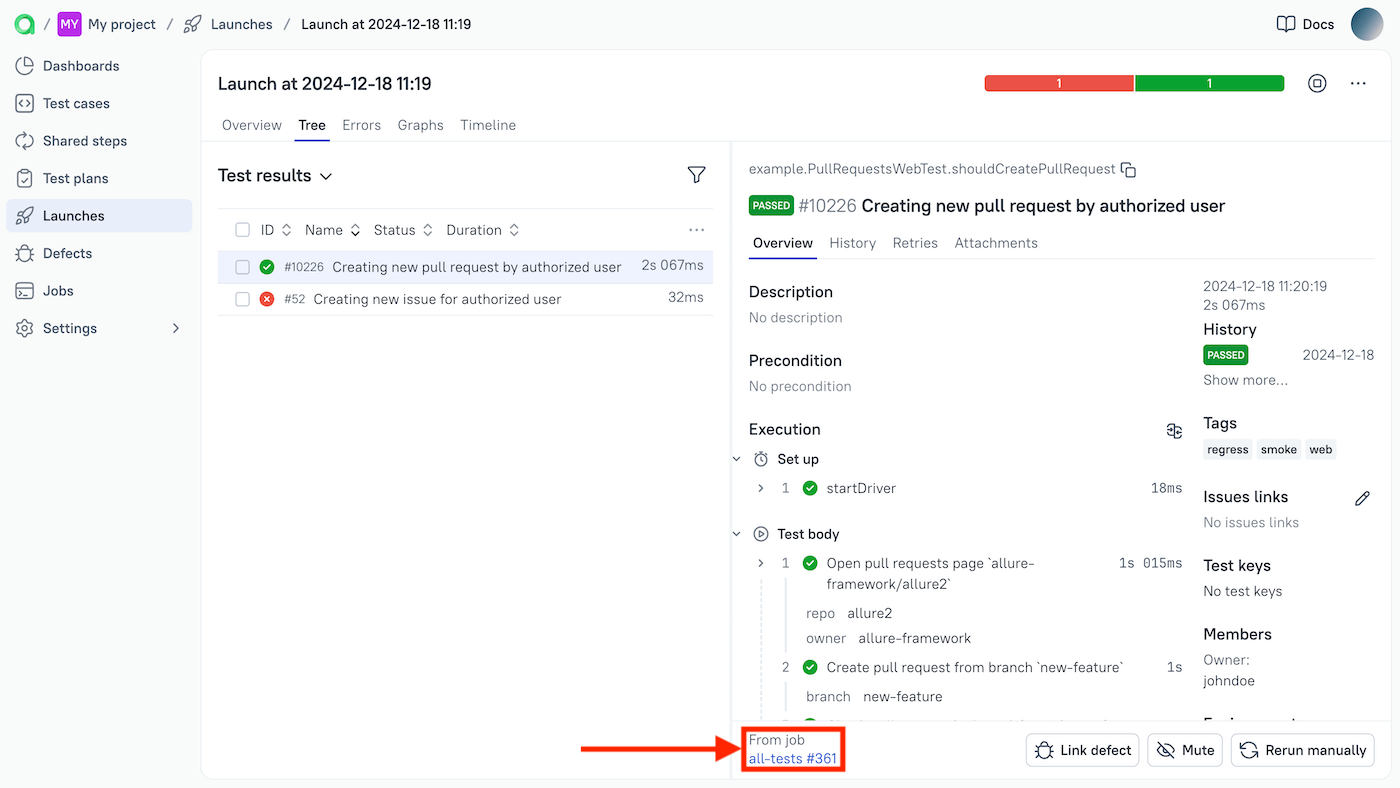
For each test result, Allure TestOps will additionally display the link to the job that executed the test.
What's next?
- Create a combined launch by running manual and automated test cases together.
- View the test results in Launch Overview and Dashboards.