Manual test scenario
A test case scenario is a sequence of steps describing how a test is performed.
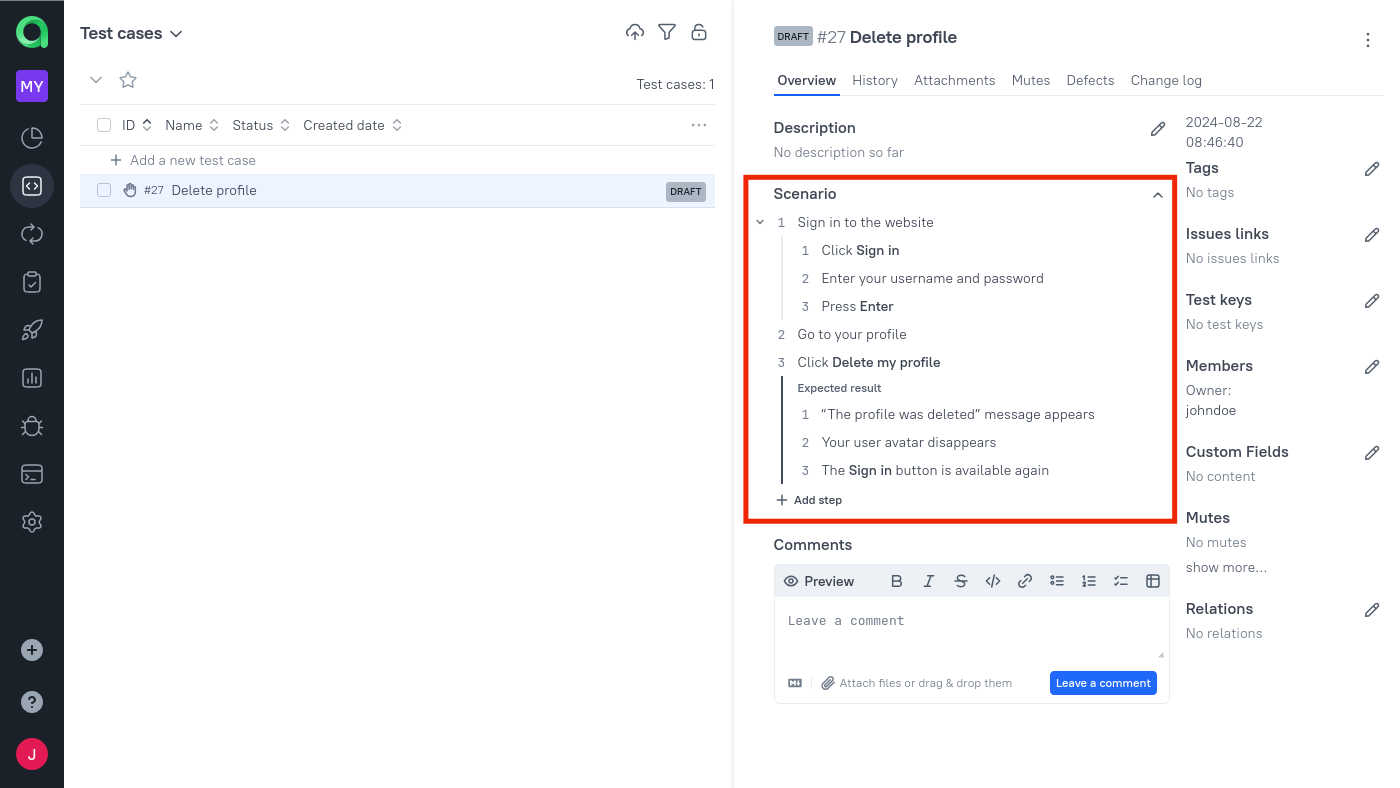
When creating or editing a test case, you specify the hierarchical list of steps in the scenario. Then, when running the test, a QA engineer follows the steps and reports each step's status as part of a test result.
This section describes steps in manual testing. A similar concept of steps in automated testing is described in the Steps section of the Allure Report documentation.
Scenarios in manual test cases
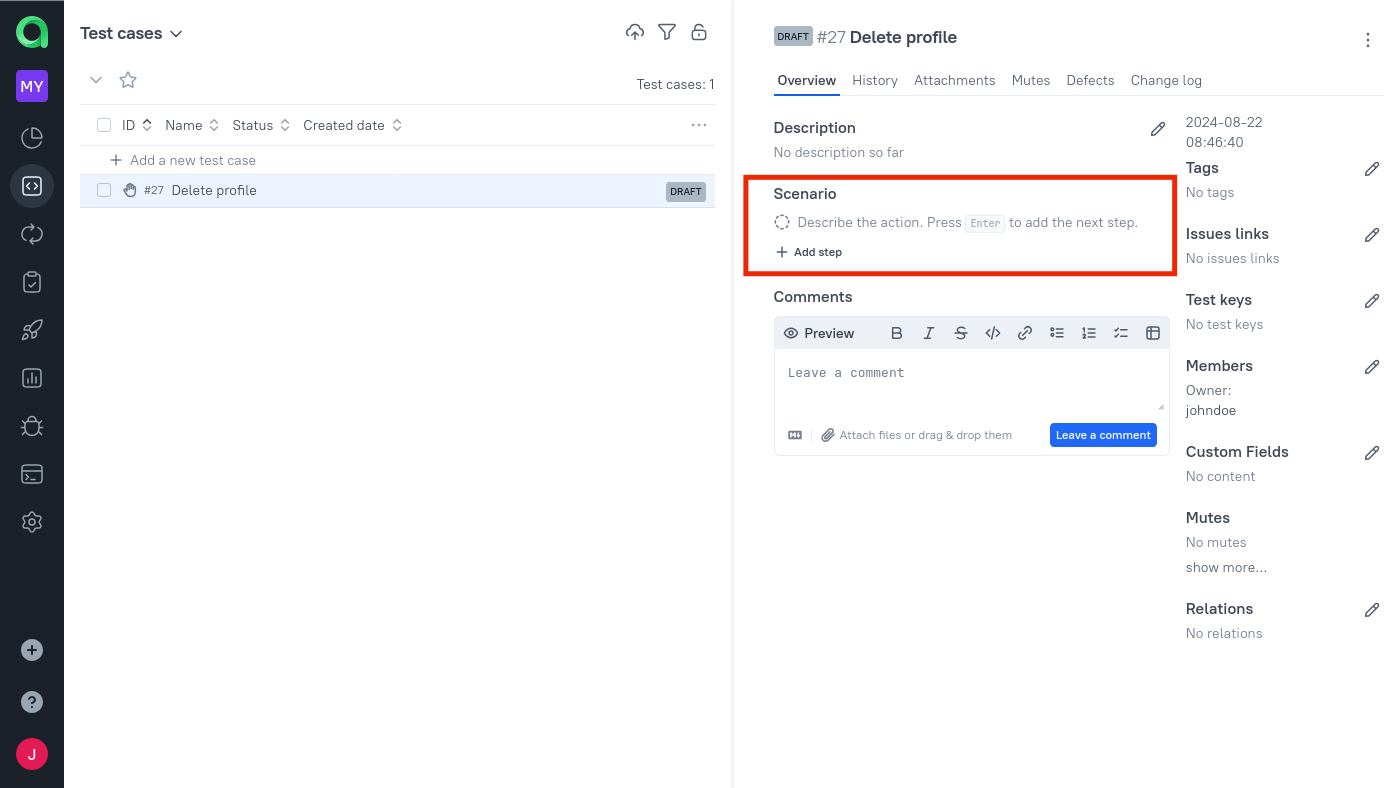
To specify a scenario for manual testing, create or select a test case in the Test cases section. On the right pane, you will find the Scenario section.

Type your first step into the text box, then press Enter to add the next step. To add an extra line to the description, press Shift+Enter. Drag and drop steps to change the order or create sub-steps.
Click ⠿ to reveal the additional actions menu. From this menu, you can:
- create steps with expected results;
- add shared steps previously created in your project;
- attach tables, text snippets, and files that will help the manual QA engineer.
Sub-steps and steps with expected results
When describing a complex operation in a test case scenario, you can divide a step into sub-steps. By doing so, you can help a QA engineer make sure they perform all the necessary actions in the correct order. Any step can be converted into a sub-step by dragging it onto a parent step.
Similarly, if your step involves not doing multiple actions but verifying multiple conditions, consider creating a step with expected results. This works pretty much like a step with sub-steps, except that it is assumed that each line is a statement that a QA engineer needs to verify. Unlike normal sub-steps, the expected results cannot have sub-steps of their own.
The Expected results section for an existing step can be added or removed via the Convert to section in the actions menu. Sub-steps can be converted to individual expected results by dragging them into the Expected results block.

Formatting text in scenario
You can format text in test case scenarios, including sub-steps and steps with expected results.
Formatting using the formatting toolbar
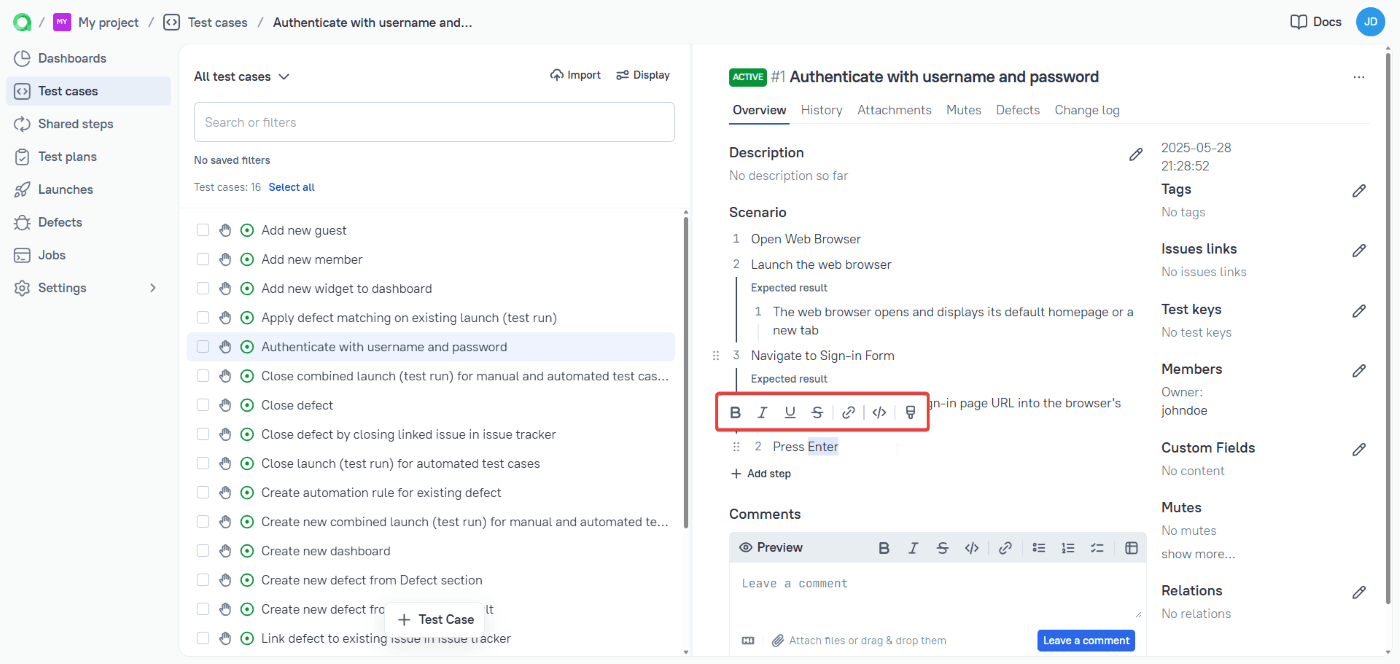
To call up the formatting toolbar, highlight text in a scenario and a toolbar will appear with available options: Bold, Italic, Underline, Strikethrough, Link, Inline code, Text color. Select and apply the desired style.

Manual formatting
You can also use symbols for formatting. In this case, the formatting is applied to the text in real time as you type. Examples of markup symbols are shown in the table below.
Bold, italic, and strikethrough styles can be combined, but they don't work inside code and links.
| Markup | Result |
| **Bold** | Bold |
| *Italic* | Italic |
| ~~Strikethrough~~ | |
| `Code` | Code |
| ** *Bold italic* ** | Bold italic |
| ~~ ** *Bold italic strikethrough* ** ~~ |
Adding hyperlinks to text
You can convert text into a hyperlink using the formatting toolbar or use the quick method:
- Copy the URL to your clipboard.
- Highlight the text in your scenario.
- Press Ctrl+V.
The hyperlink will automatically apply to the selected text.
Running a scenario
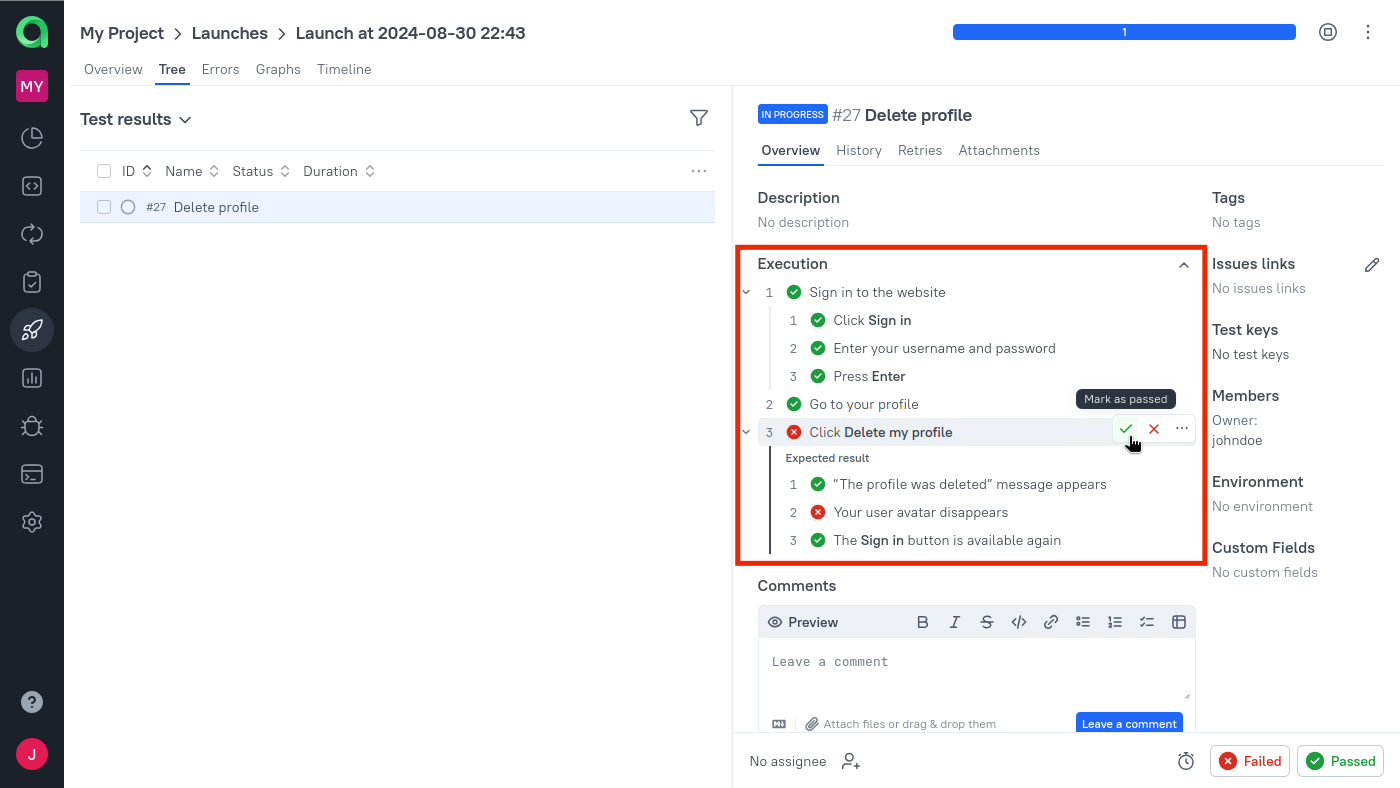
When executing the test manually, hover a step and click one of the buttons to report its status.
The most commonly used buttons are for the Passed and Failed statuses, while others are available via ⋯ → Resolve step.

Once you have set statuses for all sub-steps in a parent step, Allure TestOps will try and guess an appropriate status for the parent step. If all sub-steps have identical statuses (e.g., they all passed), the parent status will get the same status, too. Otherwise, Allure TestOps will choose the most “important” status reported across the sub-steps. For example, a single Failed or Broken sub-step is considered more important than its Passed siblings, so the parent step will become Failed or Broken, accordingly. On the other hand, a sub-step with Unknown status has the lowest priority and will be ignored as long as other statuses are present.
QA engineer can change any step's status, including a parent step's status. This helps communicate situations that were not anticipated by the scenario: for example, even if all sub-steps are Passed, a QA engineer may still choose to mark their parent step as Failed due to some unexpected last-minute failure.
QA engineer can also provide more details about what happened during executing each step of the scenario. To do so, hover the step, click ⋯ and select Attach files, Attach table or Attach text.
When you are done with executing the test, don't forget to click Passed or Failed at the bottom of the screen to set the whole test's status. If you have not specified statuses for some of the steps, Allure TestOps will set them to Skipped automatically.
Keyboard shortcuts for editing a scenario
When editing a scenario in the Test cases section, keyboard shortcuts are available. Note that they only work when a step is in focus, i.e., after you clicked on it.
Available keyboard shortcuts include:
- Shift+Enter — add a line break within a step;
- ↑ and ↓ — select another step;
- Shift+↑ and Shift+↓ — move the step up and down in the scenario;
- Tab and Shift+Tab — increase and decrease the current step's depth in the hierarchy;
- Enter — create a new step;
- Alt+Enter — create a new step with expected results;
- Ctrl+E — add or remove the expected results from the current step;
- Shift+Delete — delete the current step.