Shared steps
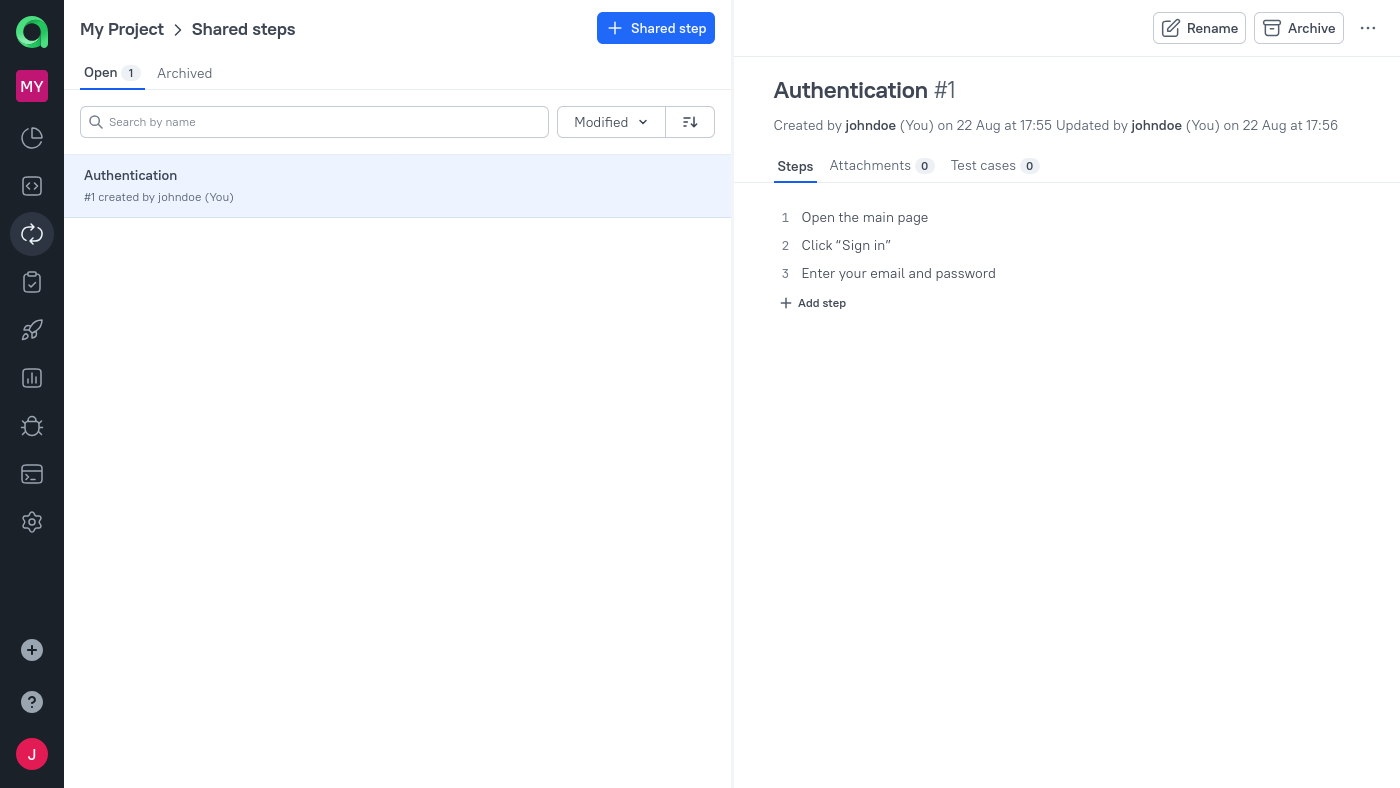
When working with manual test cases, you may encounter a situation where some steps, like authentication, are repeated across multiple scenarios. To avoid describing the same steps in each scenario, you can create a set of steps that can be shared between multiple test cases. When you change a shared step, the changes are automatically applied to all scenarios that use that step.
Creating a shared step
To create a new shared step:
- Go to the Shared steps section.
- Click New shared step.
- Enter a name to describe the new shared step (for example, "Authentication").
- Click Create.
After that, the process is identical to describing a test scenario: enter the required steps and sub-steps, add attachments if required.

Using a shared step
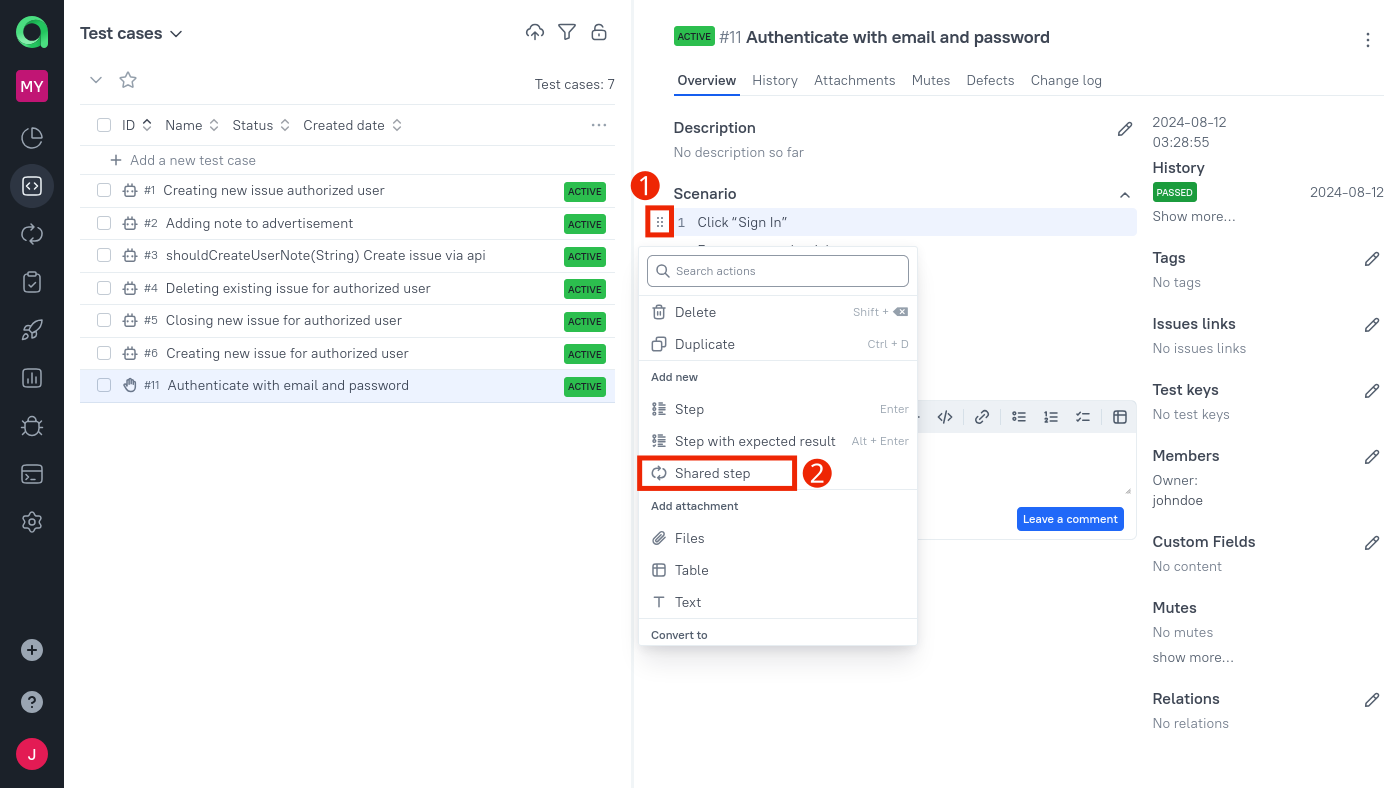
To add a shared step to a test scenario:
- When editing a scenario, click
⠿on the left side of step description. - Click Shared step.
- Select the required shared step.

Archiving and deleting a shared step
If a shared step is in use, it cannot be deleted, but it can be archived to prevent further usage. You can check which test cases are using a shared step by selecting it and clicking on Test cases.
To archive a shared step, select it and click Archive on the right side of the page.
To delete a shared step that is no longer in use:
- Select the required shared step in the Shared steps section.
- Click
⋯on the right side of the page. - Click Delete in the displayed menu.